Custom fonts can make all the difference in the world when you’re trying to convey a specific user experience. Luckily, it’s pretty easy to add your own fonts in your iOS app but there are some common pitfalls to watch out for.
Let’s walk through how to add custom fonts to your iOS application and I’ll highlight the common mistakes as we go.
The license can usually be found with your font download or on the site where you bought/downloaded it. Taking a minute to check it ensures you won’t get into legal trouble down the road.
Step 1: Include your fonts in your XCode project
Most commonly, you’ll have a TTF or OTF font that you’ll want to use with all of your UILabels or UITextViews in your app. Well, the first step is to include these fonts into your XCode project.
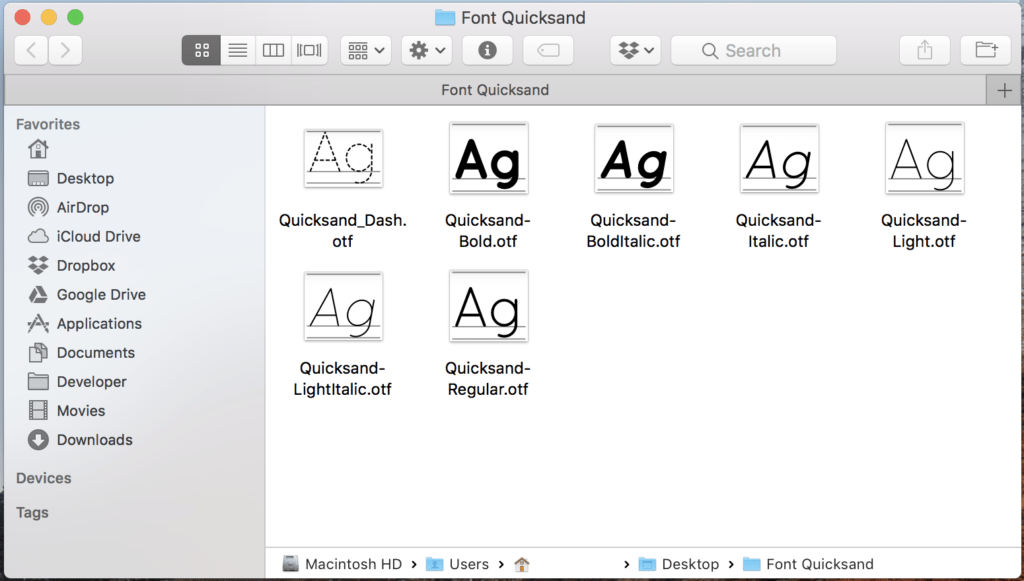
I commonly keep all of my app resources such as images or fonts in their own directory called “Resources”. I find that this helps me stay organized as projects get much more complex and there are a lot of files. Whatever your case may be, either drag and drop your font file(s) into your XCode file tree or right click and “Add Files To…” to select your fonts.
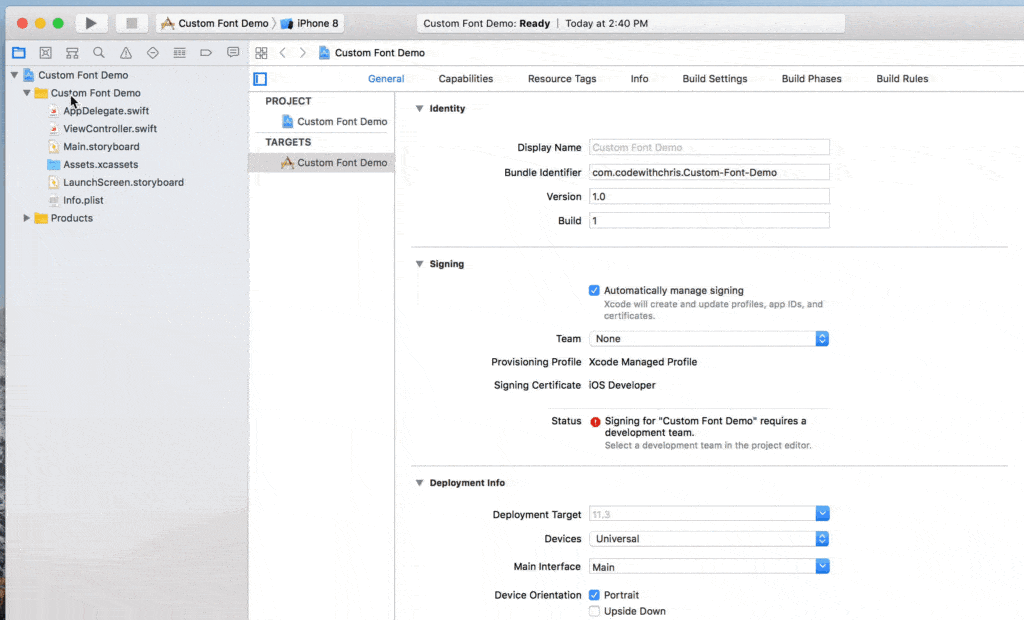
Make sure that the target you want to use your font in is checked!
(Click the GIF to play it)
Step 2: Make sure that they’re included in the target
The next thing to do is to make sure that they’re resources and included in your build target that you want to use the fonts in.
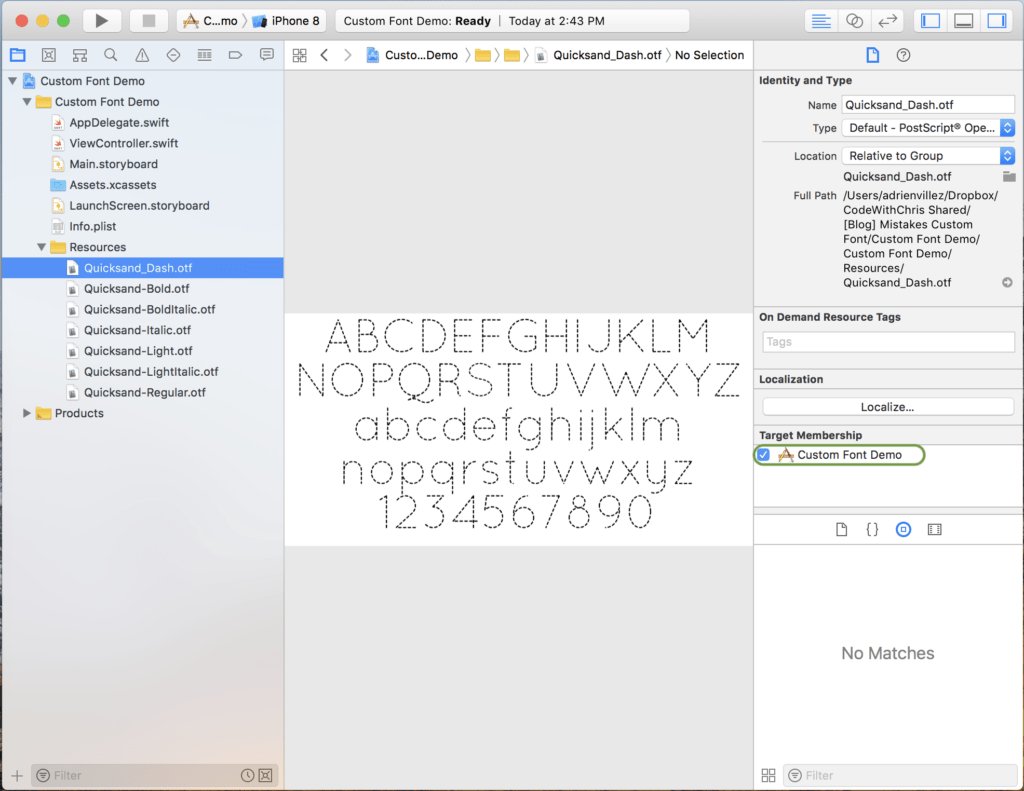
Make sure that the target you want to use your font in is checked under “Target Membership”
Step 3: Double check that your fonts are included as Resources in your bundle
This should not be a problem but sometimes when you’re having trouble getting your font face to show up, this can be a source of headache so let’s double check now to rule it out as a potential pitfall.
this can be a source of headache
Go to your project Build Phases pane by highlighting the XCode project file in your solution explorer and on the right hand side, select “Build Phases”. You’ll see that one of the sections you can expand is “Copy Bundle Resources”. Open that list and make sure that your fonts are included in that list.
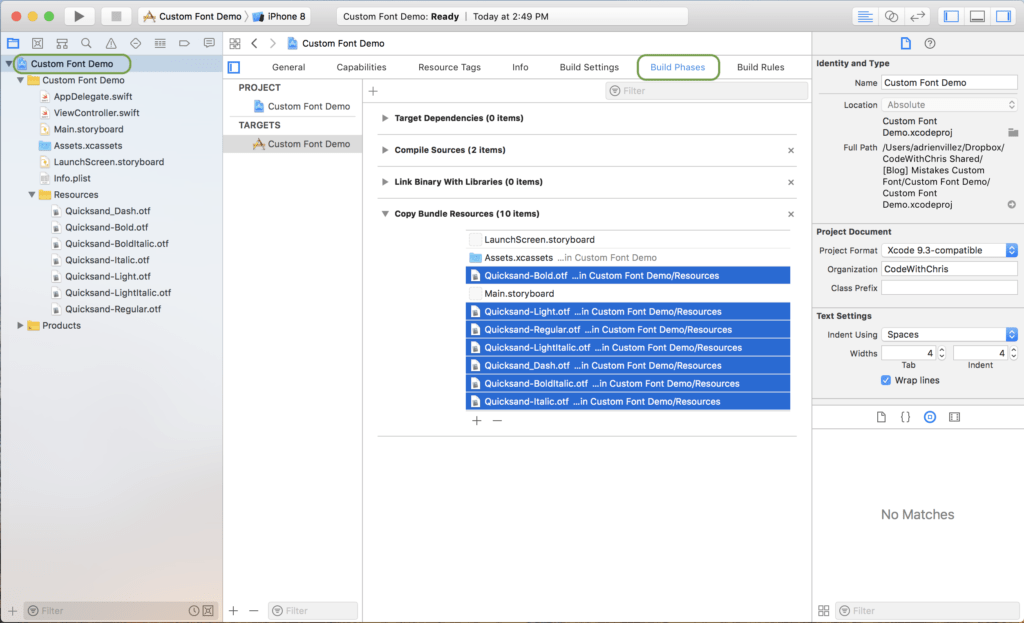
Ensure that your fonts are in the “Copy Bundle Resources” list
Step 4: Include your iOS custom fonts in your application plist
The next thing to do is to modify your app’s plist to include these font faces. By default, your plist will be named as info.plist.
Open it and add a new row called “Fonts provided by application” which will be an array that you need to add all the filenames of the fonts you want to use. In my case, it was seven of the Quicksand fonts as you can see in the screenshot below. Be careful to include the extension and make sure that you don’t perform any typos here. That’s another common problem, as simple as it may seem.
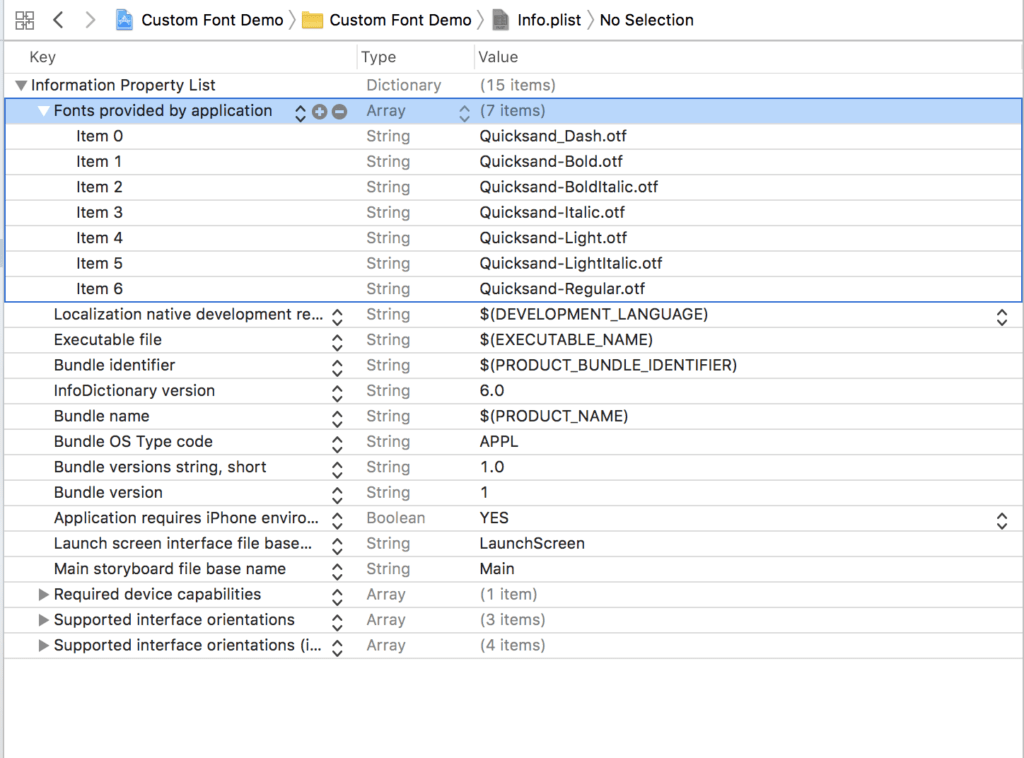
See the above screenshot on the key that you need to add, followed by the filenames of the fonts you want to include in your iOS app
…make sure that you don’t perform any typos here. That’s another common problem
Step 5: Find the name of the font
This is a common pitfall for many people trying to include custom fonts into their iOS app. This was something that eluded me before as well and it’s the fact that when you specify which font you want to use, you’re not specifying the file name but rather, the font name. The tricky part is that the font name may not be what you expect. It could be very different than any of the visible font names that you can see.
So in order to easily find the name of the font that you want to use, you can output something to the console window and see for yourself.
The tricky part is that the font name may not be what you expect
Add this snippet of code to log all the fonts available to your app in the console.
    override func viewDidLoad() {
        super.viewDidLoad()
        // Do any additional setup after loading the view, typically from a nib.

        for family: String in UIFont.familyNames
        {
            print(family)
            for names: String in UIFont.fontNames(forFamilyName: family)
            {
                print("== \(names)")
            }
        }
    }
Once you run your app, you’ll get the list of fonts displayed in your console log. Then its just a matter of finding your custom font in the list and getting the font names.
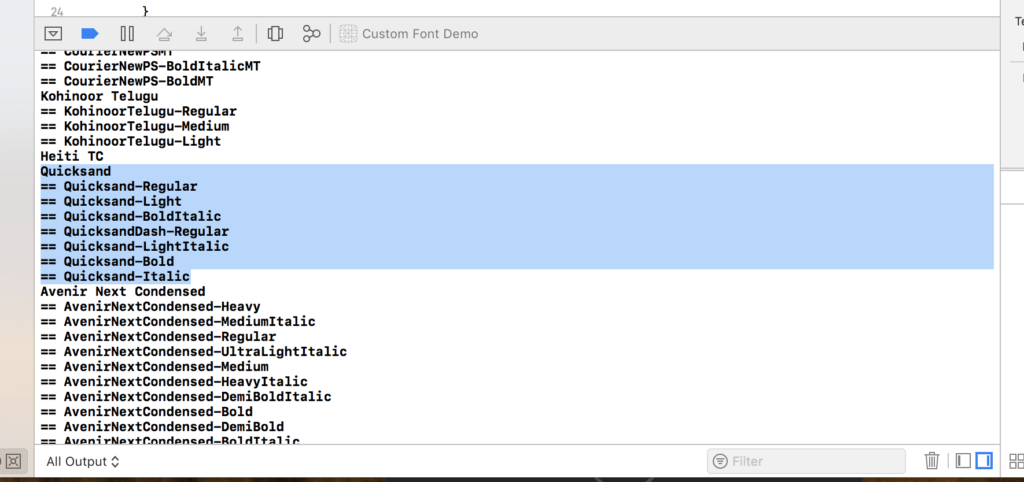
Logging all fonts and finding the font names for your custom font.
In the screenshot above, as you can see the font name I needed was QuicksandDash-Regular. This font name was no where to be found in the font properties or from the macOS font viewer. Remember to get rid of that code snippet after you find the font name that you need!
Step 6: Use UIFont and specify the name of the font
And finally, you can simply display your custom font using UIFont and whatever UILabel or text view you want.
        let label: UILabel = UILabel(frame: CGRect(x: 0, y: 0, width: self.view.frame.size.width, height: 120))
        label.textAlignment = NSTextAlignment.center
        label.text = "Using Custom Fonts"
        label.font = UIFont(name: "QuicksandDash-Regular", size: 35)
        label.backgroundColor = UIColor.white
        self.view.addSubview(label)

        view.backgroundColor = UIColor.gray
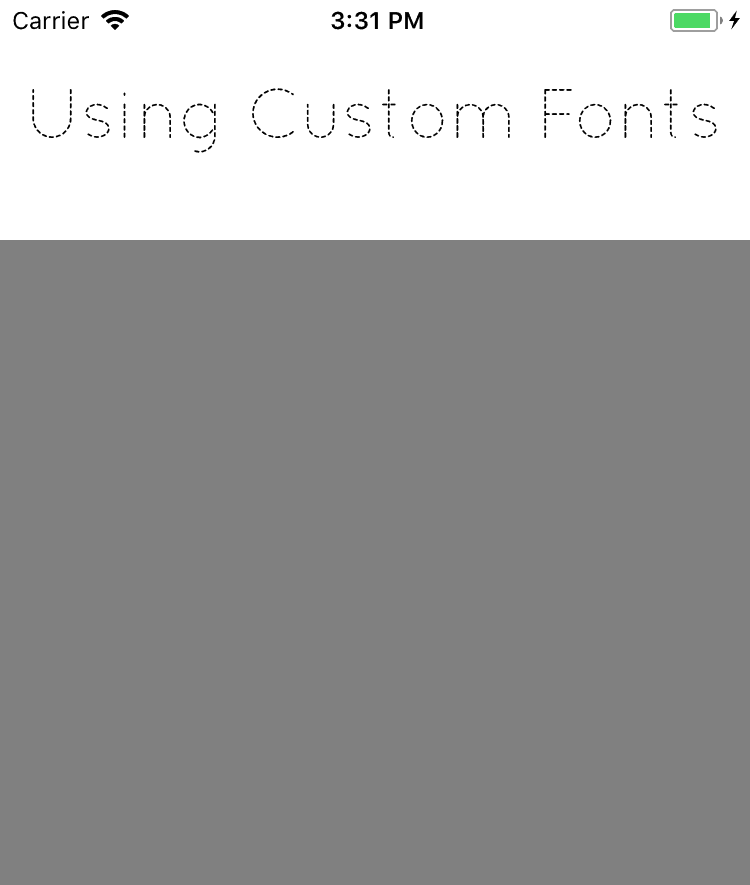
Sample of using custom fonts in your iOS App!
I hope that this iOS custom fonts tutorial was helpful to you. Let me know in the comments below!


