


In this AVAudioPlayer tutorial, we’re going to go through an example of playing a sound file that you’ve added to your Xcode project.
You’ll see that it’s actually a really simple task to accomplish!
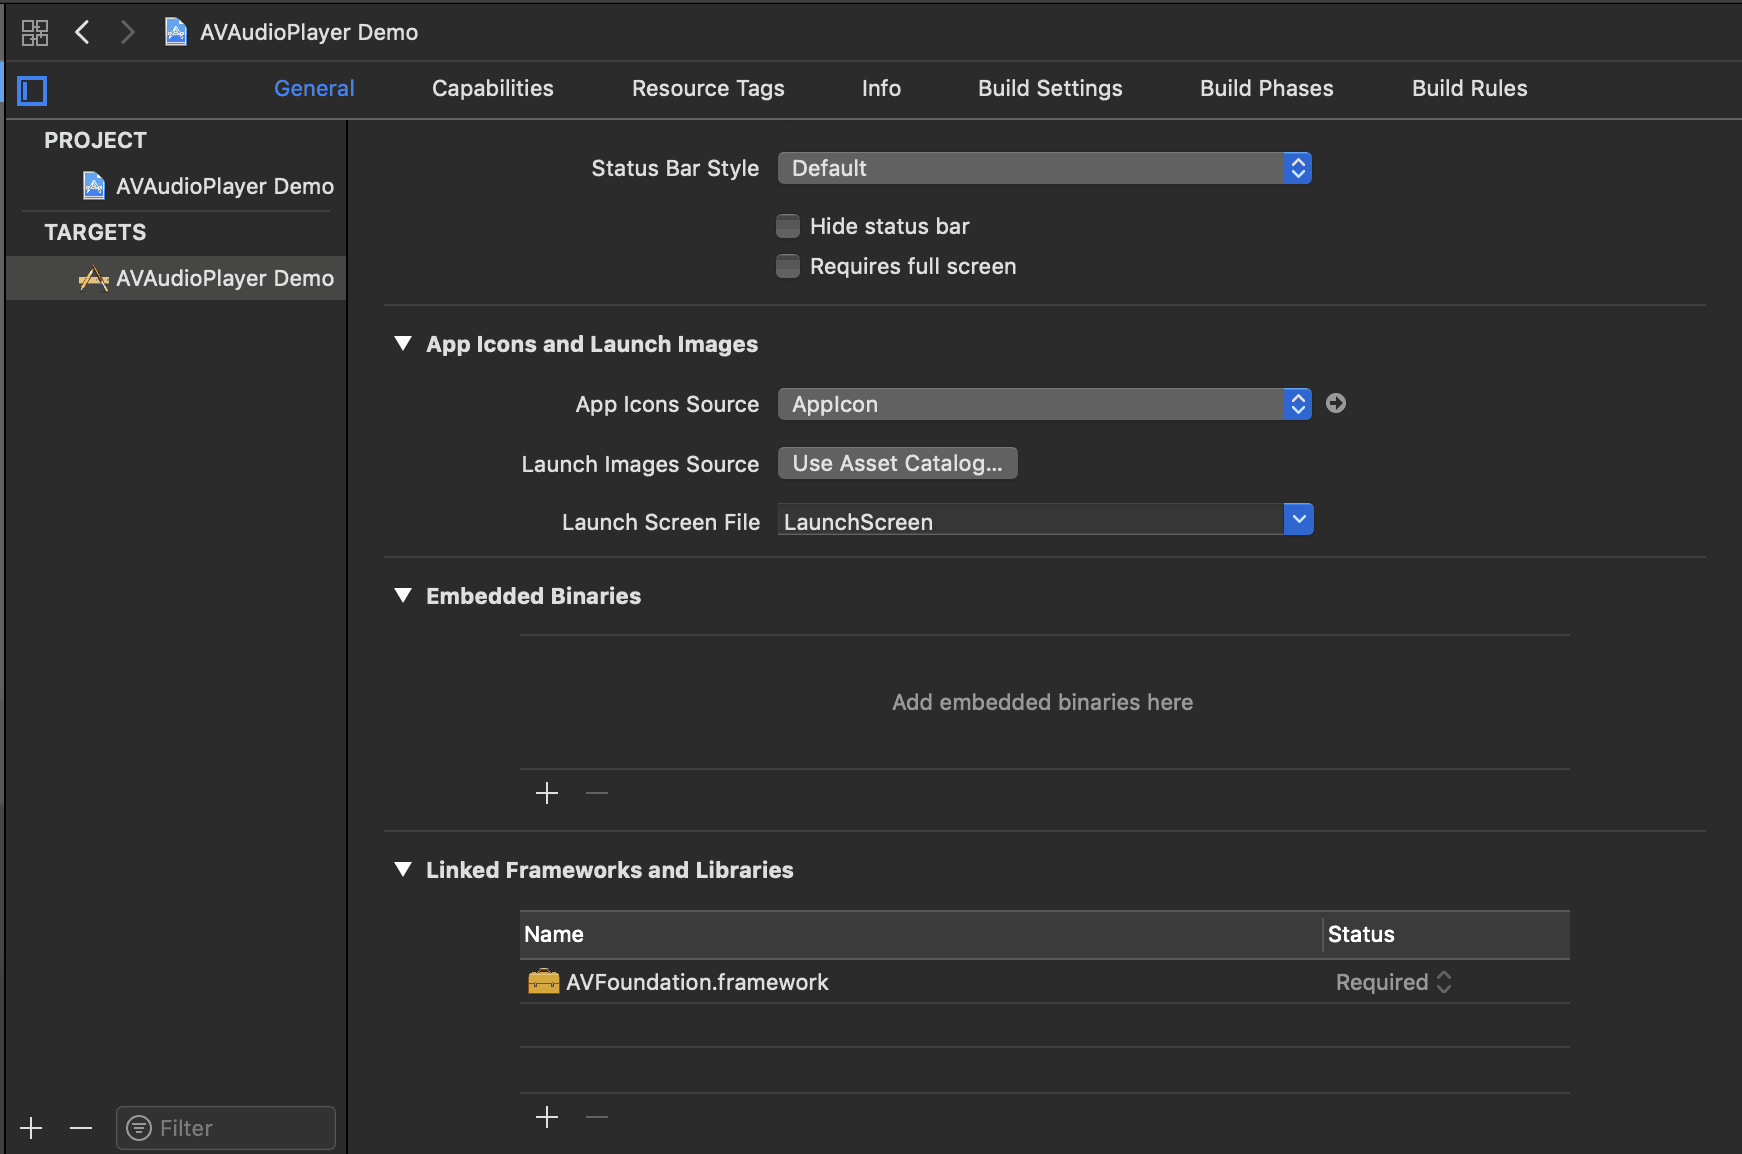
Adding the framework to your project
The first thing we’ll need to do is to add the AVFoundation framework to the project.
In the General tab of your Xcode project properties, the frameworks and libraries section is all the way at the bottom. If you click the “+” icon, you’ll get a dialog and you can search for the AVFoundation Framework to add it.
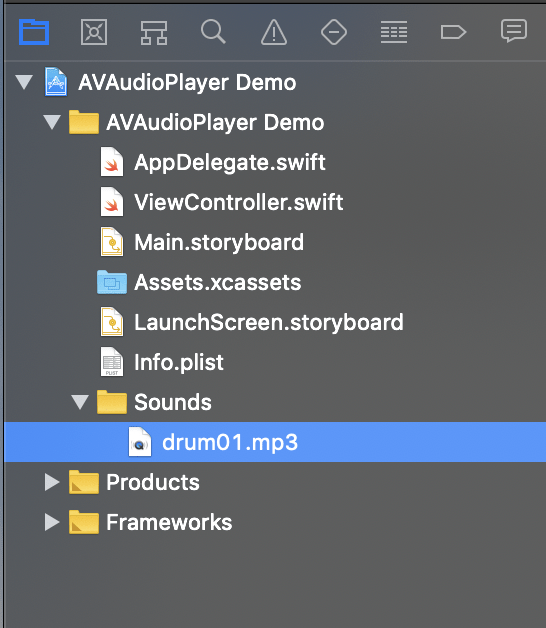
Adding the sound file to your project
For this demo, we’re going to need a sample mp3 or wav sound file. You can find a short clip on the net or download the source code for this demo to use the sample MP3 that I used.
When you have a sound file, simply drag it into your Xcode project and it’ll add the file as a resource to your project. (Make sure to select [] Copy if needed)
Importing the framework
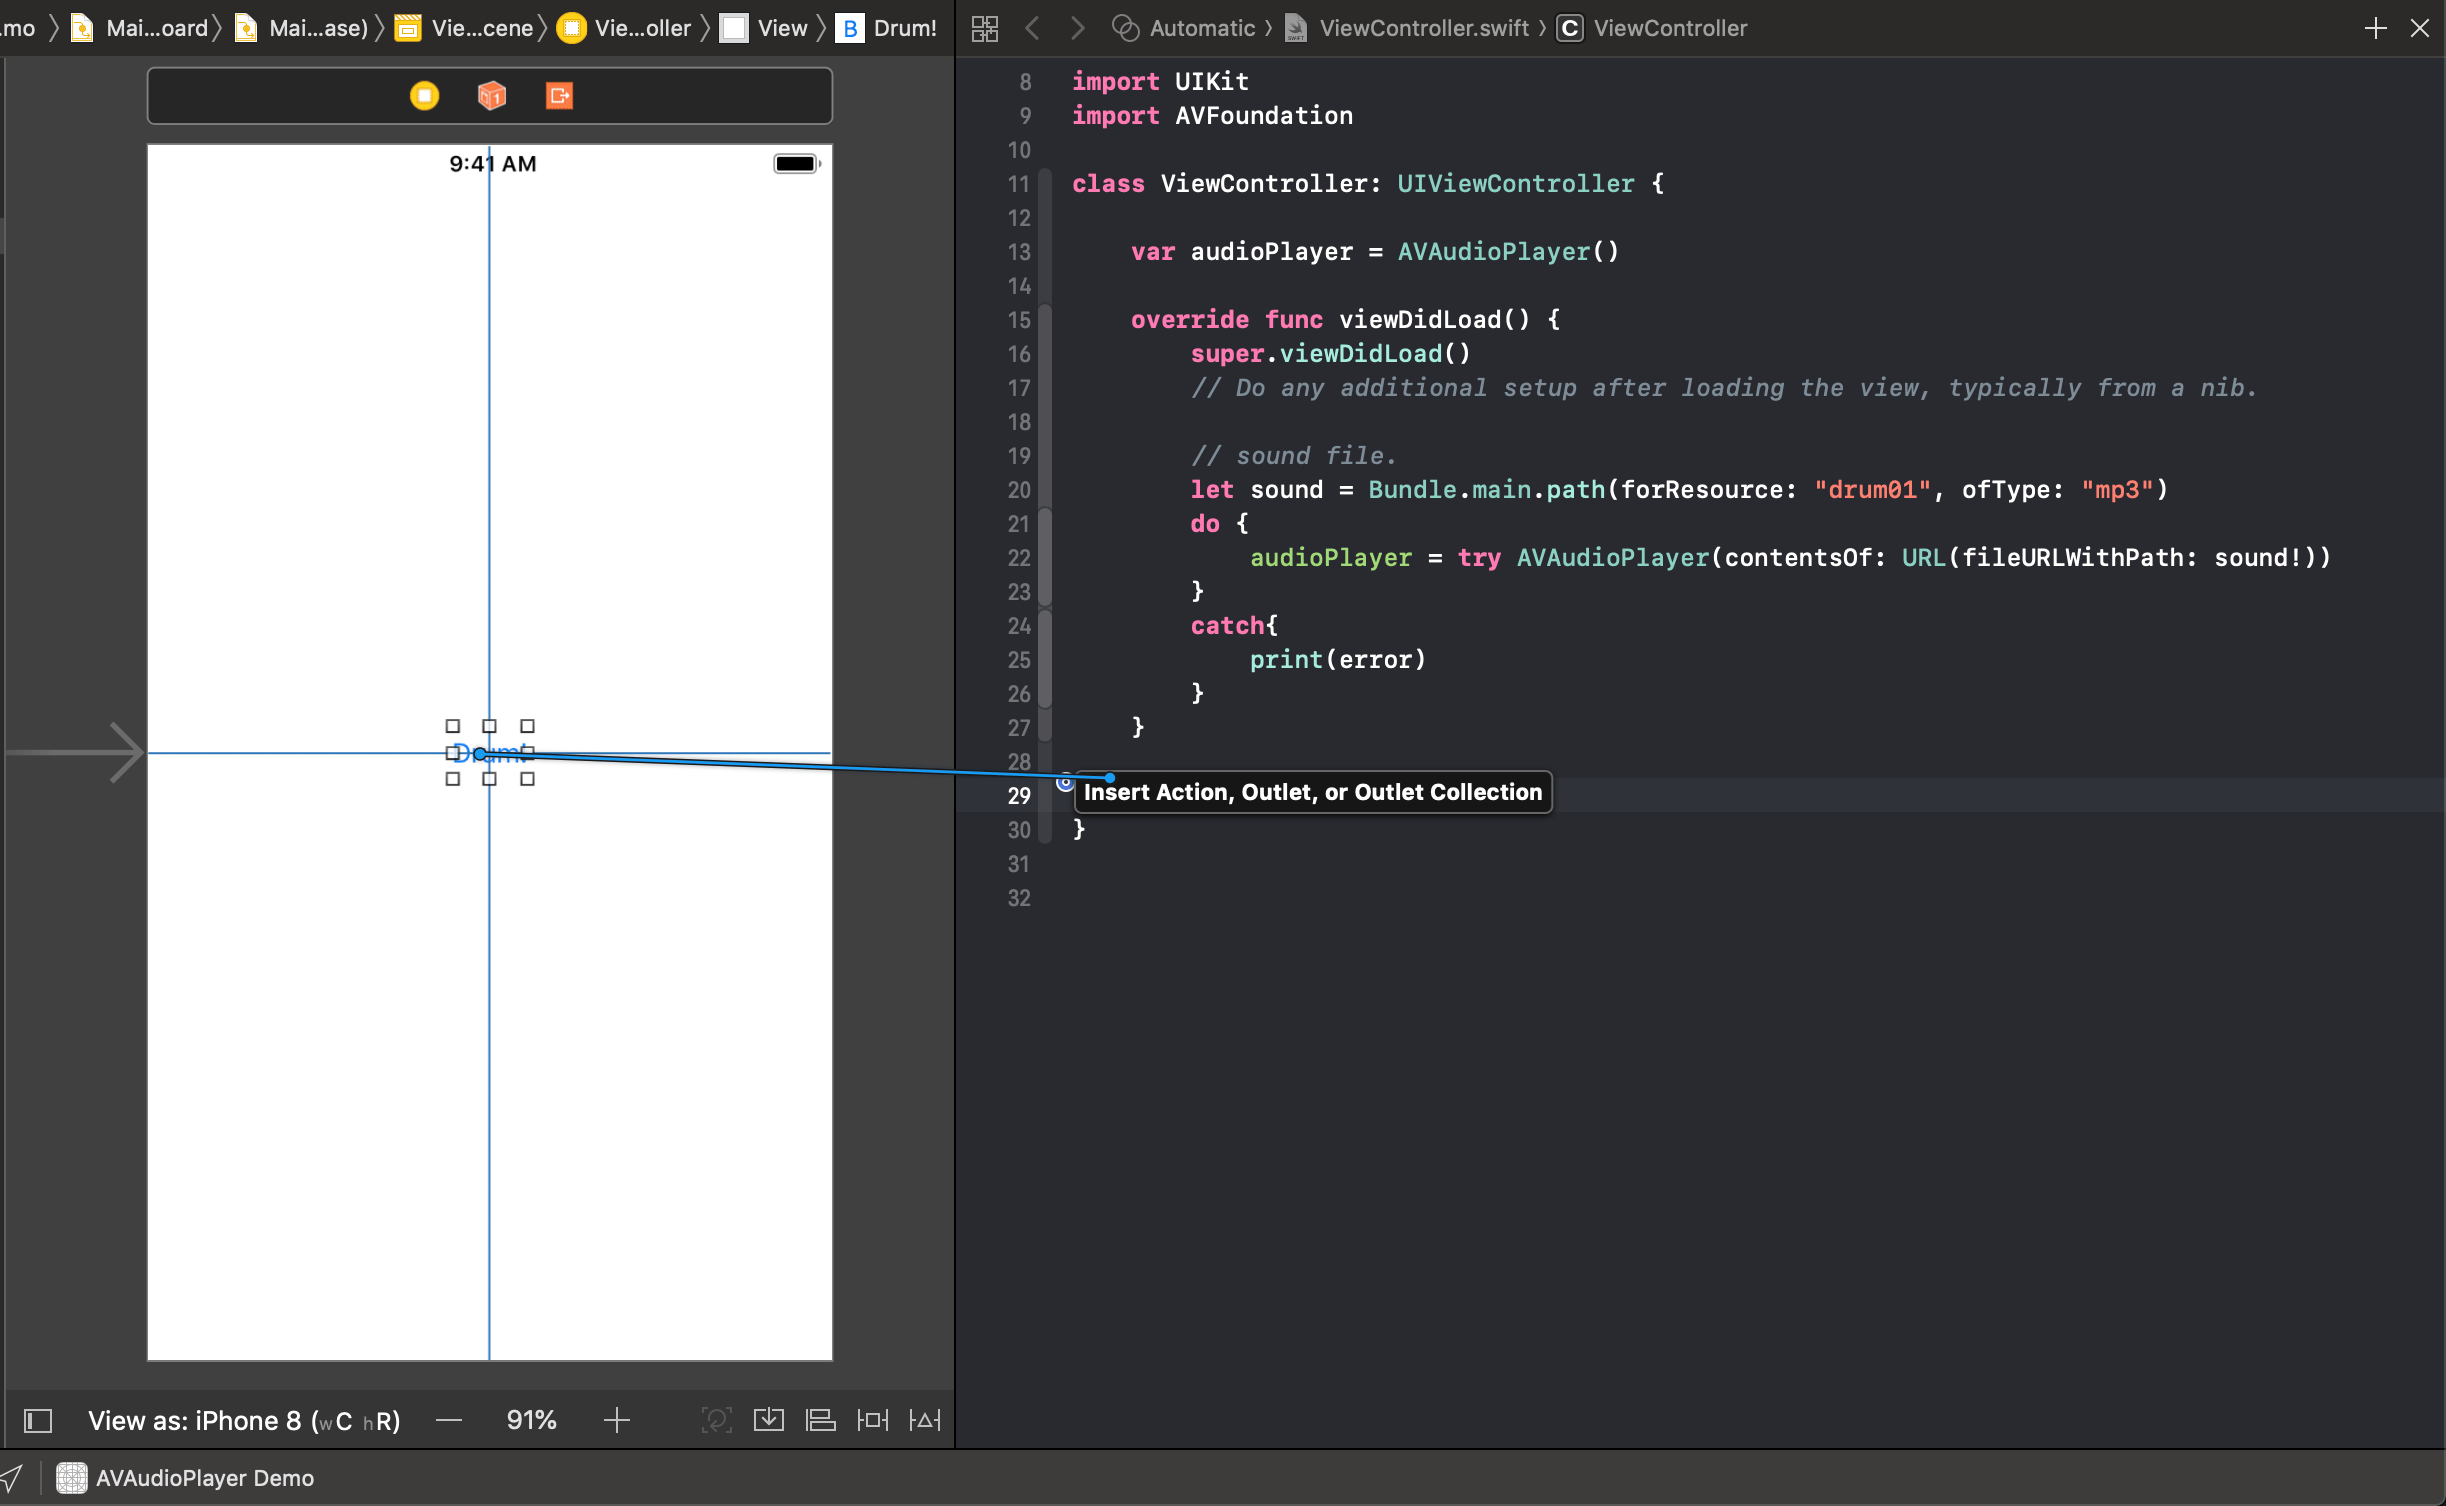
In the class that you want to play a sound, you’re going to have to import the AVFoundation classes. At the top of the ViewController.swift file, import the framework like this:
import AVFoundation
Creating and initializing the AVAudioPlayer object
In my demo, I’m going to play a sound in the ViewController class so I’m going to create an instance variable in ViewController.swift to hold the AVAudioPlayer object:
var audioPlayer = AVAudioPlayer()
Then in the viewDidLoad method, I’m going to create a new AVAudioPlayer object and initialize it with the path to the sound file like this:

Observe that we are using Bundle to find our way inside the app to go find the file named “drum” which is of type “mp3“.
After this we initialize the player inside a Do Catch block because we need to be safe and be prepared in case one day, the app isn’t able to load or find the audio file. It’s better to display or print an error rather than having the user experience a crash. This is all it takes for a user to delete your app.
Playing the sound
Whereever you want to play the sound, simply call the play method of the AVAudioPlayer object!
audioPlayer.play()
To make things more interesting, I decided to add a button to the Storyboard.

I changed the text property to “Drum!” and centered the button vertically and horizontally to not have to worry about any device’s size.

Finally, the button can be linked to a @IBAction in our ViewController.swift file.
Inside the @IBAction function, you can add the .play() method and run your project. The drum should be playing well after each tap of the button. If it doesn’t work, make sure you didn’t make a typo in the file name or extension. At the end, your code should look like the following:

_________________________________________________________________________
The AVAudioPlayer class has other properties to control playback (such as the number of times to loop) as well as properties that give you information about the sound file (such as the duration).
Check out the Apple class reference document for more information!
[social_warfare]