A spelling and grammar checker app powered by OpenAI, written in Swift and SwiftUI.
Hey there! This project contains the source code of the AI Grammar app. Feel free to use the code as a template for your own project, or to modify the source files as a way to experiment and further your learning.
Reading code written by other people is also one of the most important skills to learn as a developer. I hope that by reading this code, you improve your own understanding of Swift and SwiftUI.
This documentation contains a simple yet detailed explaination of the project, but should you have any questions regarding the code and stuff, please feel free to hit us up on the CWC support chat or through the CodeCrew forums.
Prerequisites
This app uses the OpenAI Chat Completions API to provide its functionality.
In order to use the app, you need to get access to an OpenAI API key: https://platform.openai.com/docs/api-reference/authentication
The app uses the gpt-3.5-turbo as a model for the create chat completion endpoint.
OpenAI API Credits and Limits
OpenAI imposes rate limit restrictions on their API usage based on the number of times a user or client access services within a specified period of time.
To learn more about limits, visit OpenAI’s Rate Limits documentation.
⚠️ IMPORTANT: You need to buy credits to be able to use any OpenAI API. When your credit balance reaches $0, your API requests will stop working. You can buy OpenAI credits on the billing page.
Getting Started
To get started, open the .xcodeproj file in Xcode.
You need to have an OpenAI API key to be able to build the project and run the app.
Setting up the API key
Once you get an OpenAI API key:
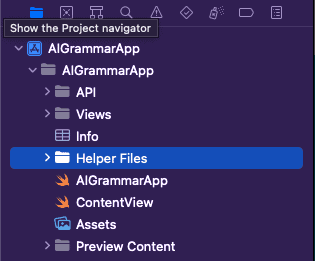
- In Xcode, create a new group
Helper Filesin Project Navigator (press Cmd+1 to reveal the Project Navigator).
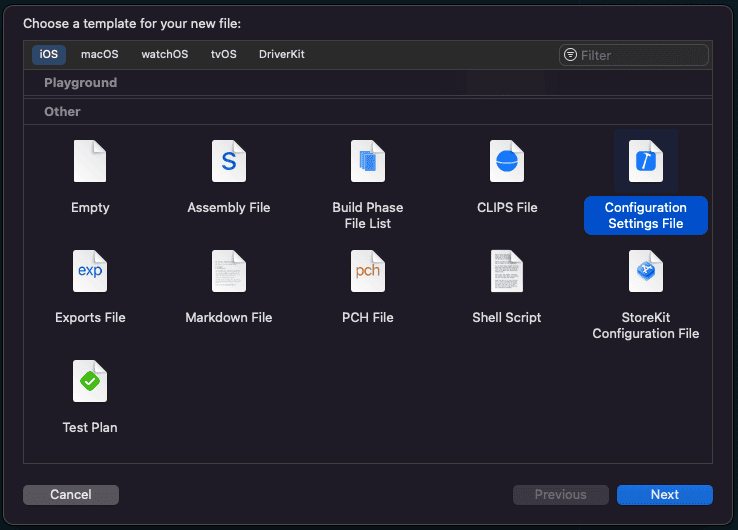
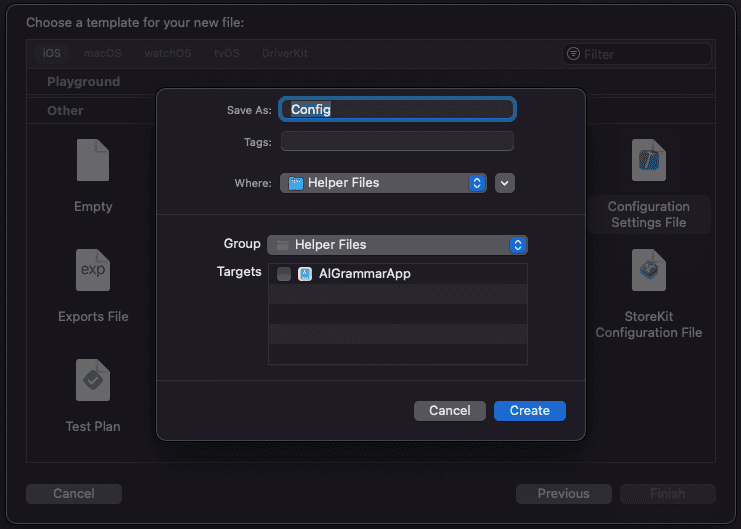
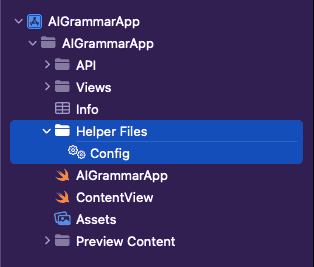
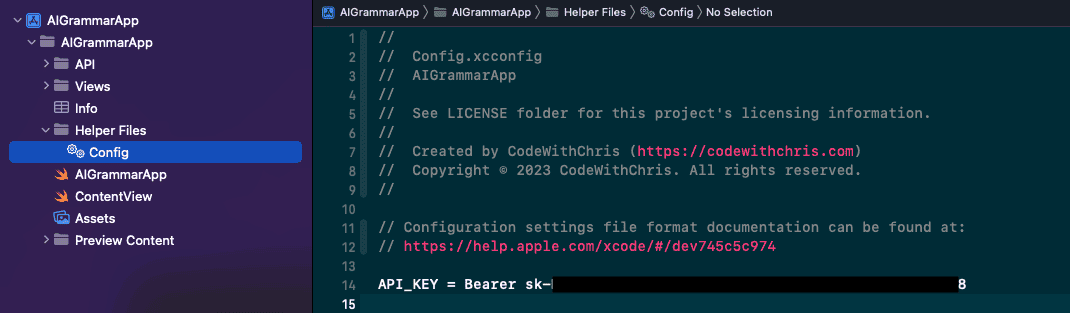
- Create a new configuration file inside the
Helper Filesgroup, and name itConfig.xcconfig. You can create a new file from theHelper Filesgroup by doing a right-click > New File, then selectConfiguration Settings Filefrom the list of file templates. Make sure that no targets are checked in the succeeding prompt (see screenshot below).
- Open
Config.xcconfigand declare yourAPI_KEYas follows:
API_KEY = Bearer {your OpenAI API Key here}
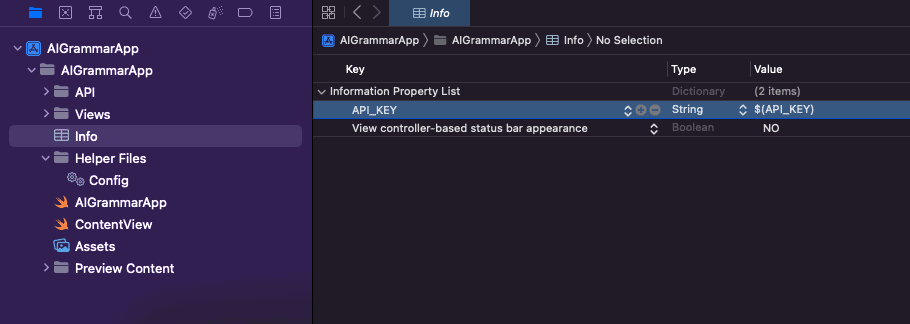
- Open up
Info.plistand create a new String propertyAPI_KEYand link the$(API_KEY)from Config.xcconfig.
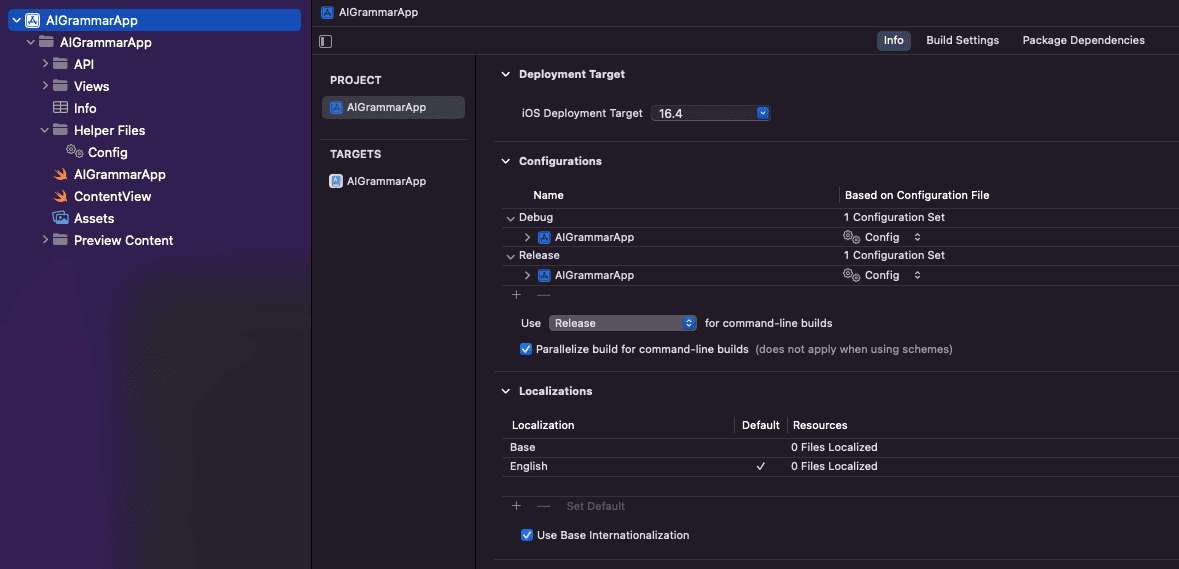
- Setup the build configuration in Project settings by going into Project Navigator > Click on the App Name > Select the name of the Project > Open Configurations drop-down, and set
Configto bothDebugandReleaseconfigurations. (See screenshow below)
Running the Project
Once done with the API key setup, run the project (by pressing Cmd+R) in Simulator. This will allow you to experience the app first hand.
The app’s starting point is the app file, which should be ContentView.swift. Most of the source code includes inline documentation to serve as your guide reading the code.
Getting Help
Should you have any questions about this code kit, feel free to post it up on our forums.
Copyright © 2024 CodeWithChris. All rights reserved.