Introduction
When GitHub Copilot first debuted for Visual Studio, it was clear that coding was about to change. Now, its expansion into Xcode is impacting Apple developers as well. But what exactly is GitHub Copilot, and how does it affect everyday coding? Let’s explore my personal experience with setting it up and see how it can transform your development workflow.
My Experience with GitHub Copilot
I was intrigued when I first heard about GitHub Copilot’s public preview for Xcode. Having used it in Visual Studio, I knew it could offer significant assistance, but adapting it to my Xcode projects was an exciting new challenge. Here’s how I got it up and running:
Step One: Getting the License
First, you’ll need a GitHub Copilot license. I appreciated the flexibility of the plans, which are tailored for individuals, teams, and enterprises. If you’re hesitant about committing immediately, starting with a free trial is a straightforward choice. Visit GitHub’s Copilot page, select the plan that suits your needs, and follow the prompts to activate your trial.
However, it’s important to note that the trial isn’t entirely free upfront. When I signed up, I had to provide my credit card details and was informed of a potential $10 charge. This setup means you can start using Copilot without an initial payment, but the card will be charged if the trial isn’t canceled before it ends.
Step Two: Installing the GitHub Copilot Extension for Xcode
Getting GitHub Copilot up and running in your Xcode environment involves a few detailed steps. Here’s how I did it:
- Check Requirements: Ensure that your system meets the necessary requirements. You need Xcode version 8.0 or higher and macOS Monterey (12.0) or higher. These requirements are crucial for the extension to function properly.
- Download and Install the Extension:
- Navigate to the github/CopilotForXcode repository.
- Download the latest version of the GitHub Copilot for Xcode extension.
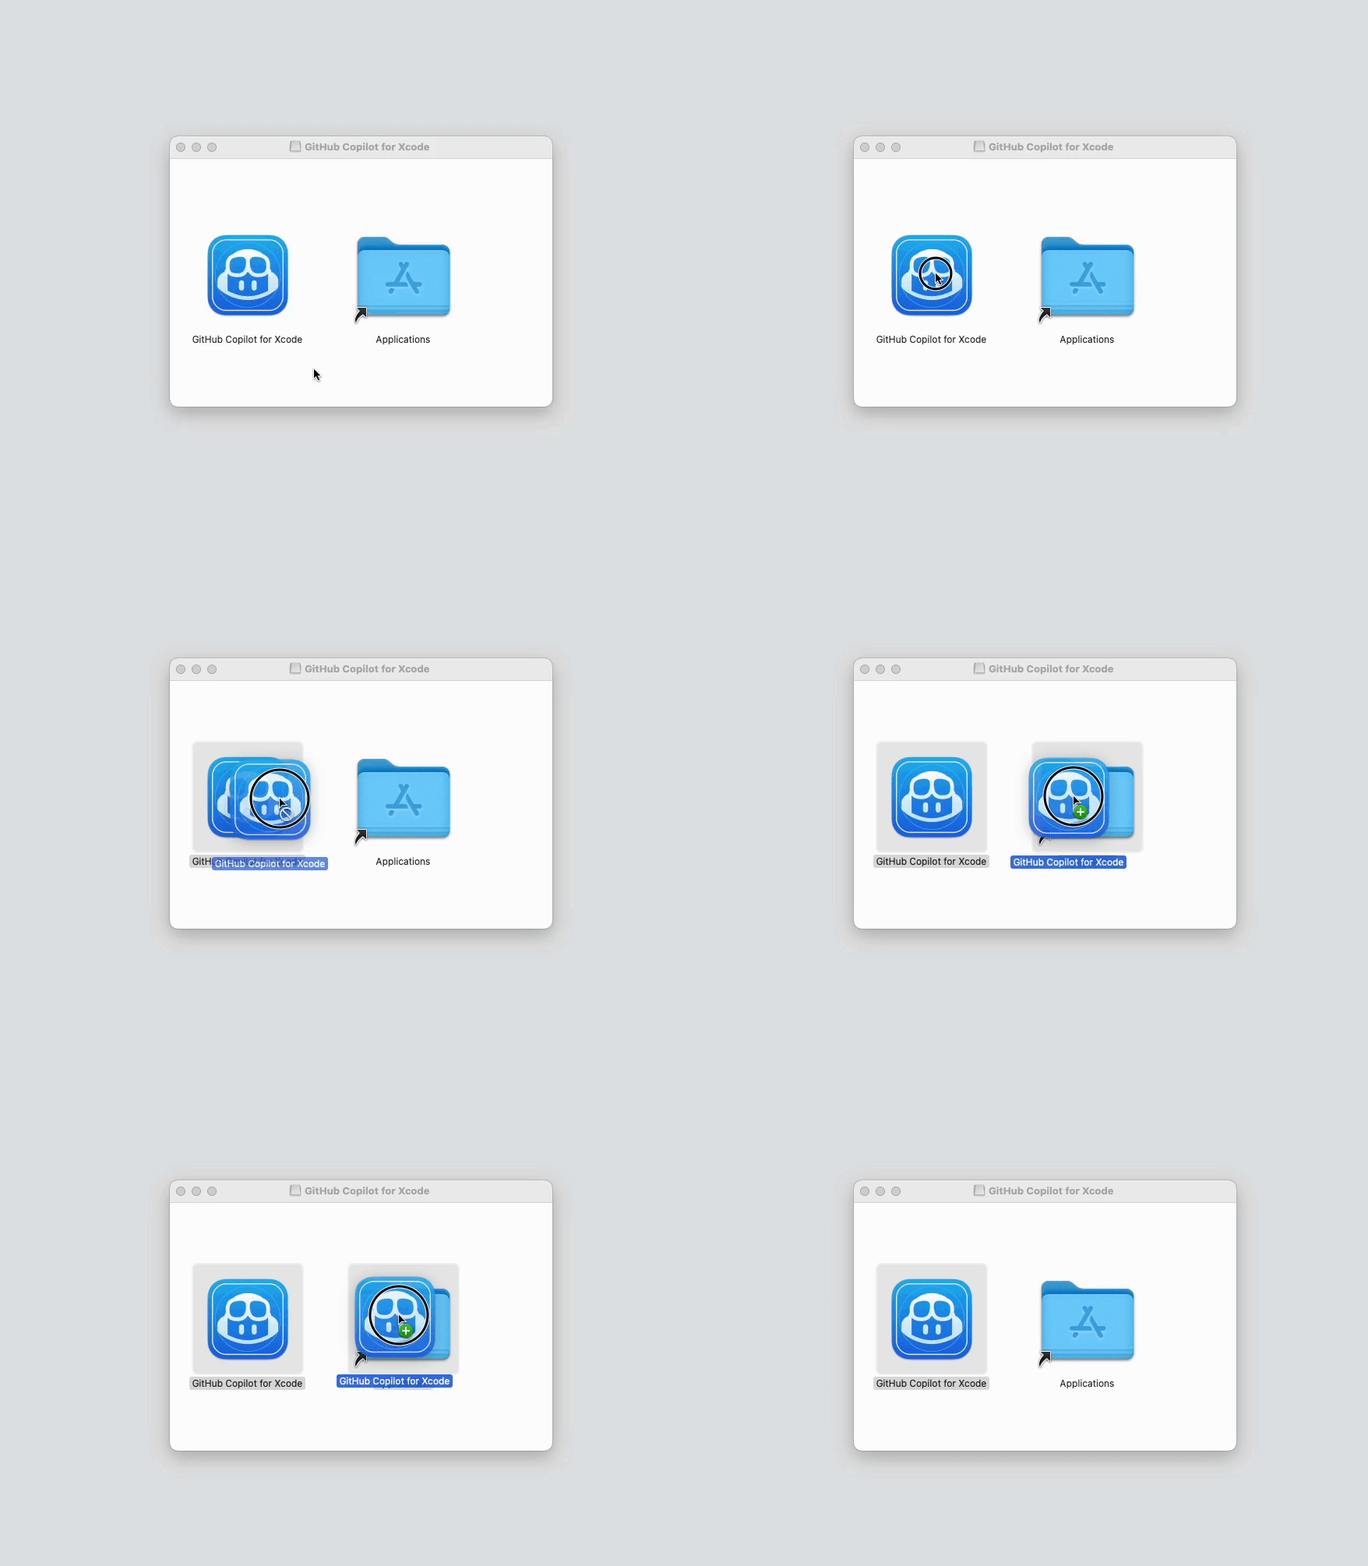
- Install the extension by opening the file and dragging the GitHub Copilot for Xcode icon into the Application folder.

If you try to open GitHub Copilot for Xcode for the first time, you will see a security prompt. This is normal. You can just press “Open” to continue.

- Grant Required Permissions: The extension needs specific permissions to operate:
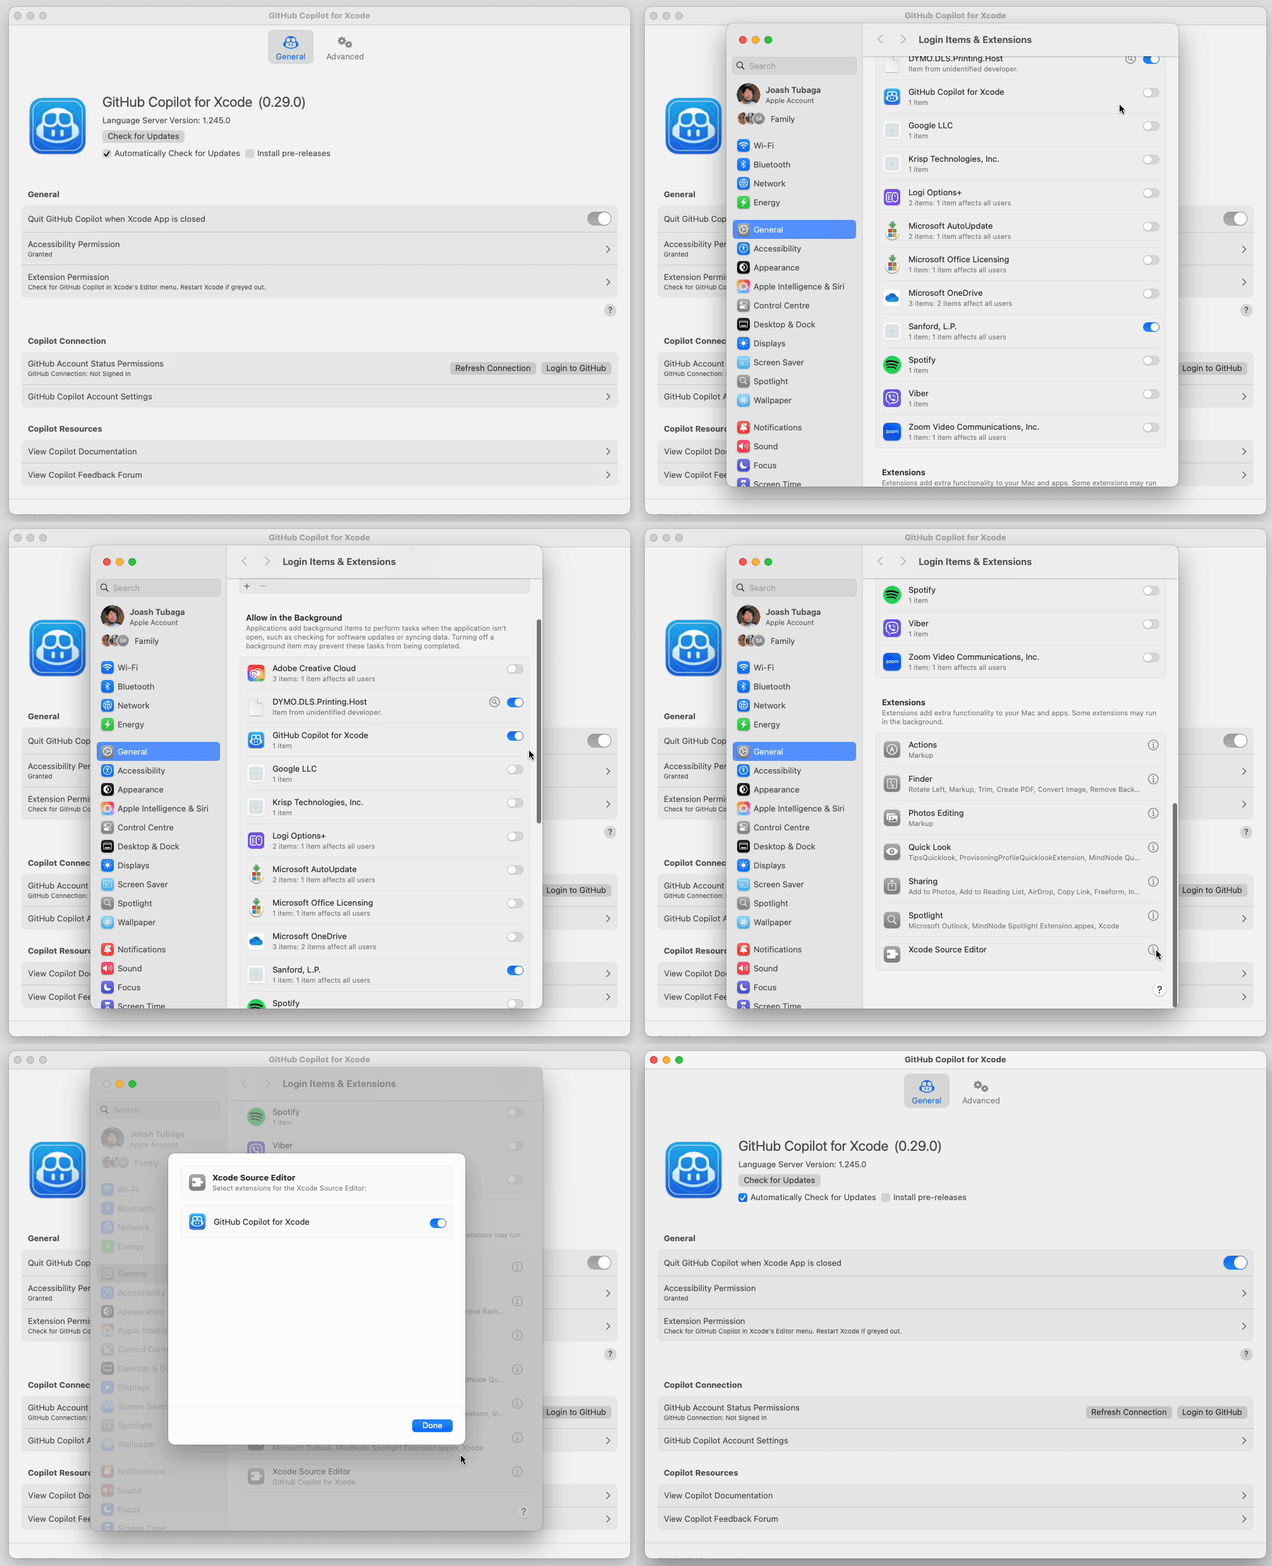
- Accessibility Permission: The first time you start the extension, you’ll be prompted to enable the “Accessibility” permission, which is essential for the extension to interact with Xcode.


- Xcode Source Editor Extension: This needs to be enabled manually:
- Open the GitHub Copilot extension application.
- Click on ‘Extension Permission’ and then select ‘Xcode Source Editor.’
- Enable GitHub Copilot and click ‘Done.’

- Restart Xcode: After setting the permissions, restart Xcode. You’ll find a new item in the “Editor” menu labeled “GitHub Copilot,” indicating the extension is now active and ready to assist.
- Sign in to GitHub Copilot: Before you can begin using the GitHub Copilot features:
- Open the GitHub Copilot extension application.
- Click on ‘Login to GitHub’ and follow the prompts to authorize the extension. This links your GitHub account to the extension, enabling it to generate code suggestions based on your past code and preferences.
Seeing It in Action
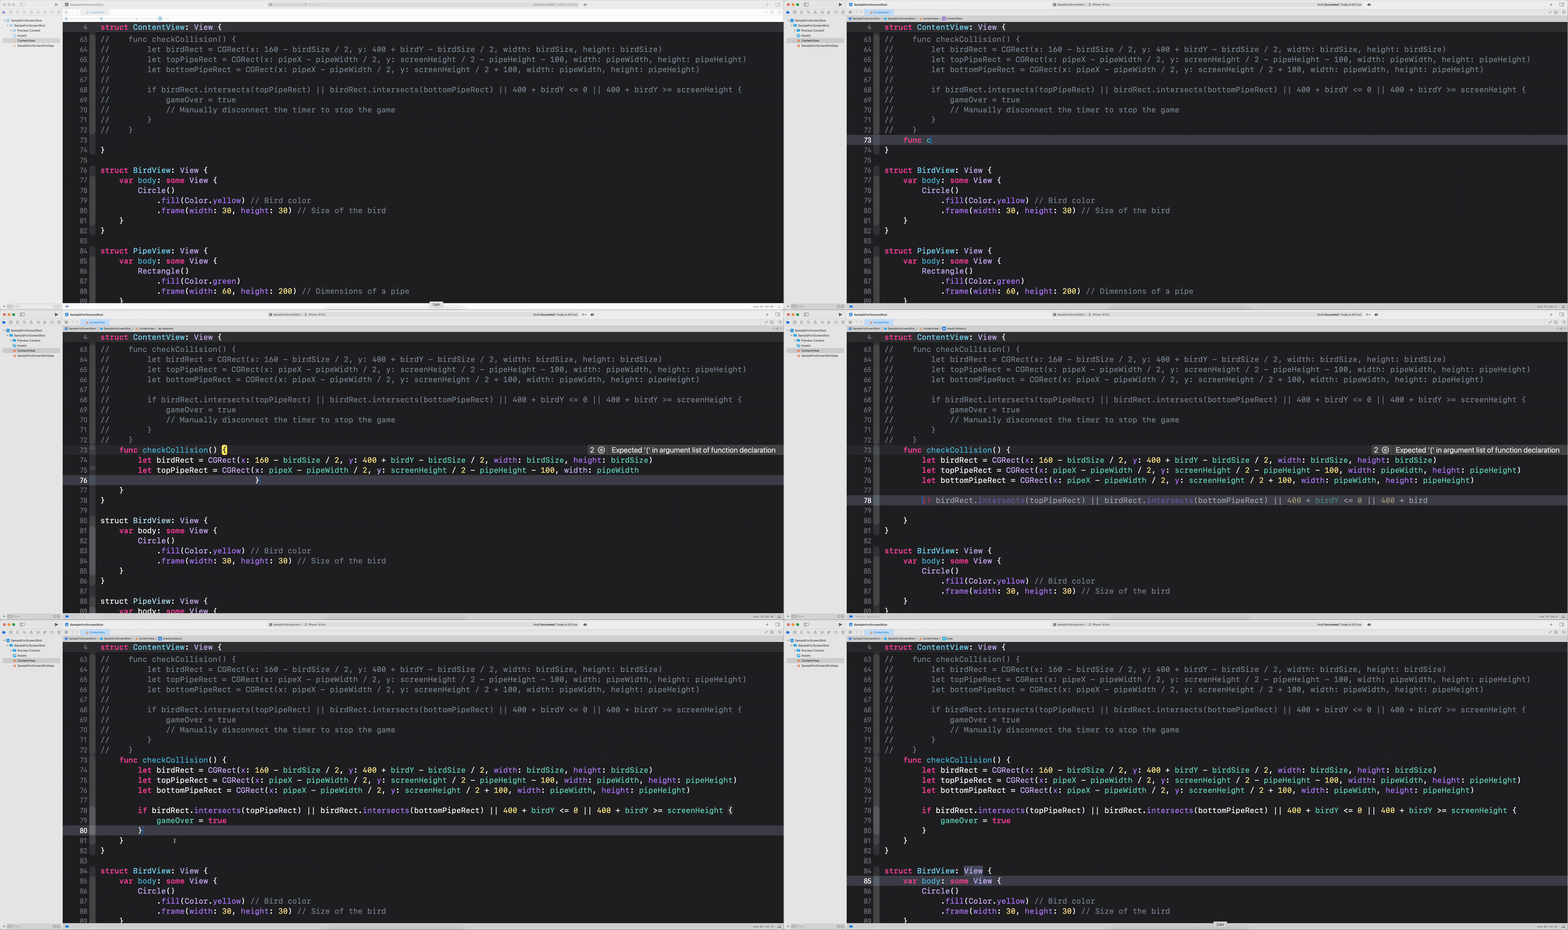
Once everything was set up, using GitHub Copilot felt like having a coding mentor who could suggest entire blocks of code or quick fixes. It can even automatically suggest an entire function body in grayed text. To accept the first line of a suggestion, press Tab. To view the full suggestion, hold Option, and to accept the full suggestion, press Option+Tab.

Conclusion: Is GitHub Copilot Worth It?
From my experience, GitHub Copilot is more than just a tool; it’s a new team member. It has helped me streamline my coding process, reduce errors, and learn new coding practices along the way. For anyone new to coding or seasoned developers looking to boost productivity, I highly recommend giving Copilot a try in your Xcode environment.


