
As a software developer you have probably heard the term repository by now, and sometimes maybe Github is not really to your liking. Then maybe BitBucket might be the right repository for you!
But first up whats a repository you ask? To put it simply, a repository is a central file storage location. It is used by version control systems to store multiple versions of files.
Now, why BitBucket you ask? Aside from the usual source control you can actually create teams in BitBucket, this is a bit better option than Github because you can have a private repository that a team specified by you can access at anytime. Additionally, BitBucket also integrates easily with Trello (Project Management Board) for smooth project management and debugging tickets/issues.
Register an Account
Register for an account on BitBucket.org, its free for the first 5 users on the team so it’s perfect for small teams to start with.
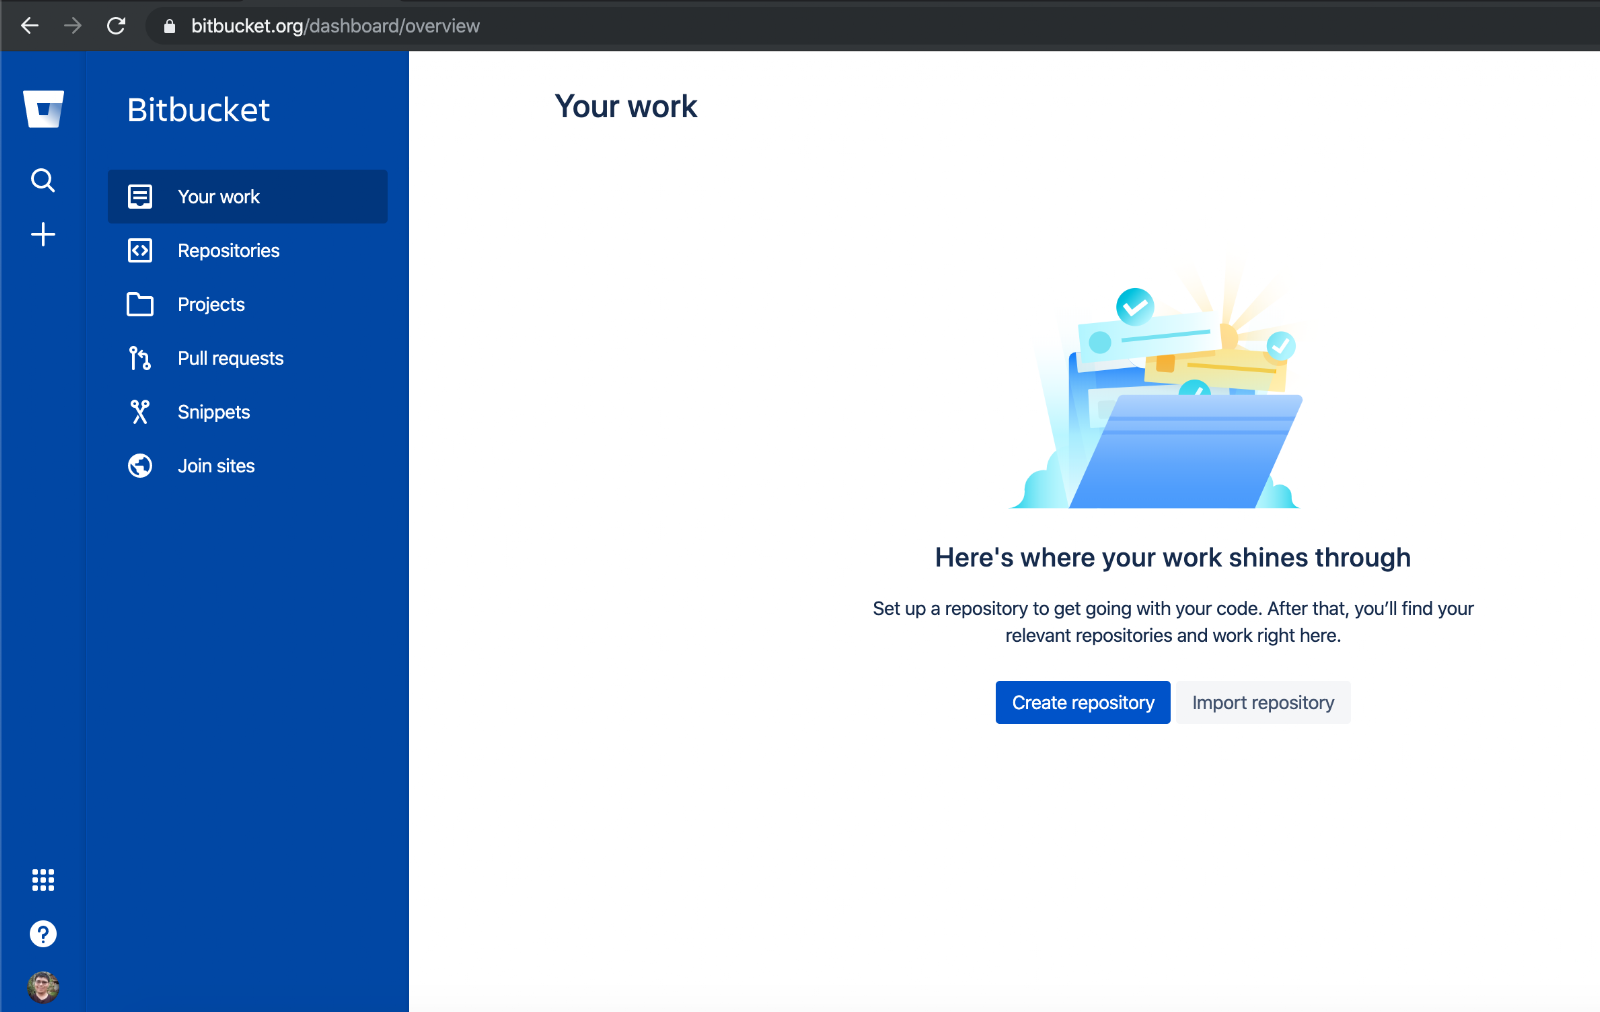
Once that’s done and your email is confirmed you should be able to log-in and access your dashboard.
Create a Repository (personal)
Click on create repository to create your own repository, lets name out repository SimpleContacts and lets make it a private repository, for this tutorial we will be using Git.
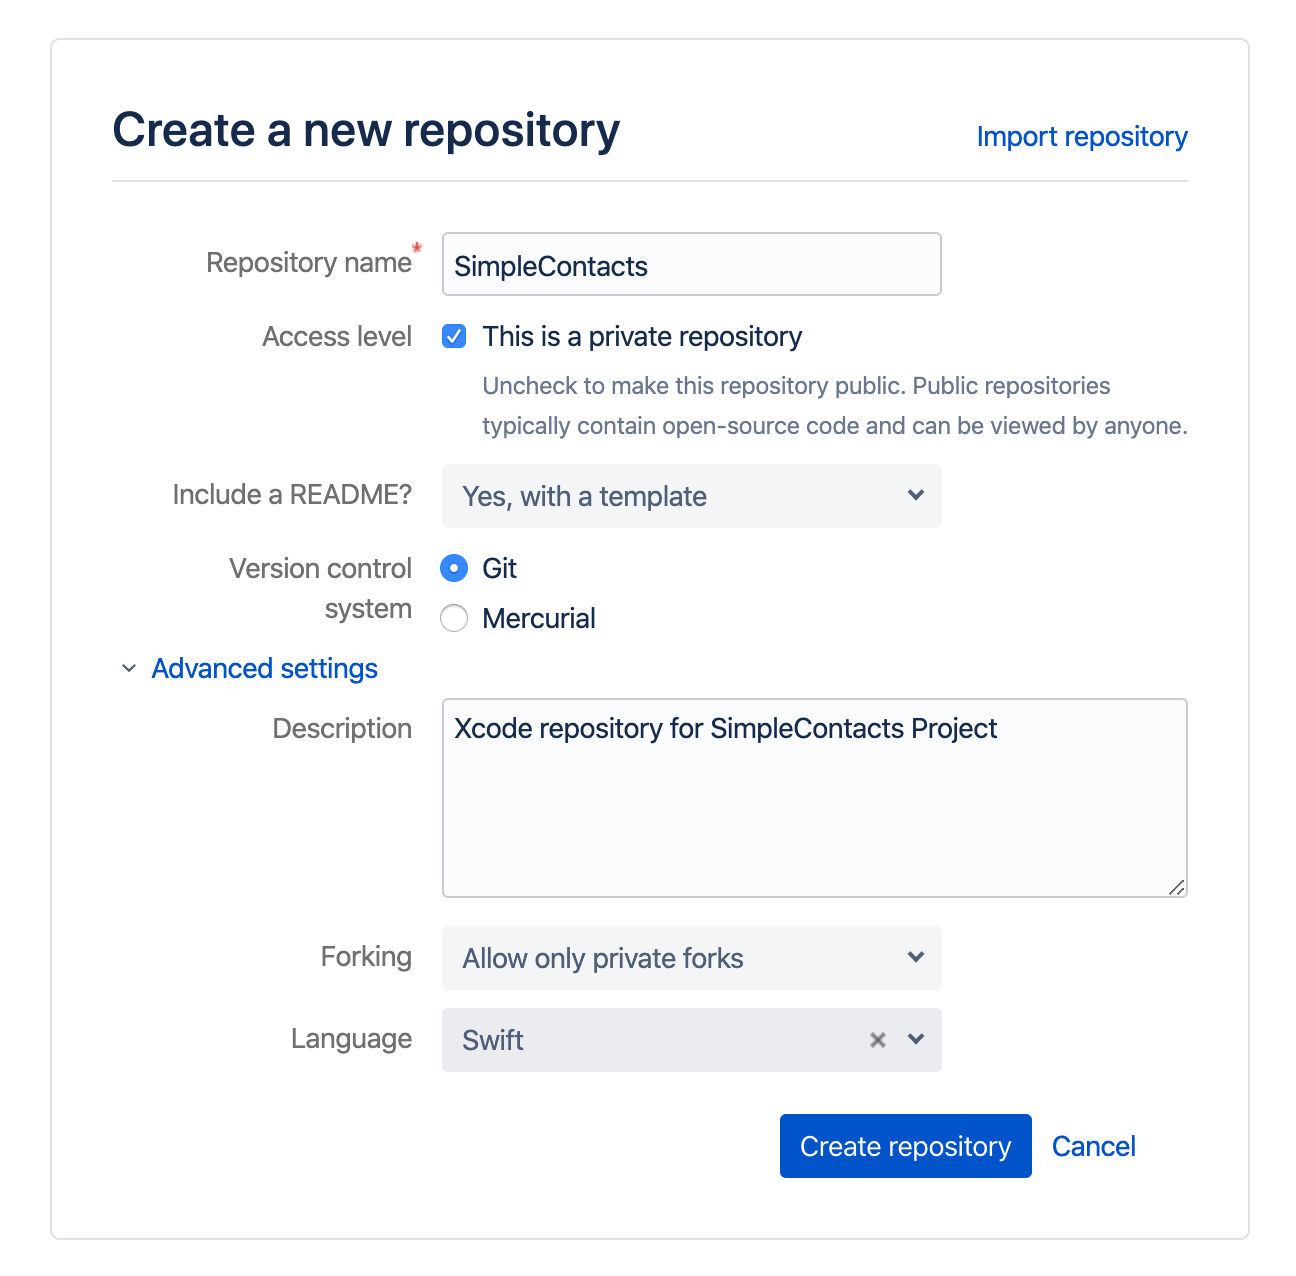
You can set to have a readme file and even set the language of the repository. Once completed it should look like this
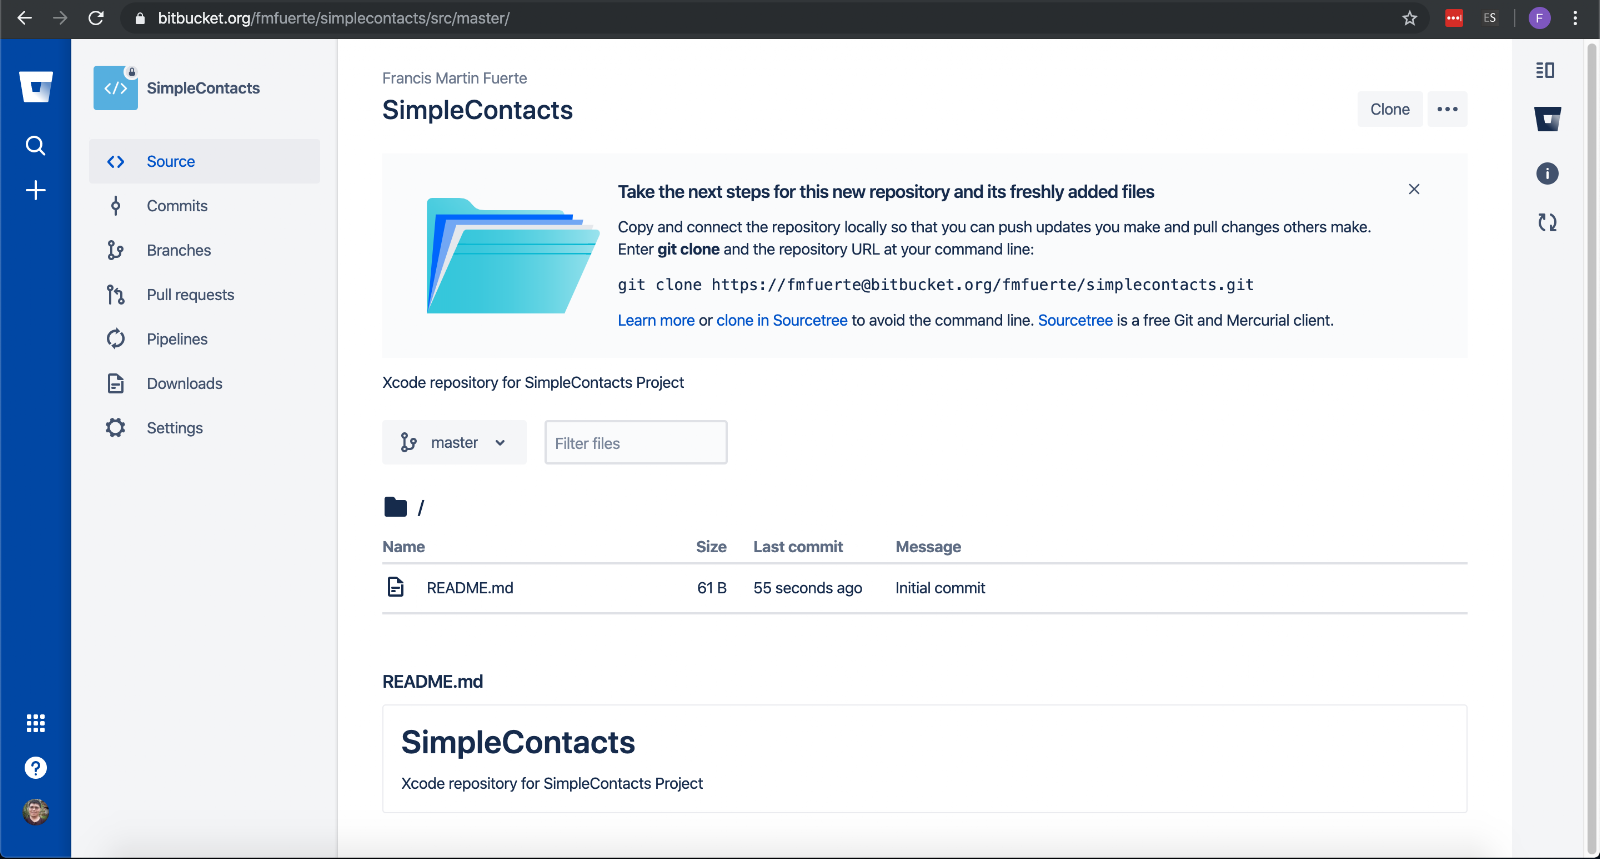
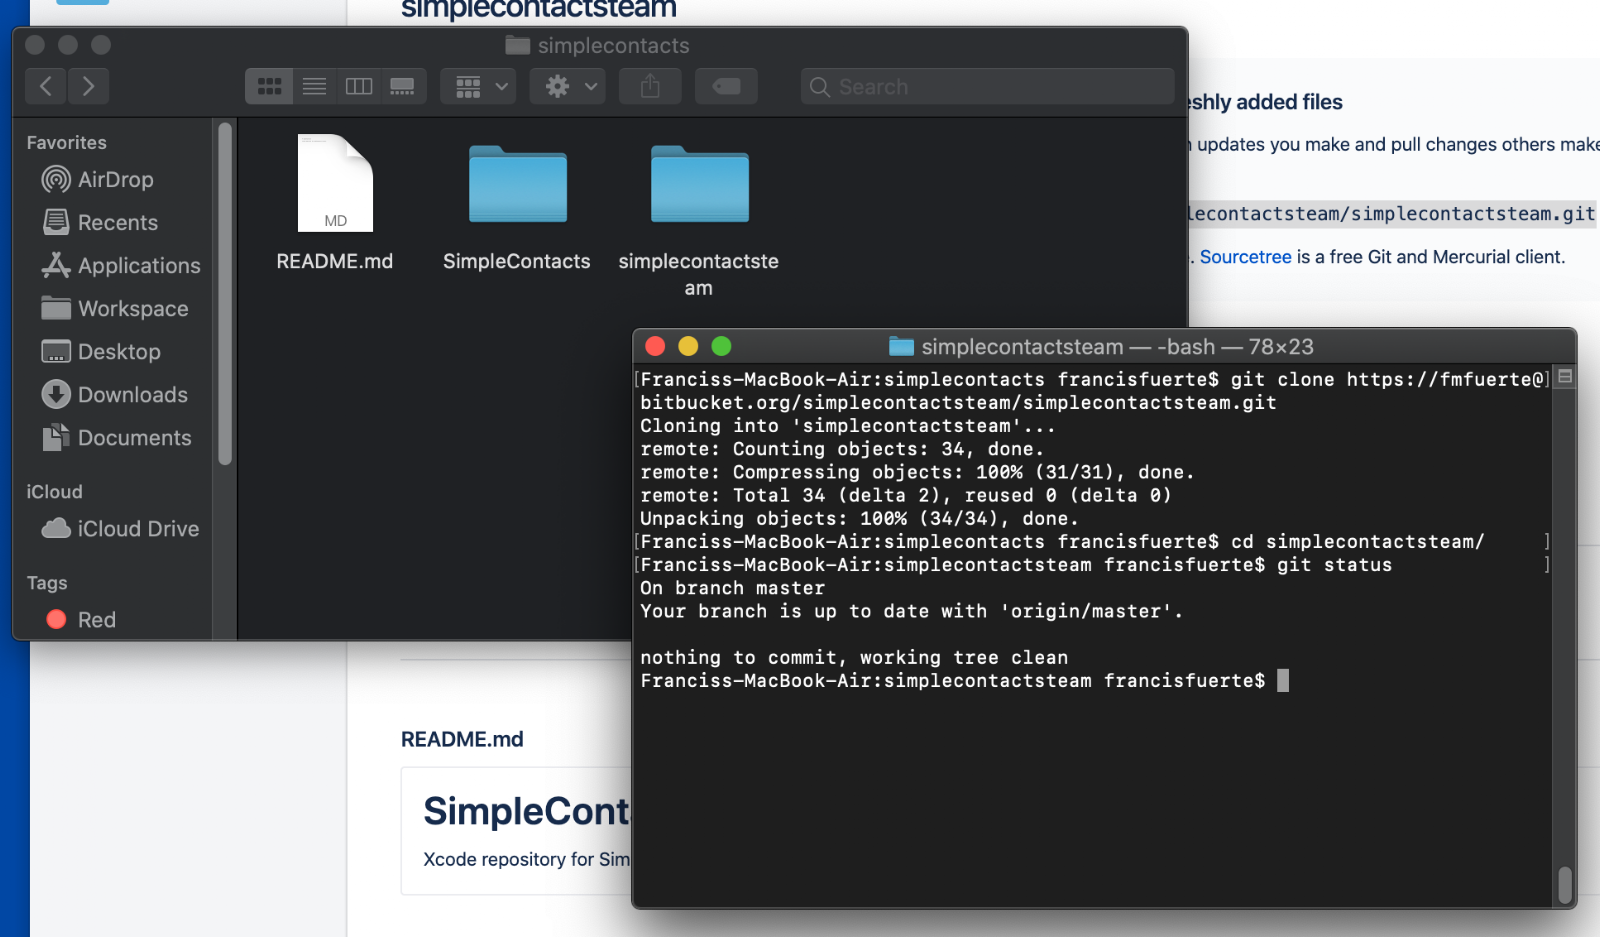
Open Terminal and navigate to a folder of your choice, for this example i also created a folder named bitbucket-repo. Once navigated to the folder copy the instructions for cloning above and and press enter
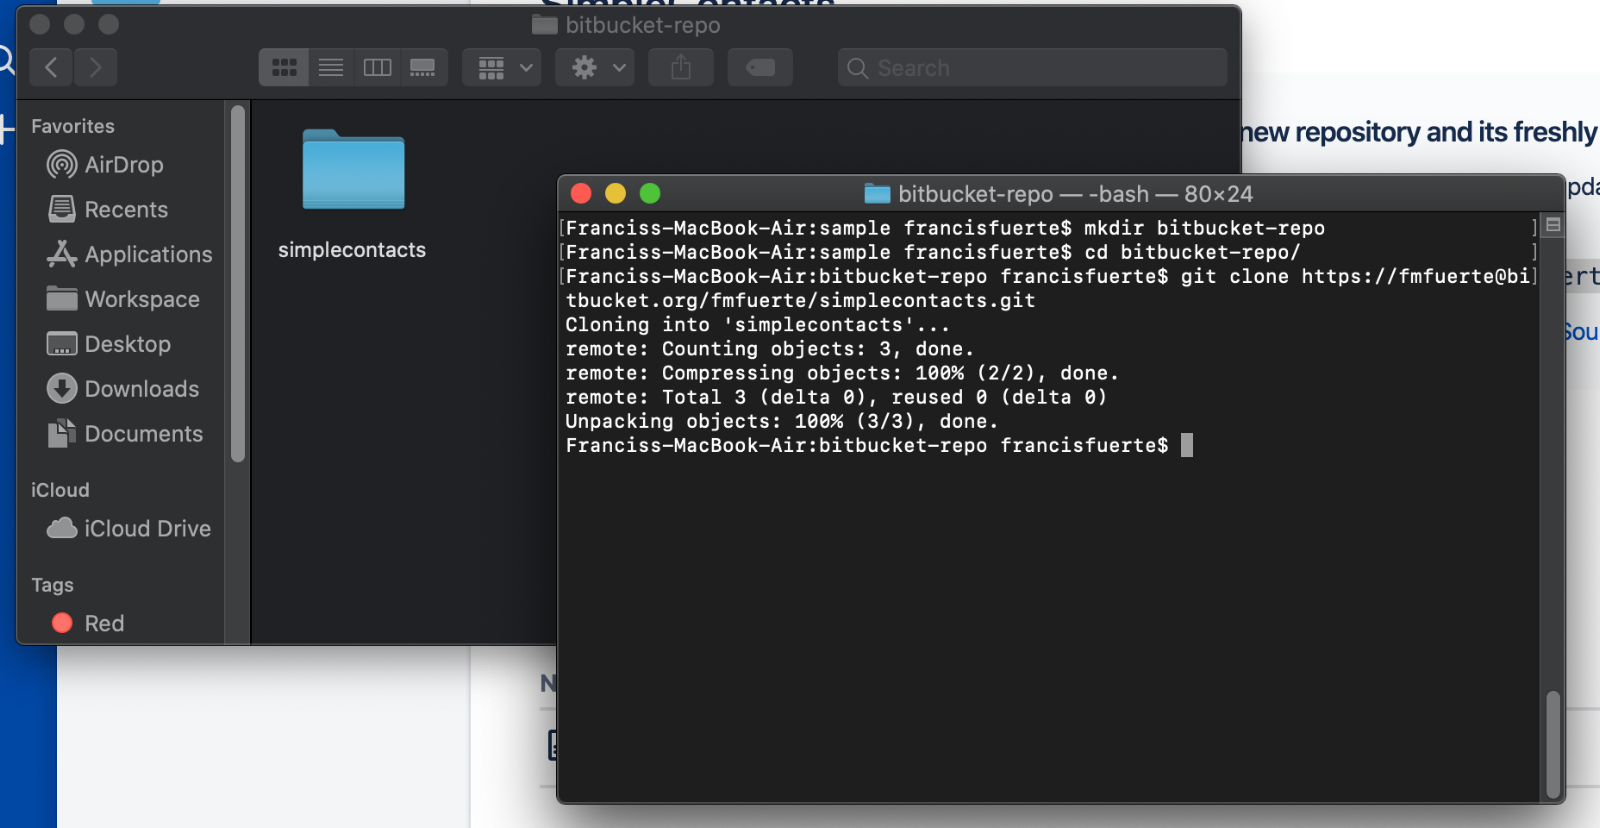
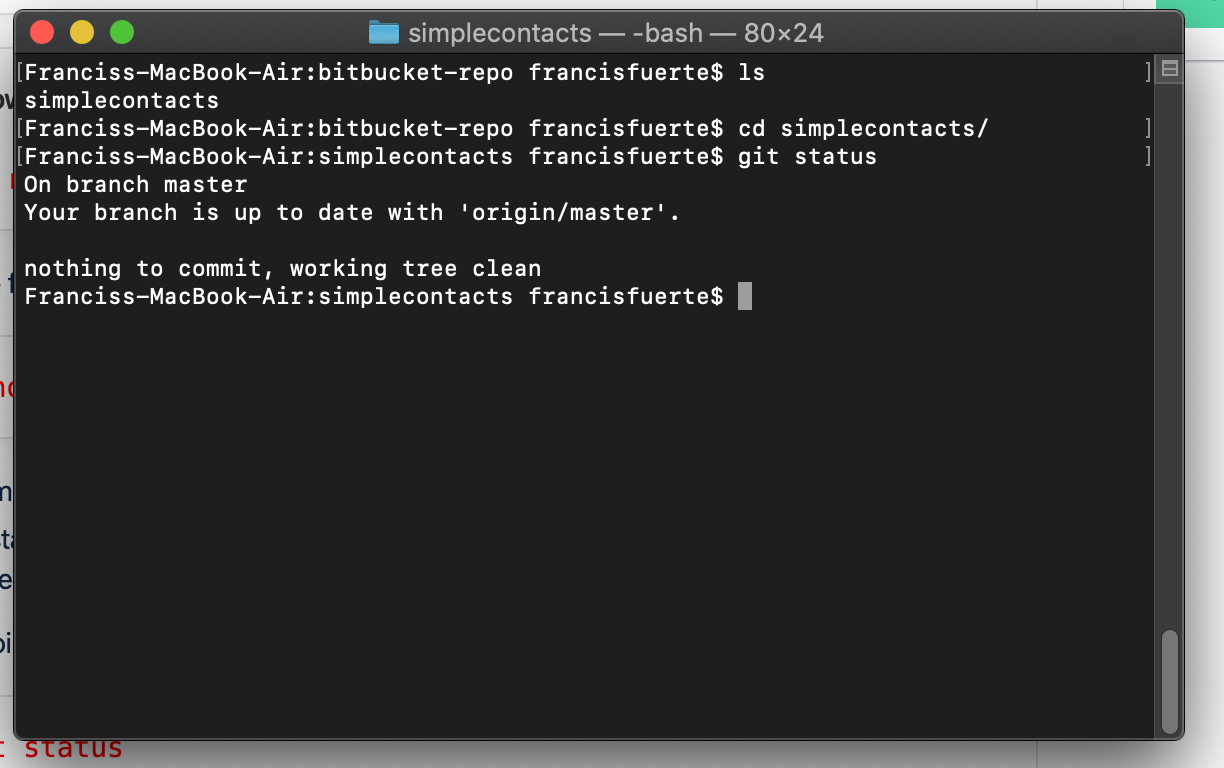
You will see that your repository is now created on your local machine, you can navigate to this folder and check the status
Adding updates/files to your repository
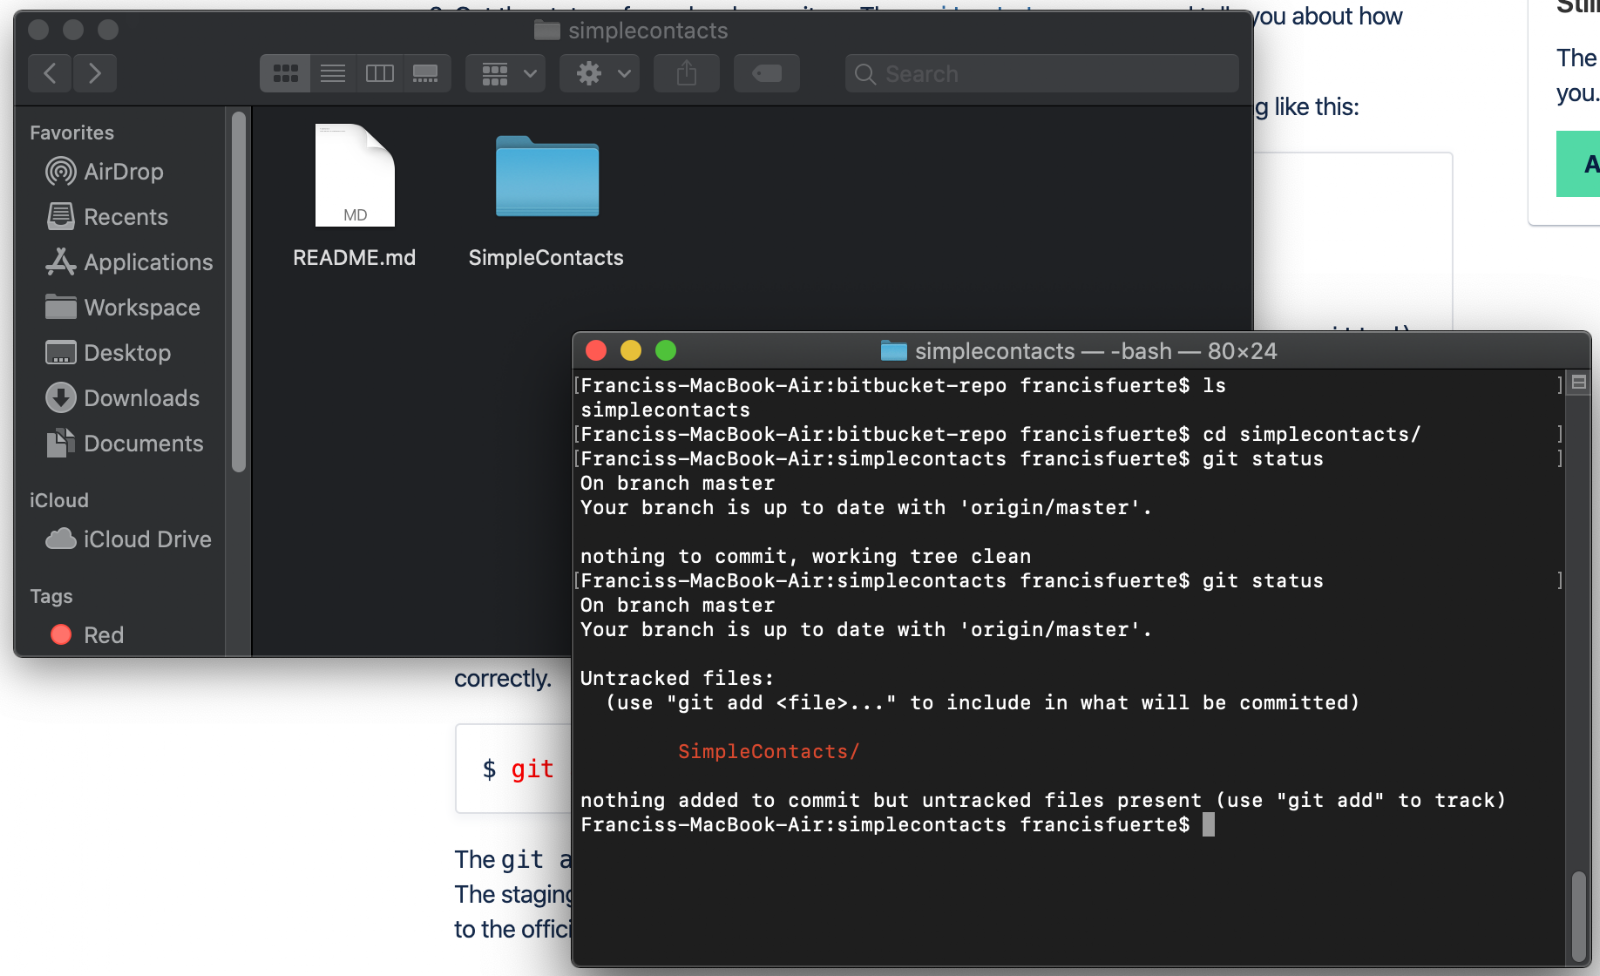
Open the Terminal and navigate to the repository of your choice. For this tutorial i have already created an xcode project (SimpleContacts) and saved it to the repository folder.
Doing a git status will say that I have a whole folder that is not tracked/committed yet.
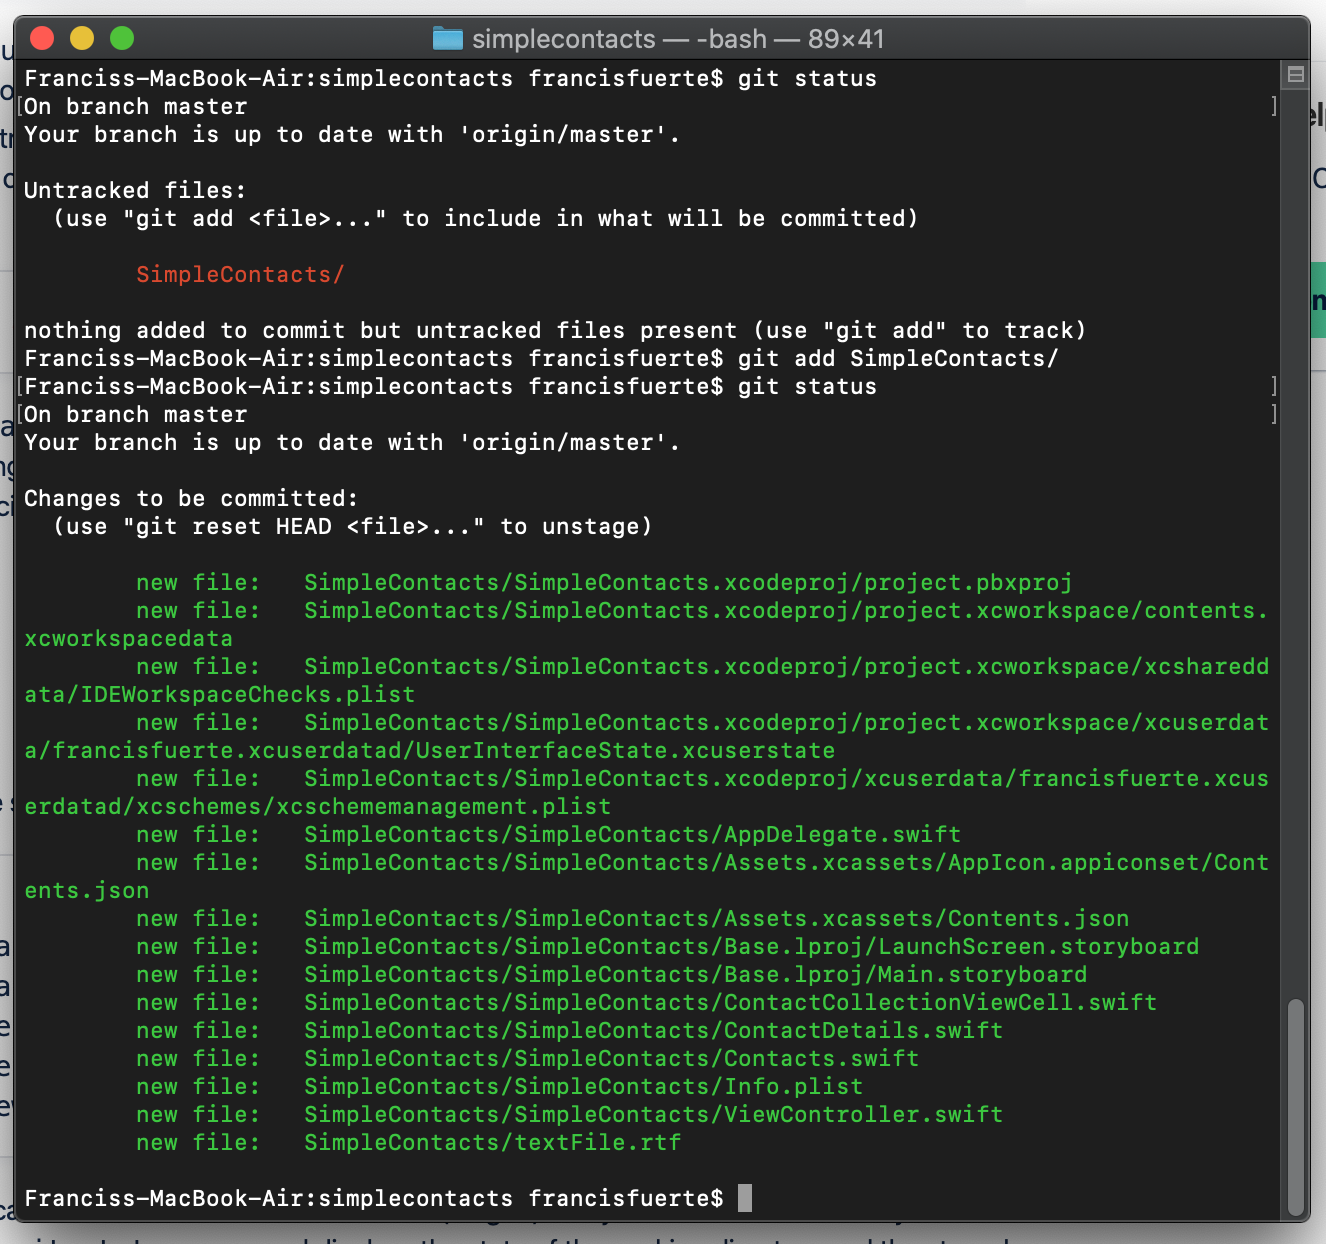
To add a file/folder for commit you can type the filename/foldername individually or just do git add . (doing so will add all files that are changed so be careful).
Doing a git status now will list out all the files that we have added
The files are now ready to commit. To commit simply type git commit -m “[message]” and press enter.
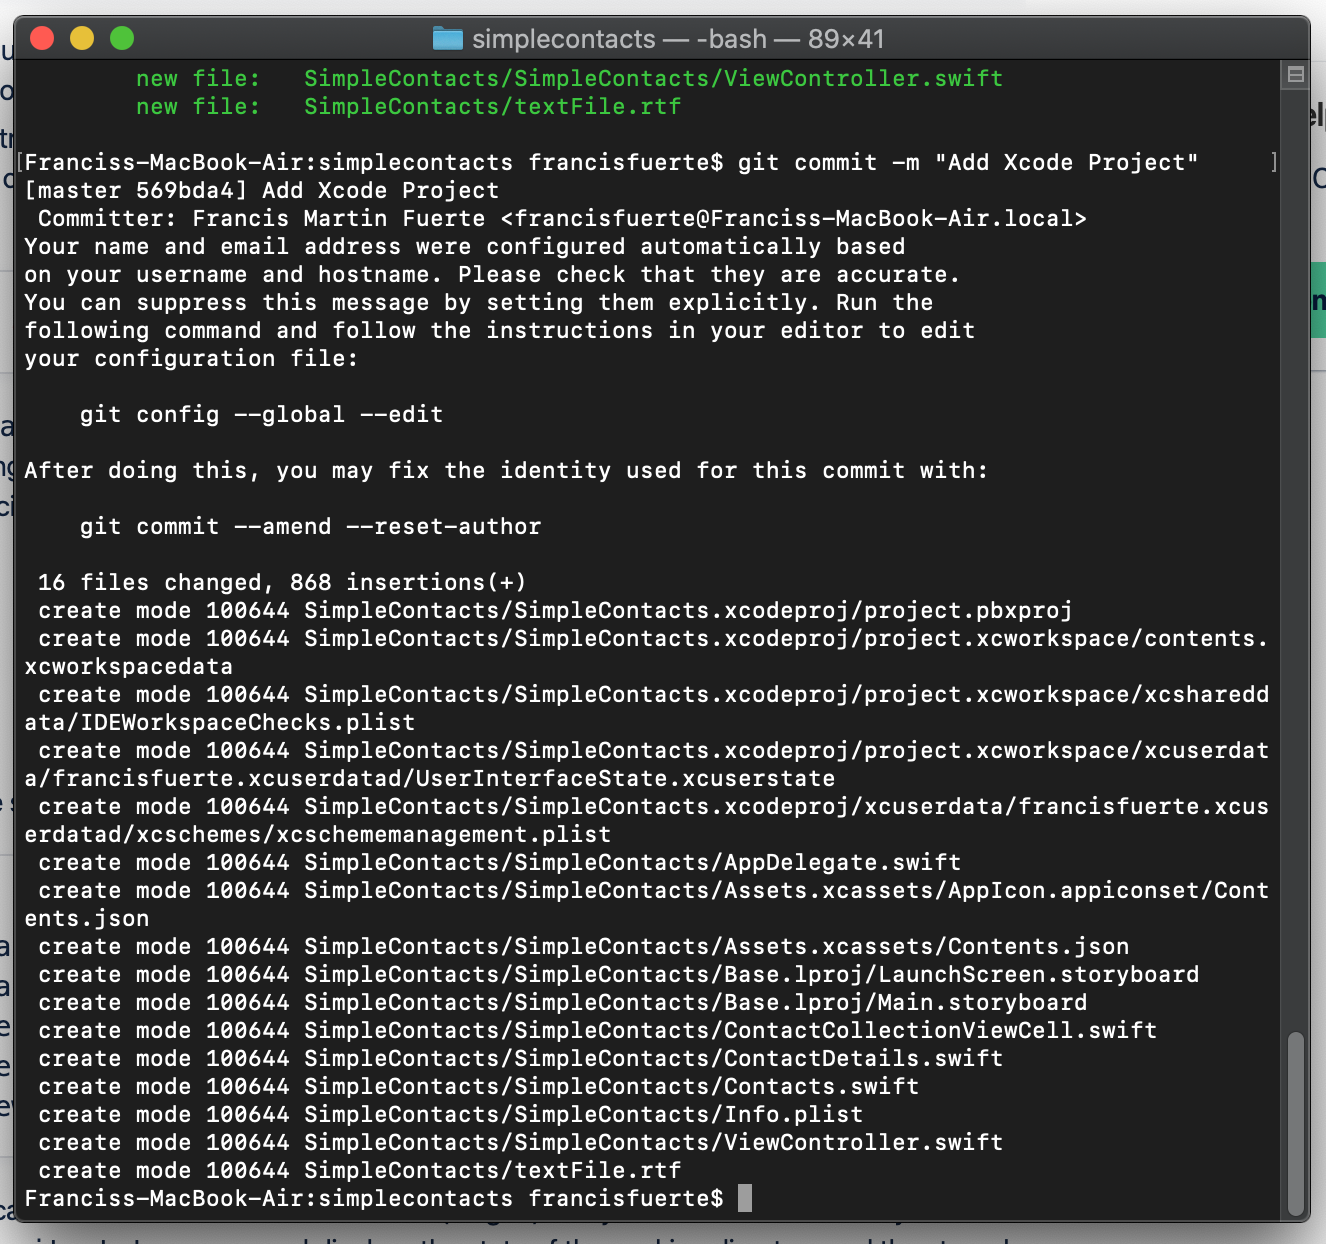
The files are now committed and ready to push. To do so just simply git push origin master (you can also push to a branch if you set-up one)
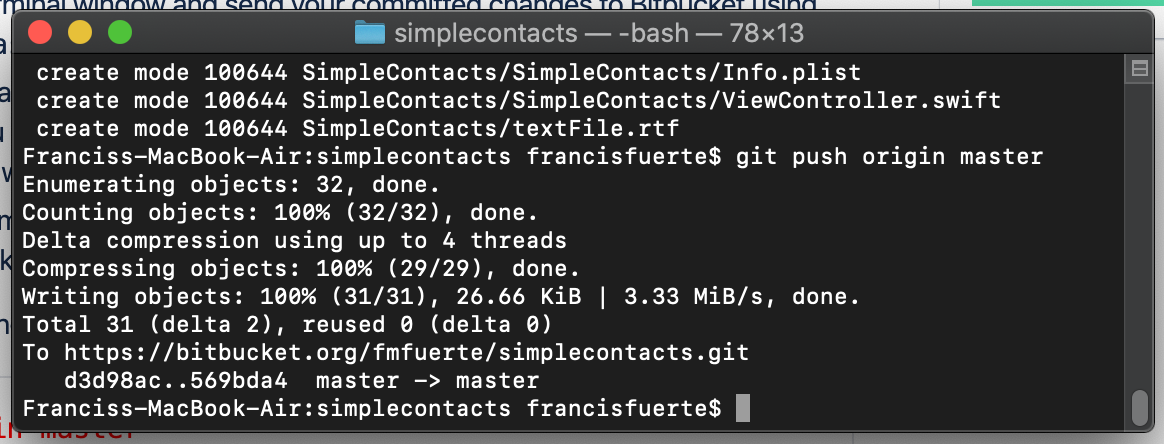
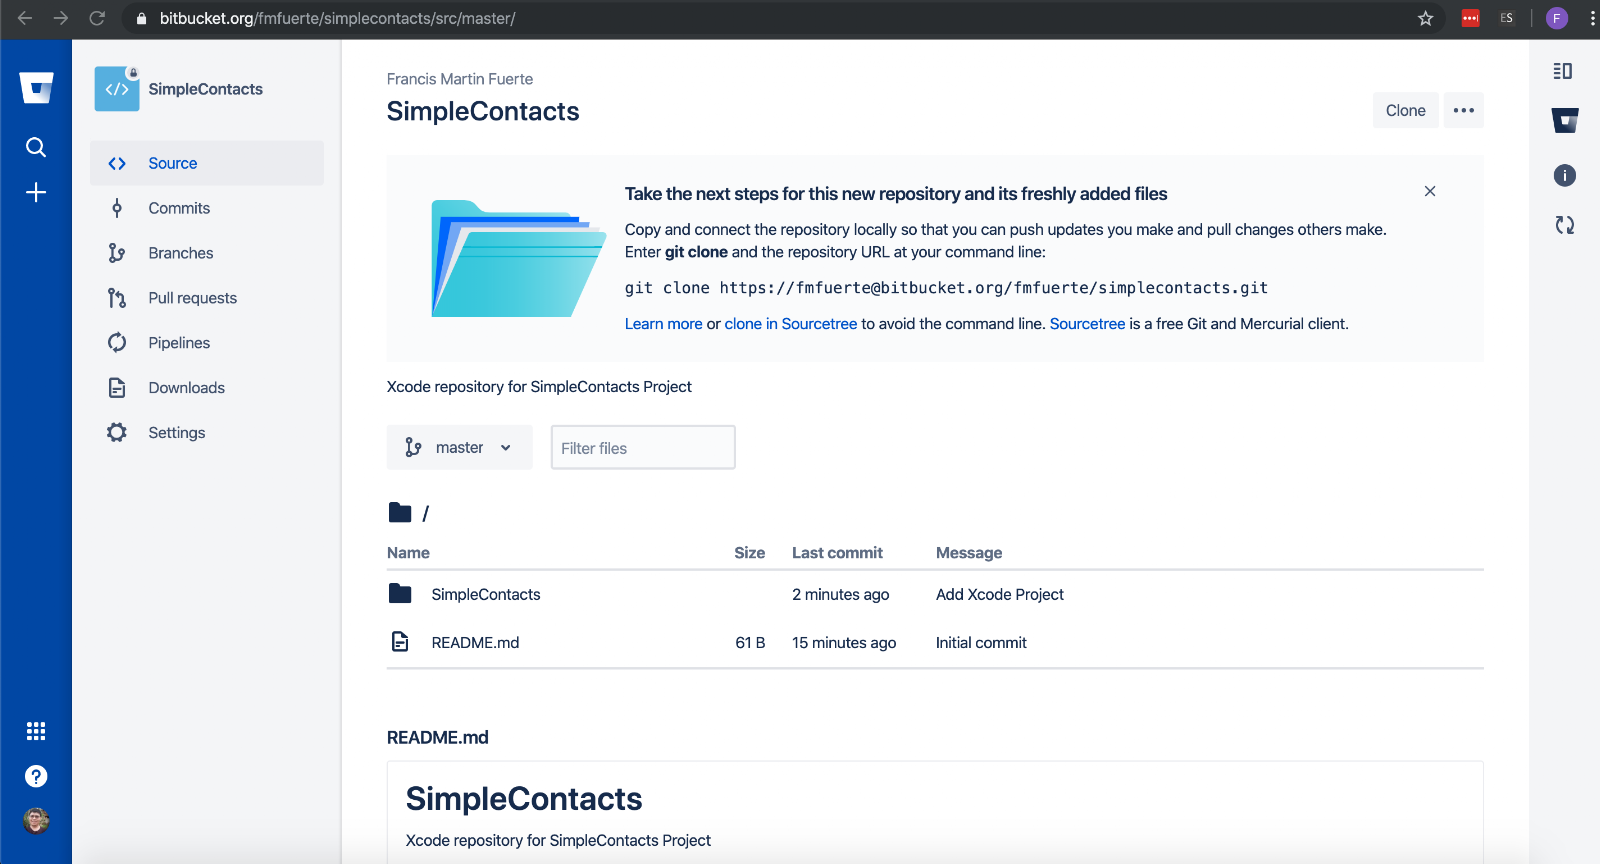
If you refresh your bitbucket project page you will now see the new folder/project added to your repository
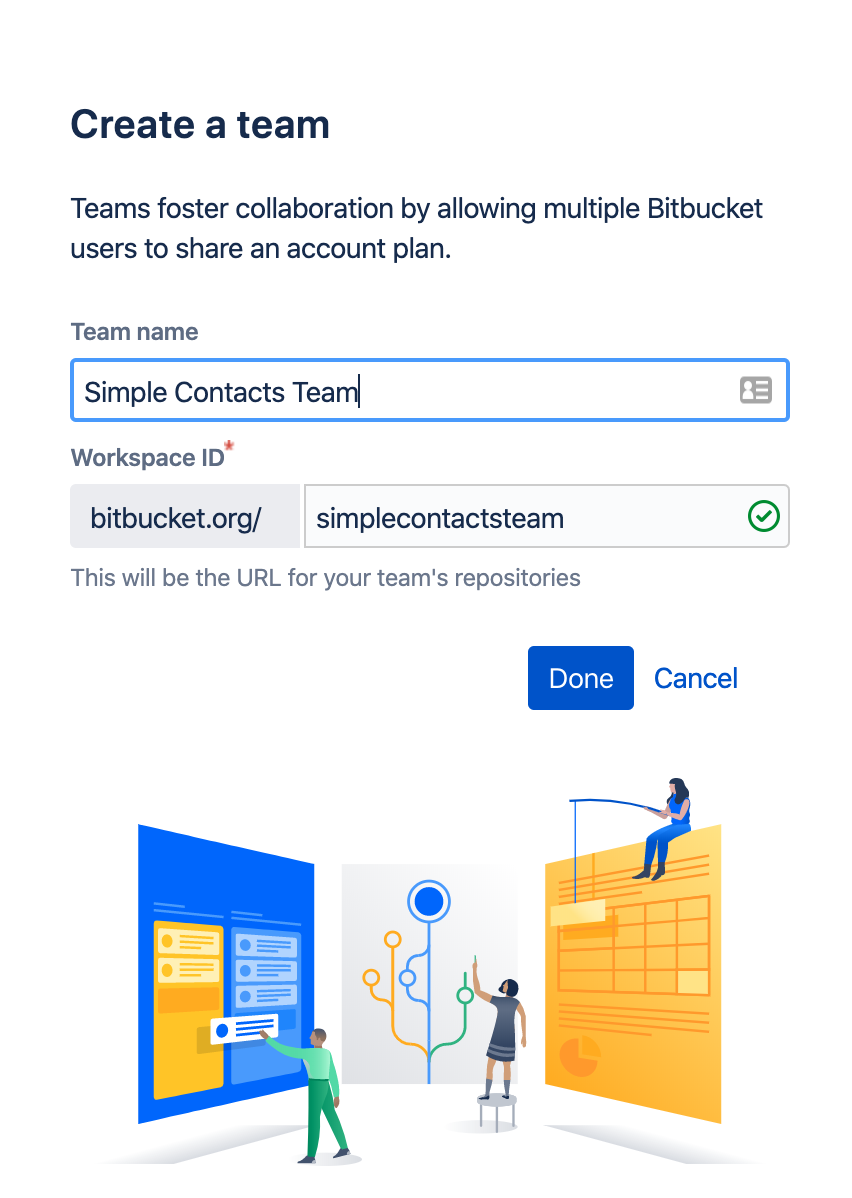
Create a Team Repository
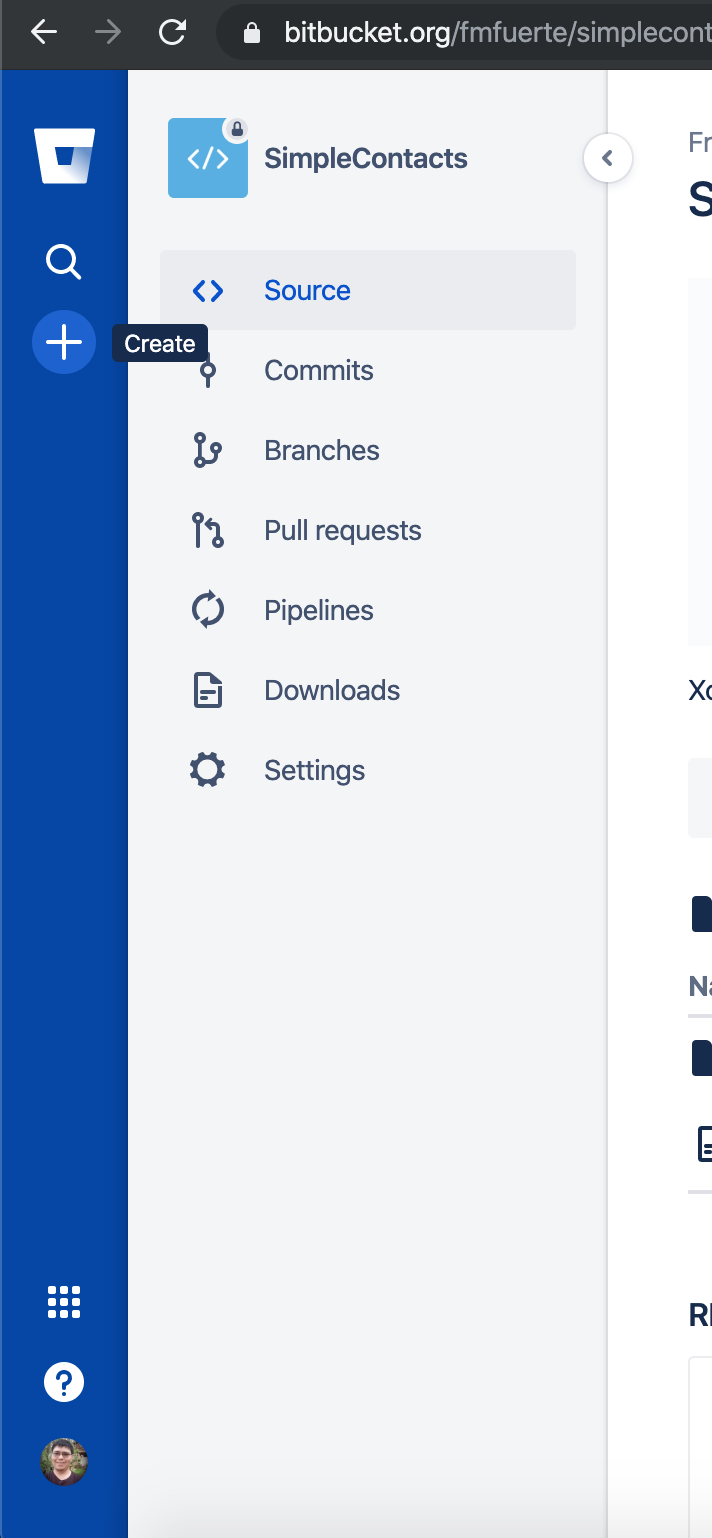
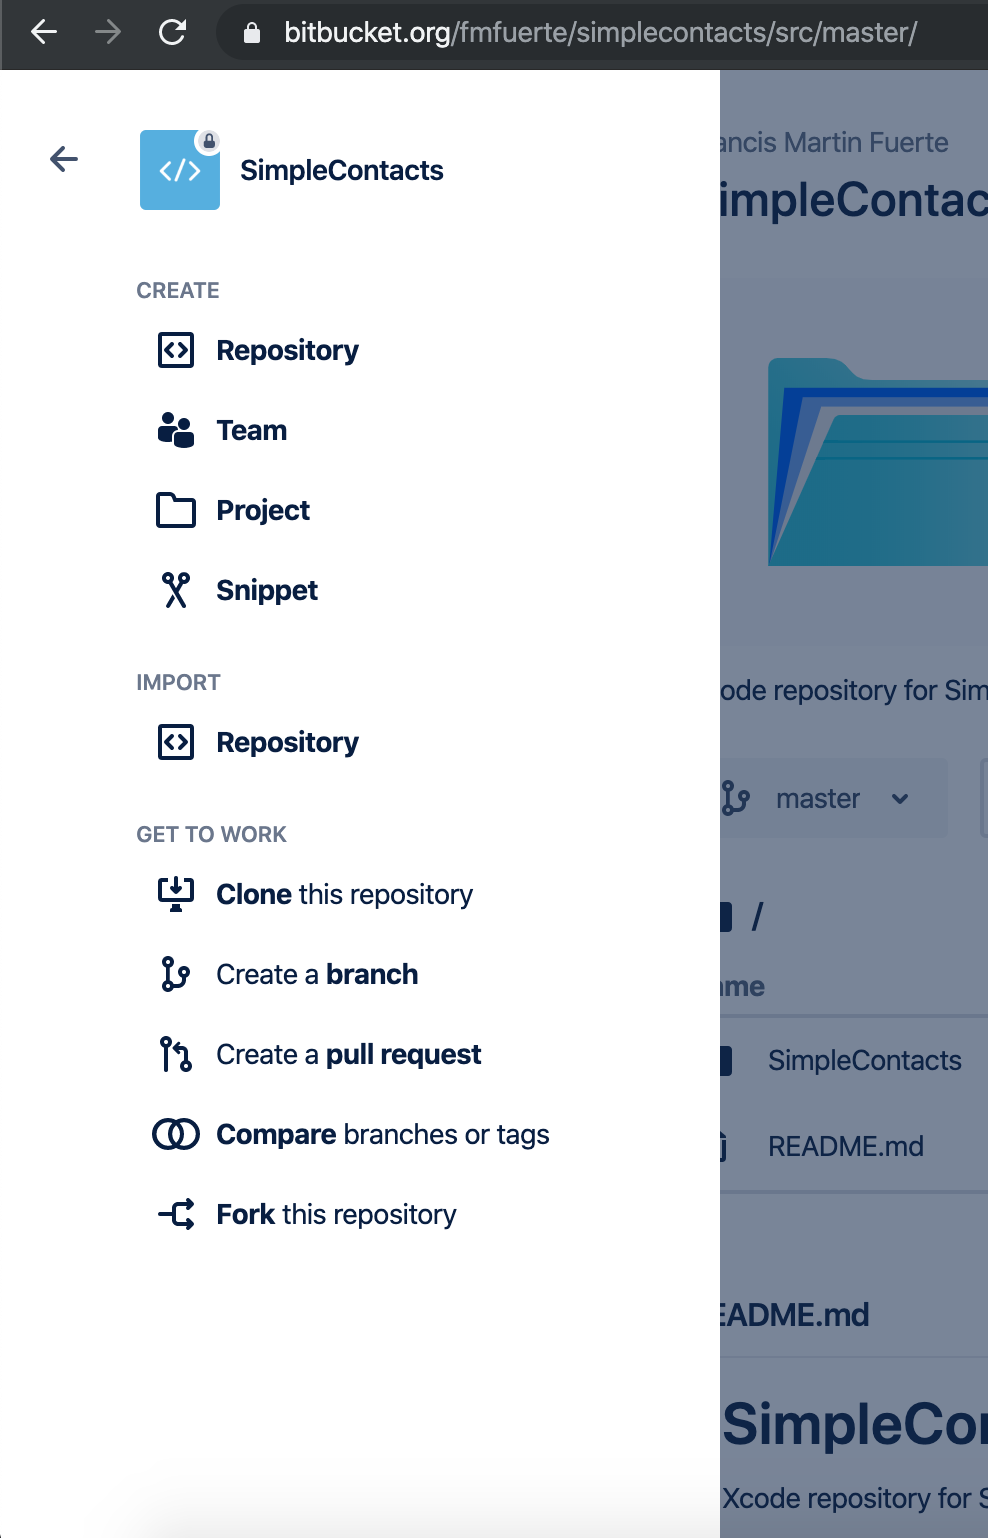
On your dashboard click on the plus (+) icon, this will open up a menu, choose Team.
Then, set-up the repository name for your team
Once completed it will take you to your team repository. Its technically similar to a personal repository but can team can collaborate on it even if it is set to private.
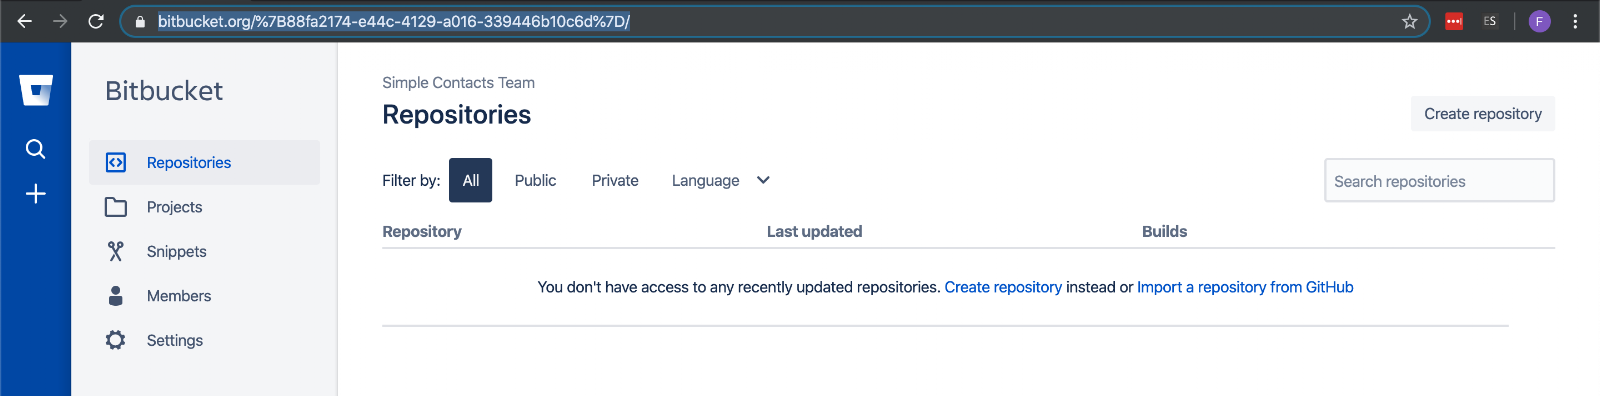
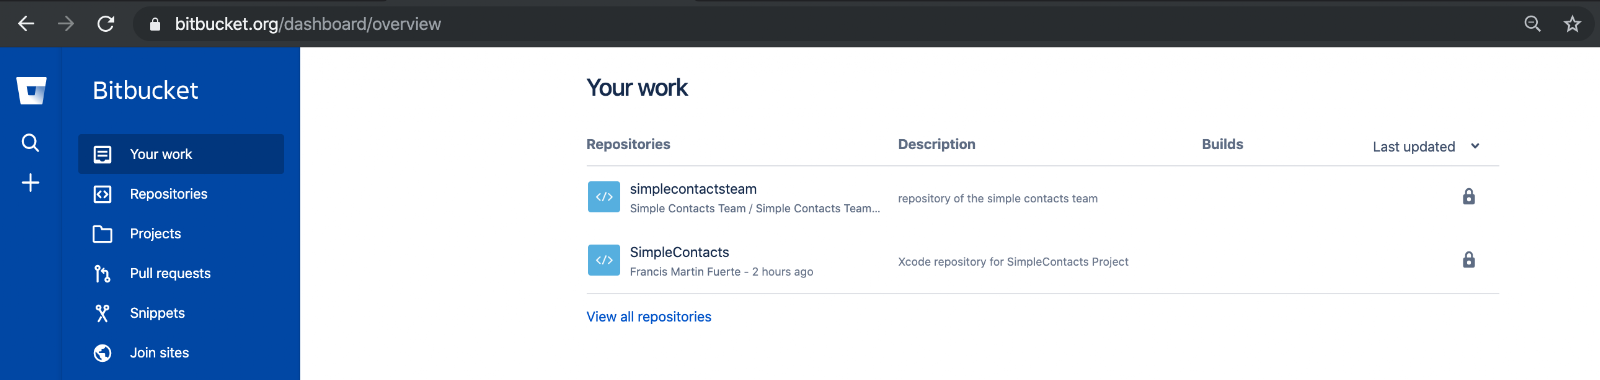
Checking your dashboard will list all the available repositories that you have
Transfer an existing repository
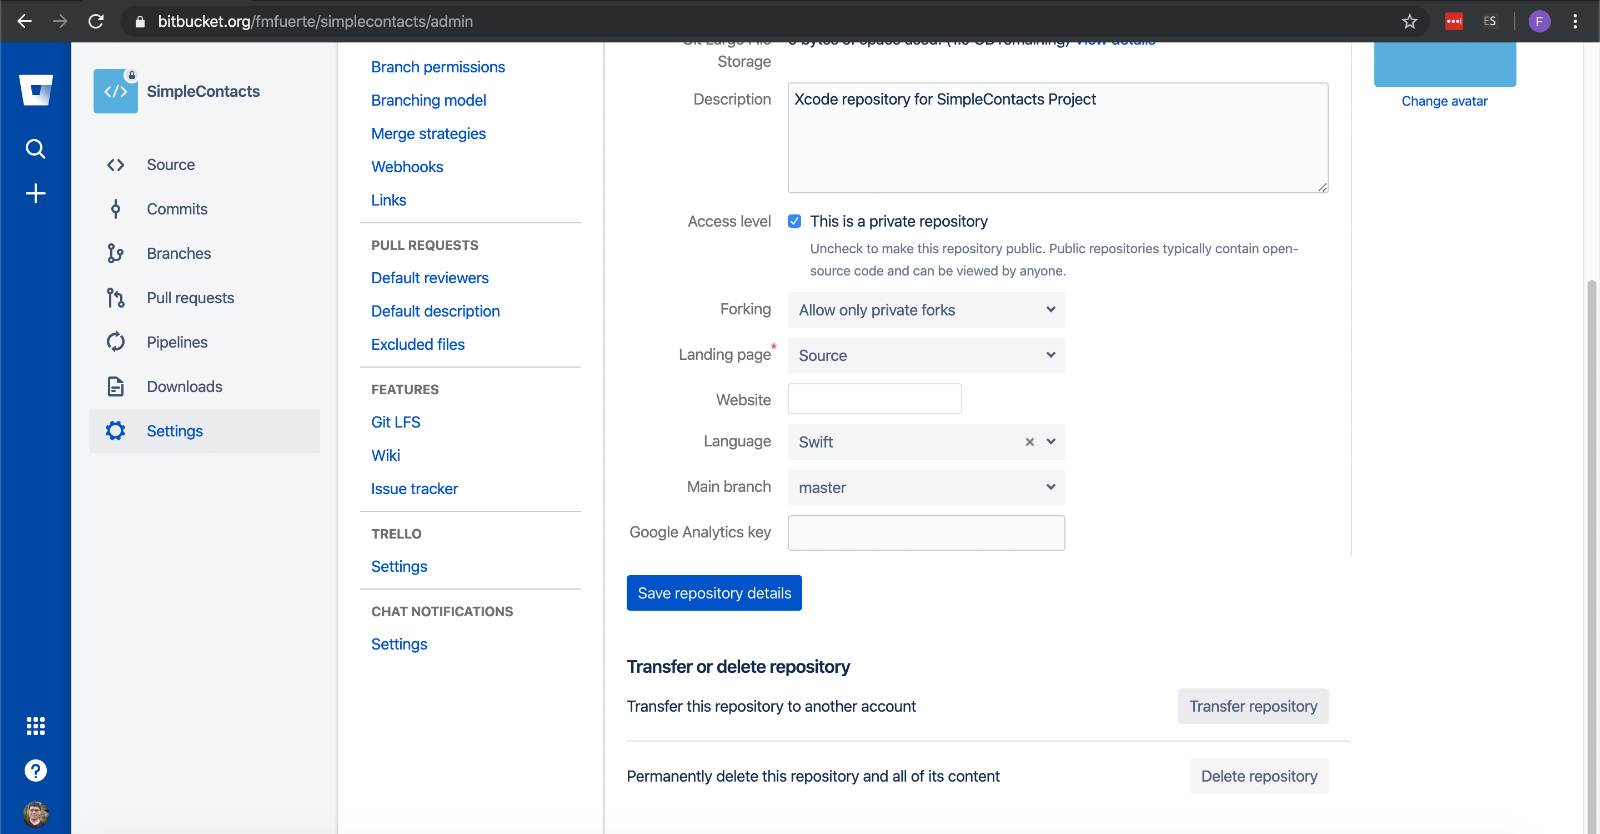
Since we already created our SimpleContacts repository we can opt to just transfer the contents to our team repository, open the repository you want to transfer and click on settings, from there you will see a button to transfer repository, click it.
It will then pop-up and ask for the repository address
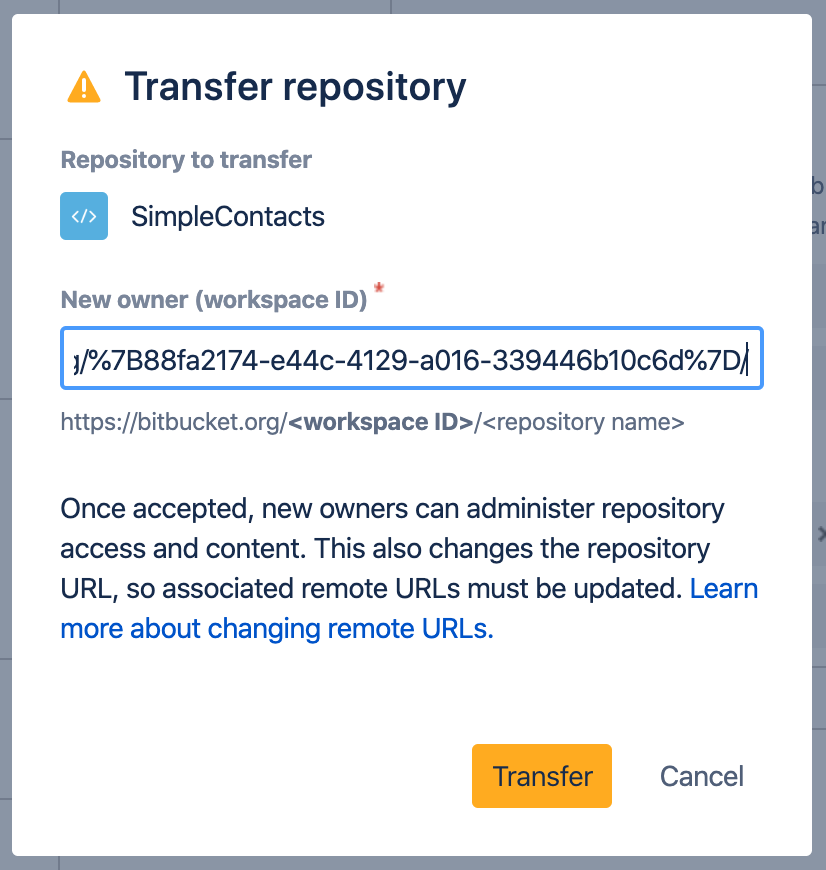
This will be will the repository address of your new repository / or team repository, to get the address just go to the repository in your dashboard and copy the url.

Import an existing repository
If transferring a repository is not for you then you should just choose to import a repository, to do so just click import a repository from Github (don’t worry you can also import from your own BitBucket repo)
Fill out the details, also don’t forget to provide the url of the repository you will be importing from and provide authorization (username and password) if needed. next , select the owner of the repo (which in this case it is the team)

Once completed you can choose to clone your new team repository on your local machine
Adding team members
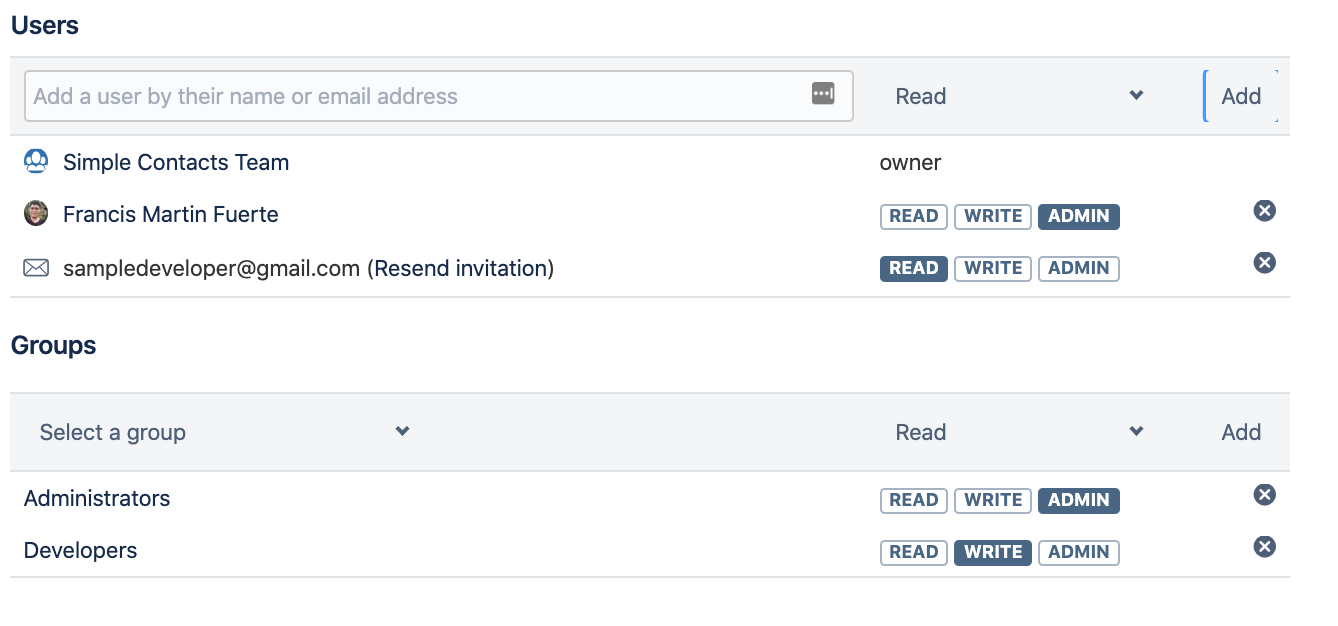
To add members to your team repository just open the team dashboard and click on settings. Then, click on user and group access.
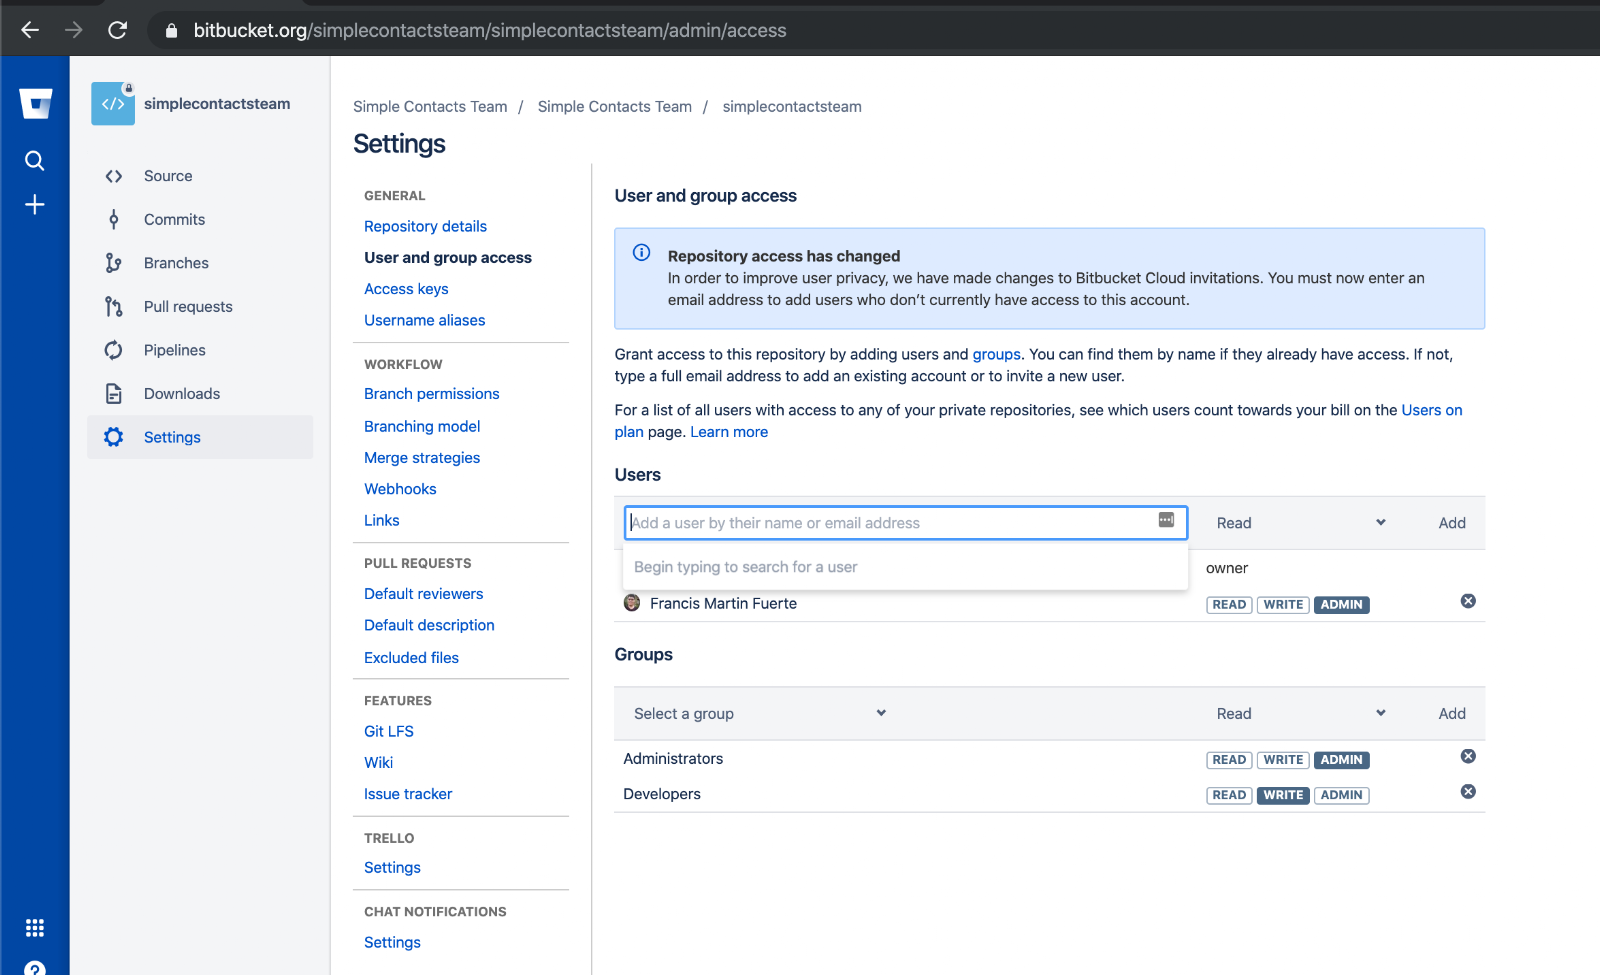
You can simply type the email address of your team members on the box provided and select the permission you want to grant them, for this tutorial we added a sample email address. It then sent an email to it which will invite the user to your repository in BitBucket.
Integrating Trello
On your team repository click settings, you will see Trello->settings on the bottom click this
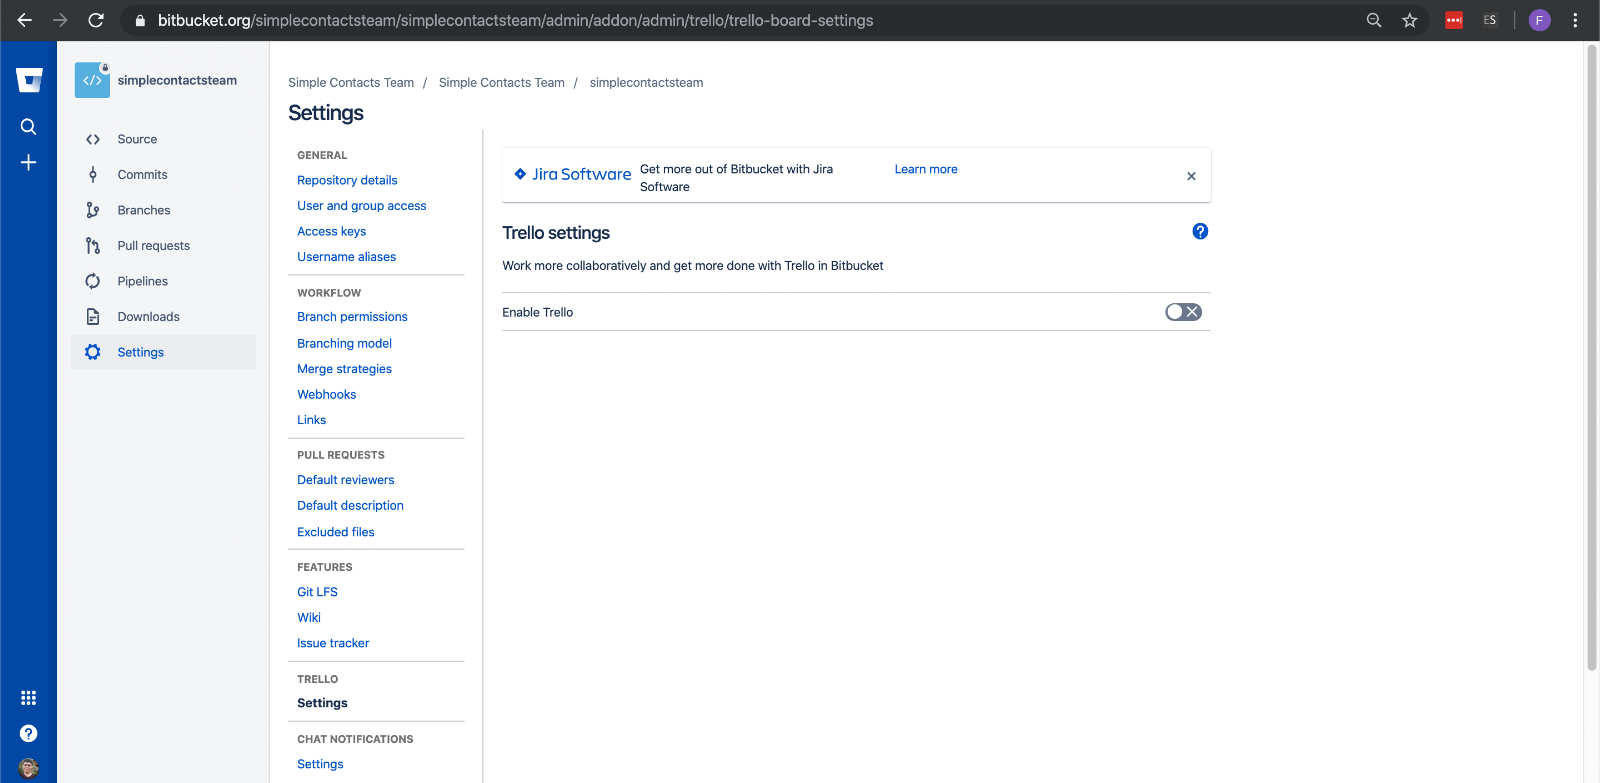
Once that’s opened click Enable Trello, it will then open pop-up that will ask for authorization.
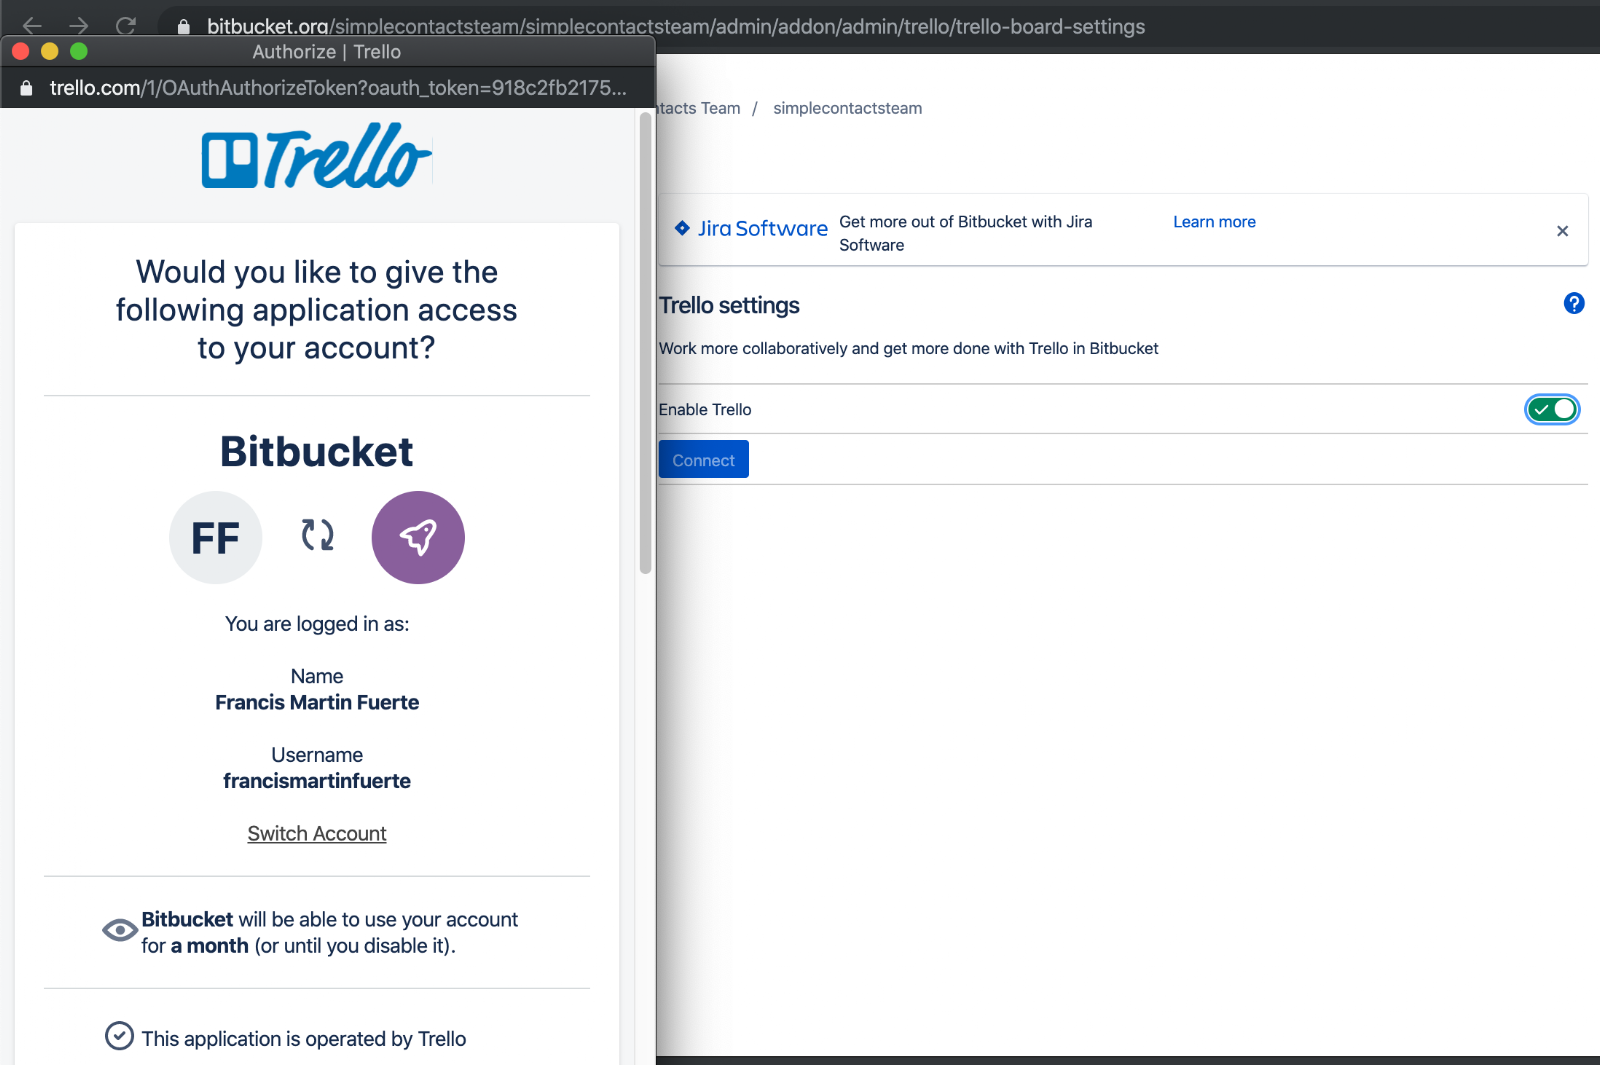
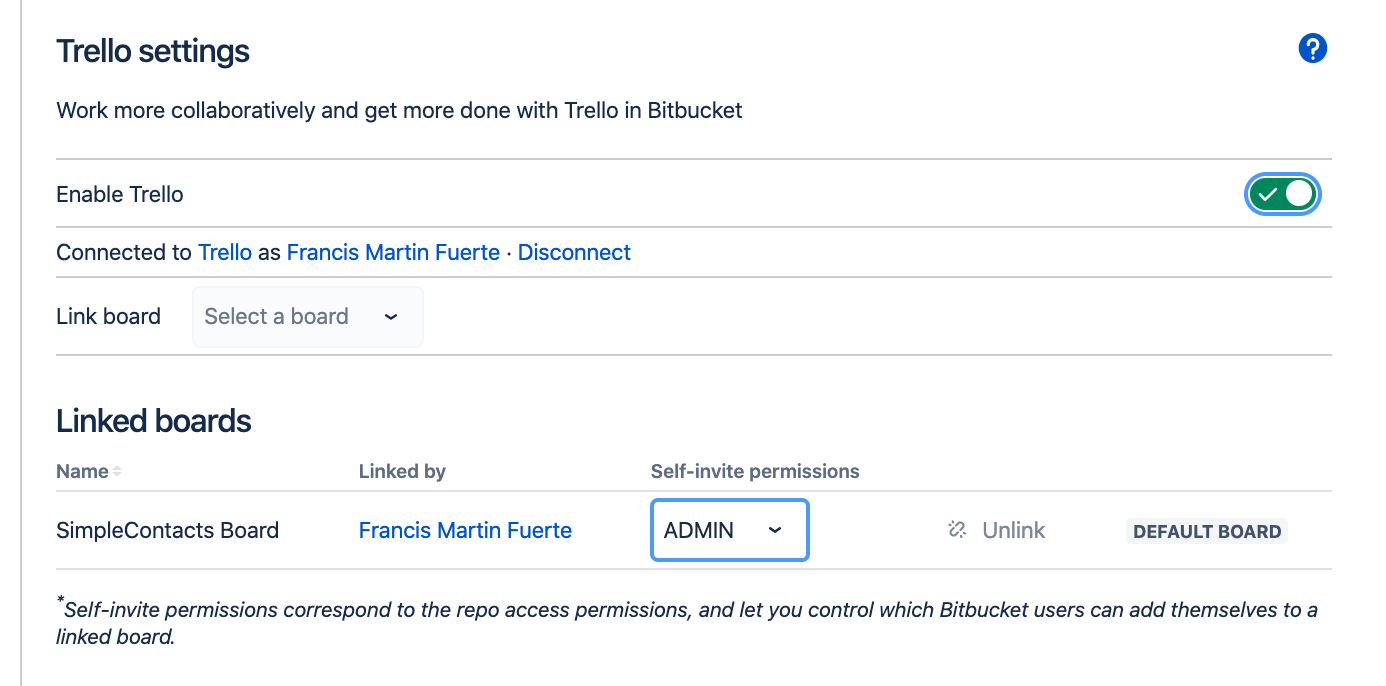
Set it up and finish.
You can then select which boards you want to use, in this tutorial we have selected the SimpleContacts Board (you can have multiple boards if you want).
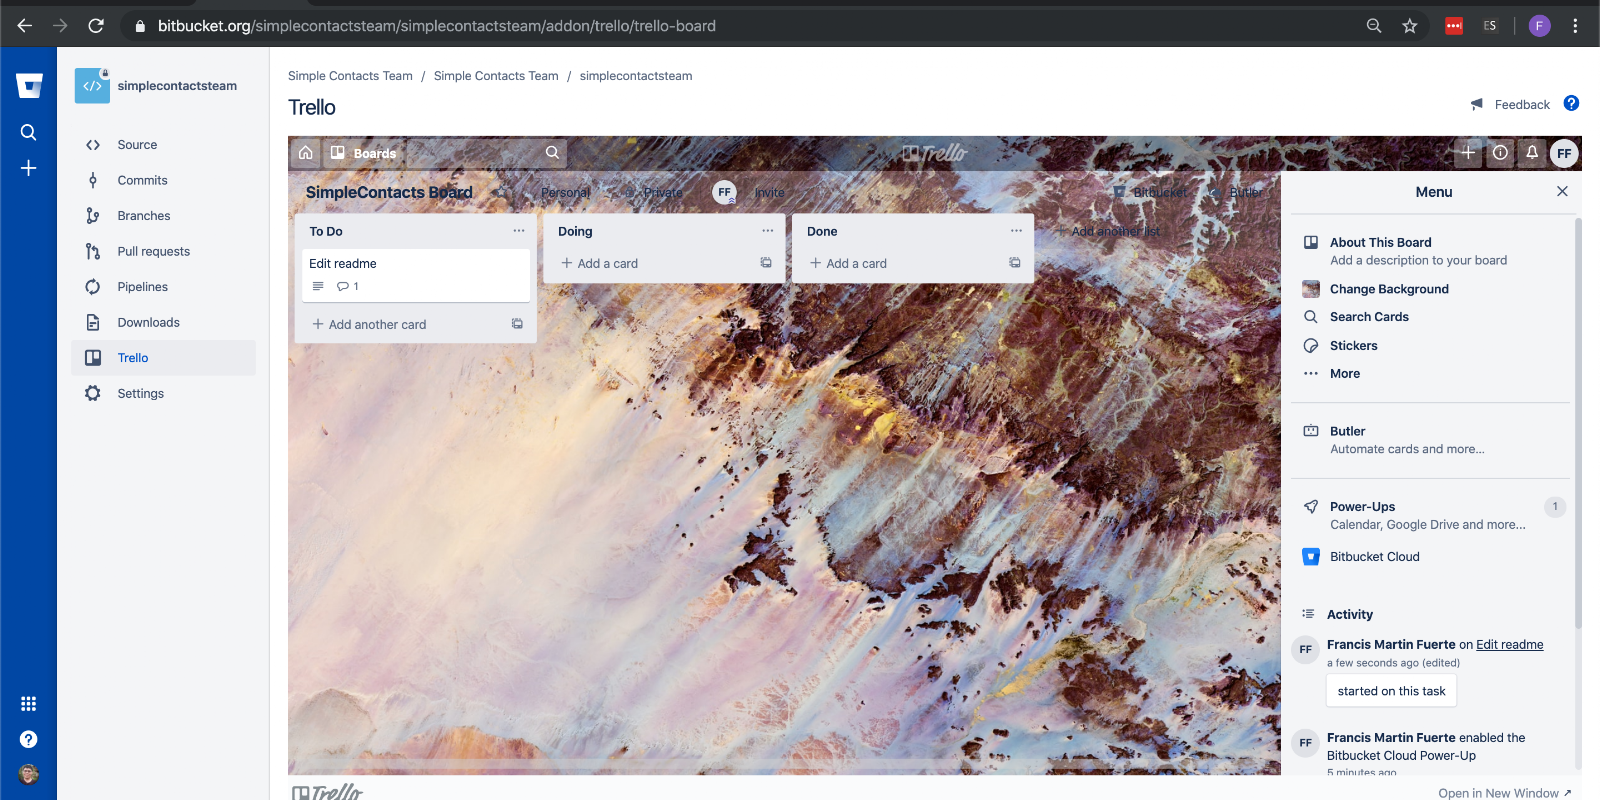
If refresh your dashboard you will see a short-cut for your Trello Board. In my experience opening sub-menus are a bit buggy so it’s still better to use Trello website for this.
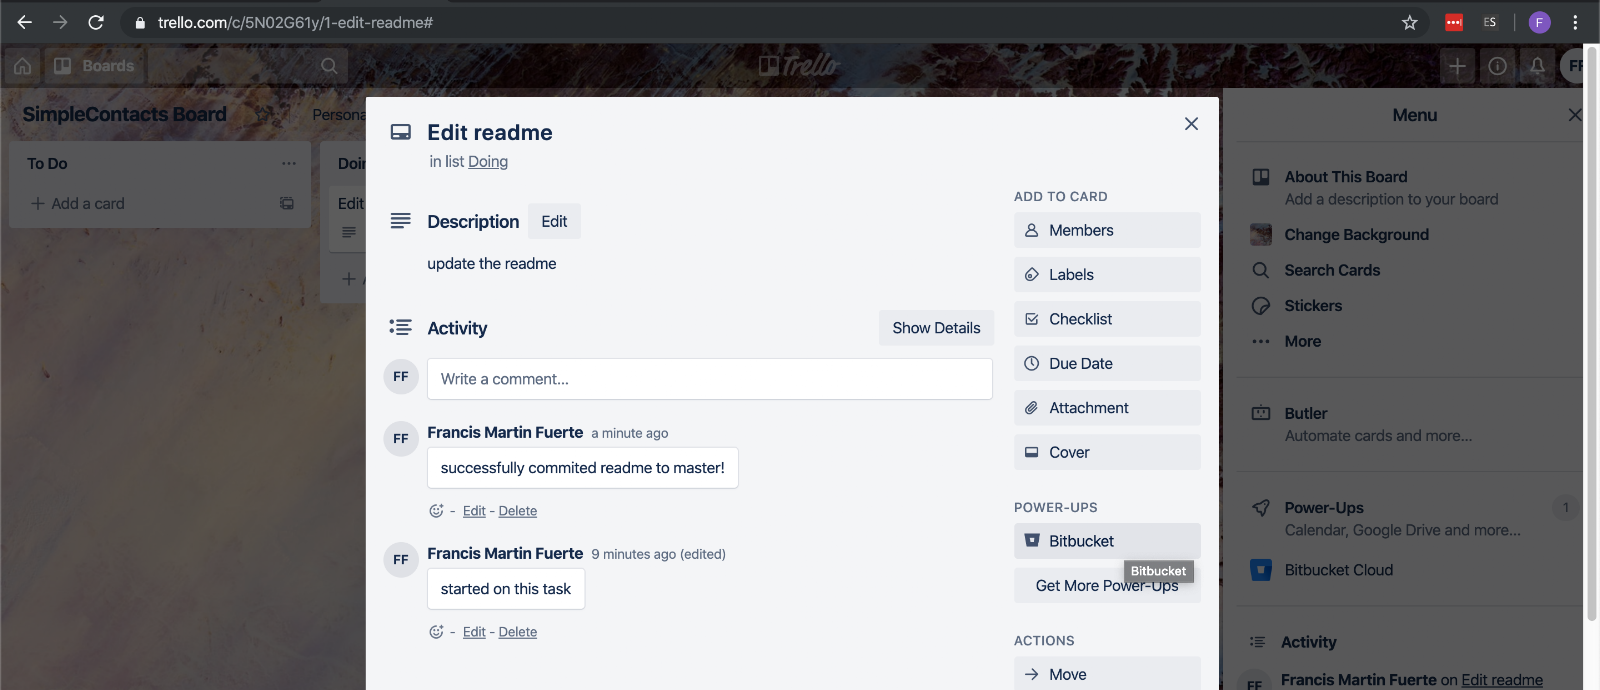
Linking a commit to a Trello task
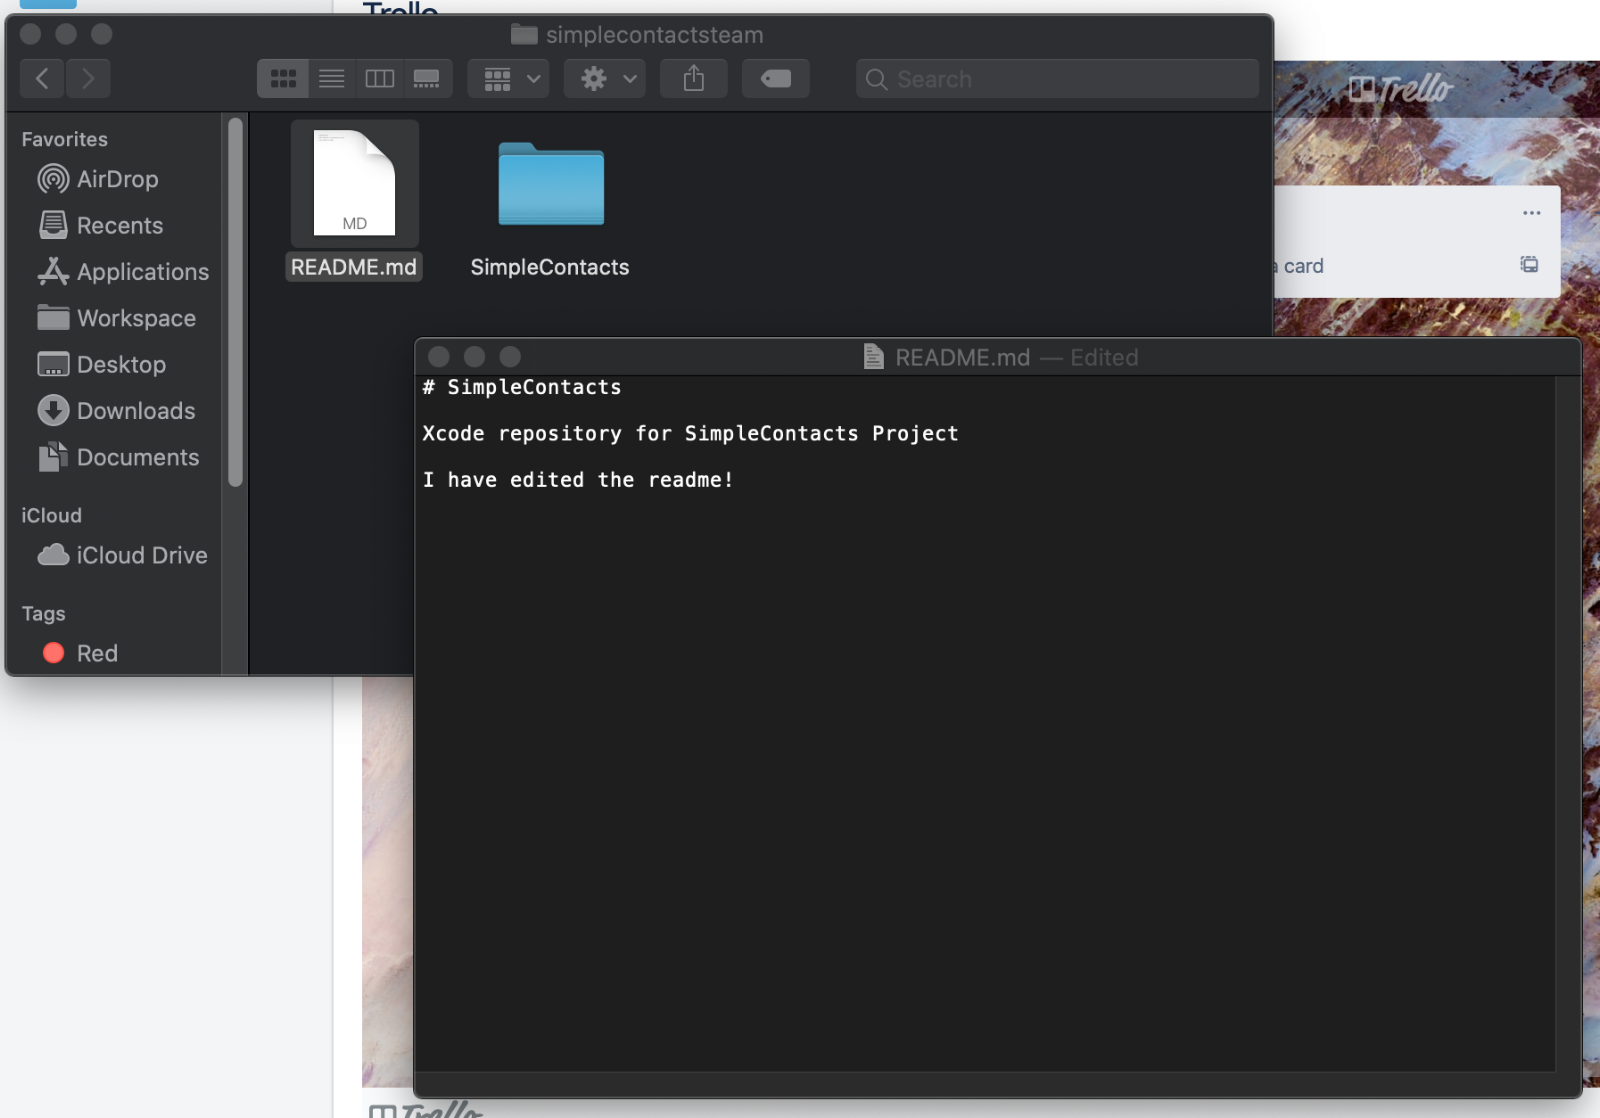
For this tutorial we want to edit the readme of our SimpleContacts Team repository as an example. I went ahead and created the task already.

So let’s edit that readme file then!
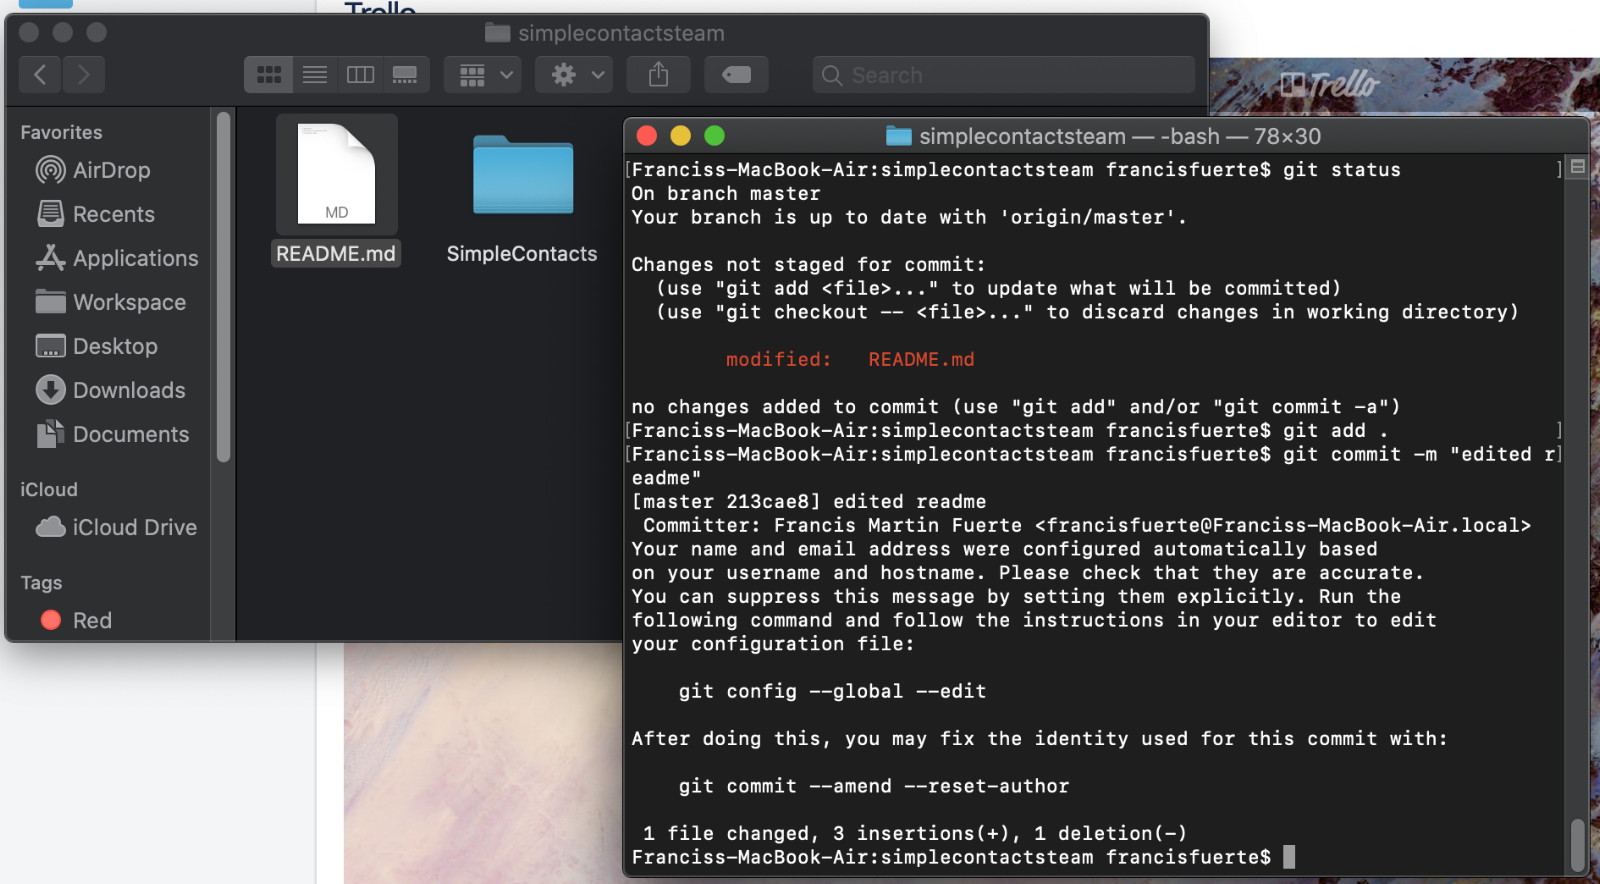
Once that’s saved let’s do a quick add, commit, and push to our repository.
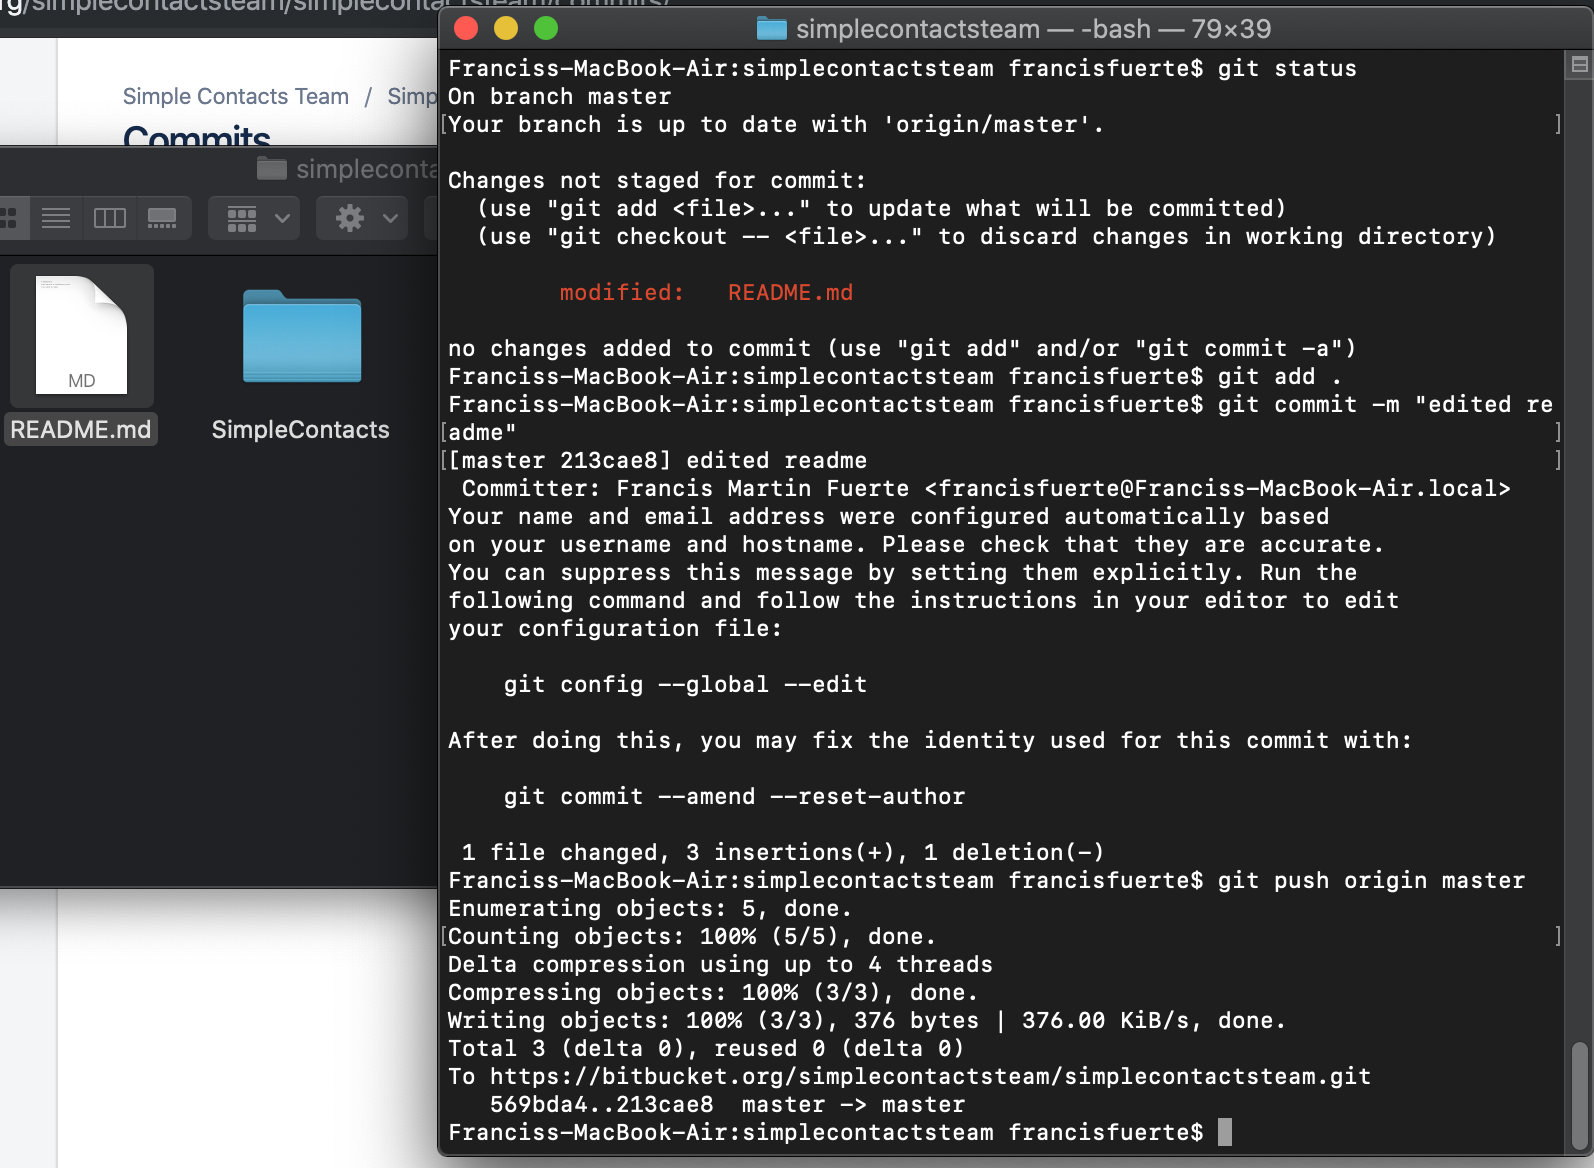
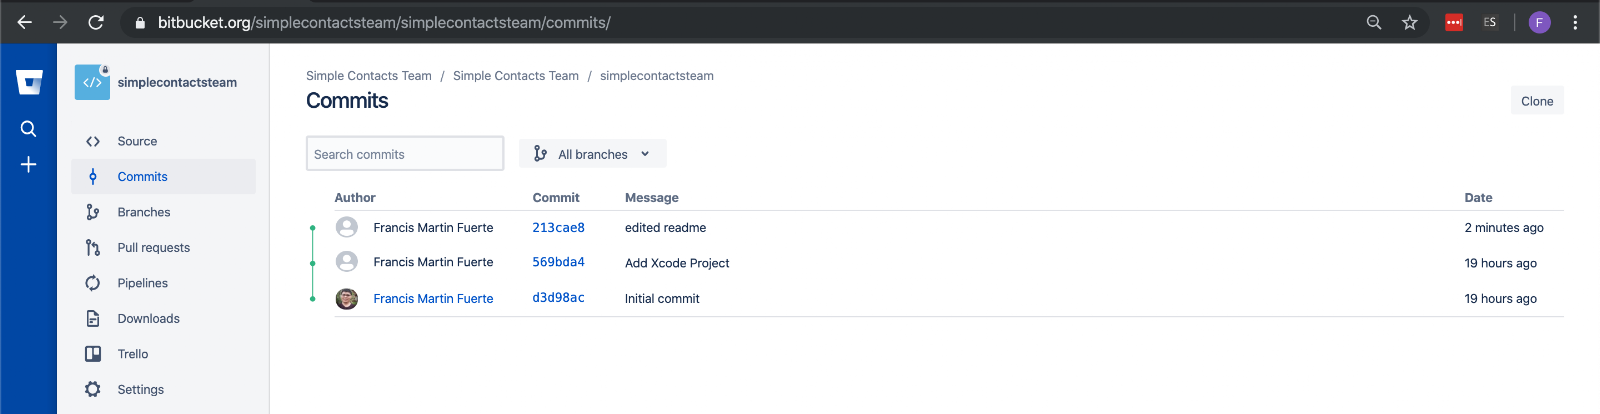
If we open our commits on the dashboard you will see that the commit is now listed
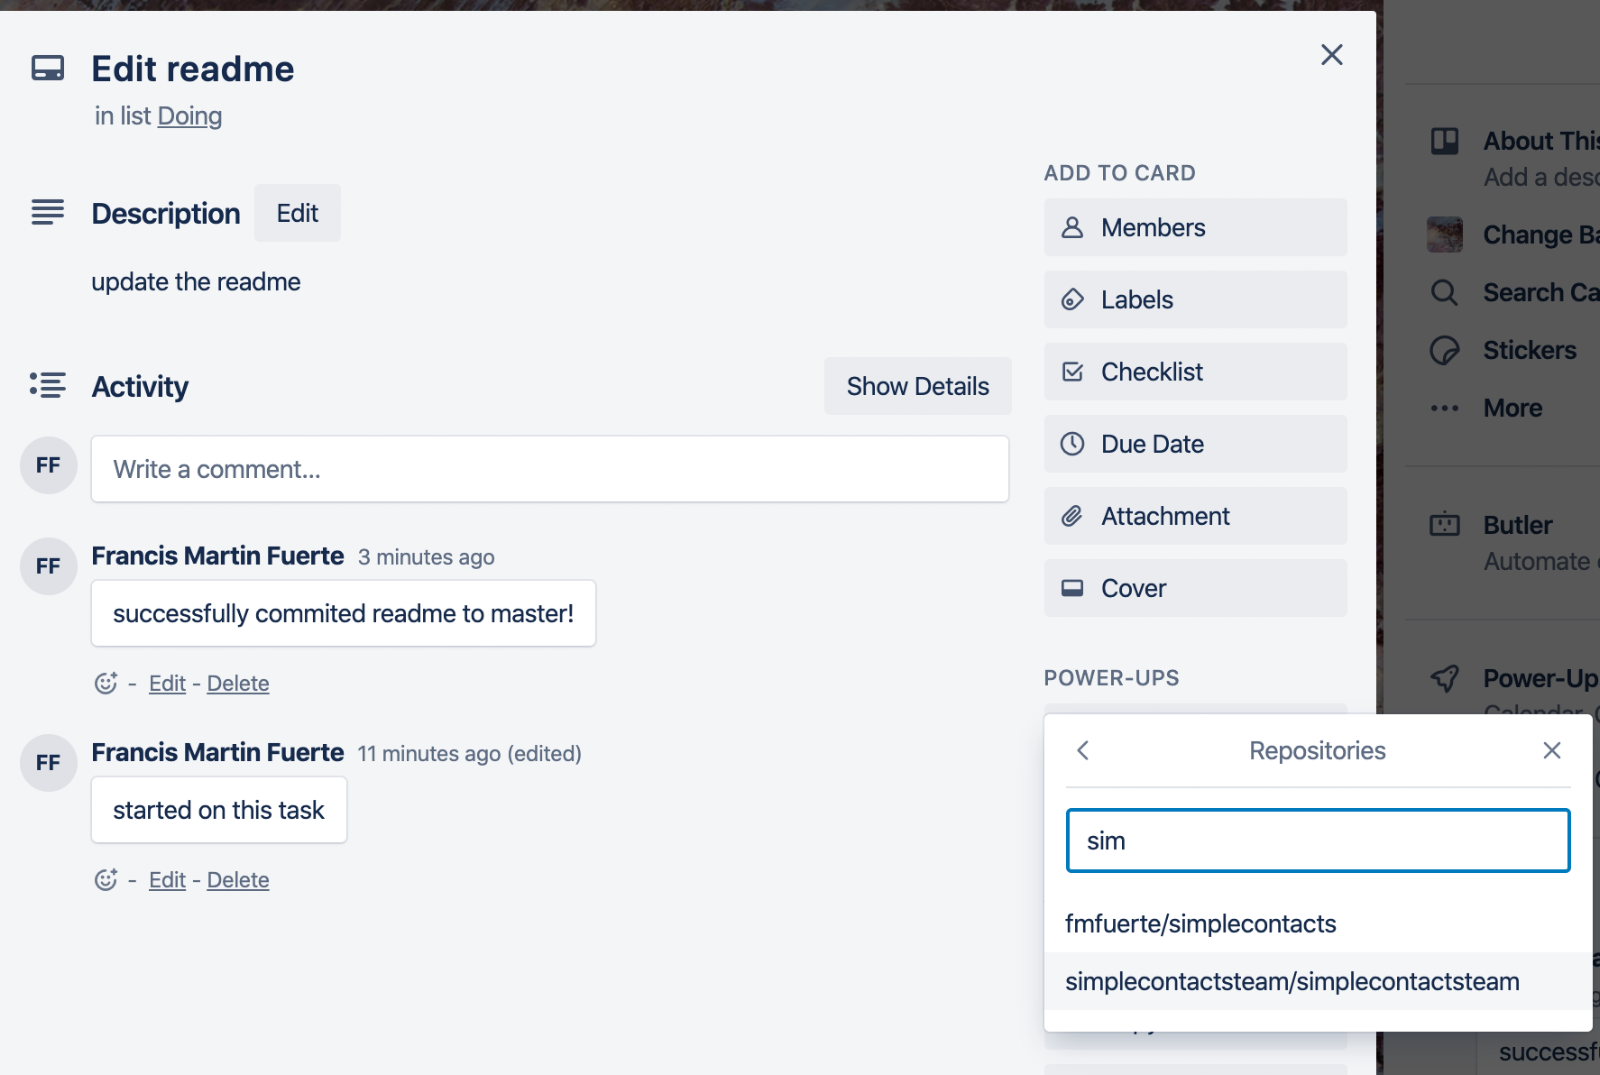
Next, open up your Trello task and you will see at the left sidebar BitBucket just under Power-Ups. Click on this, it might ask for authorization so just do it.
Once it is authorized it will let you choose the repository, let’s choose the team repository.
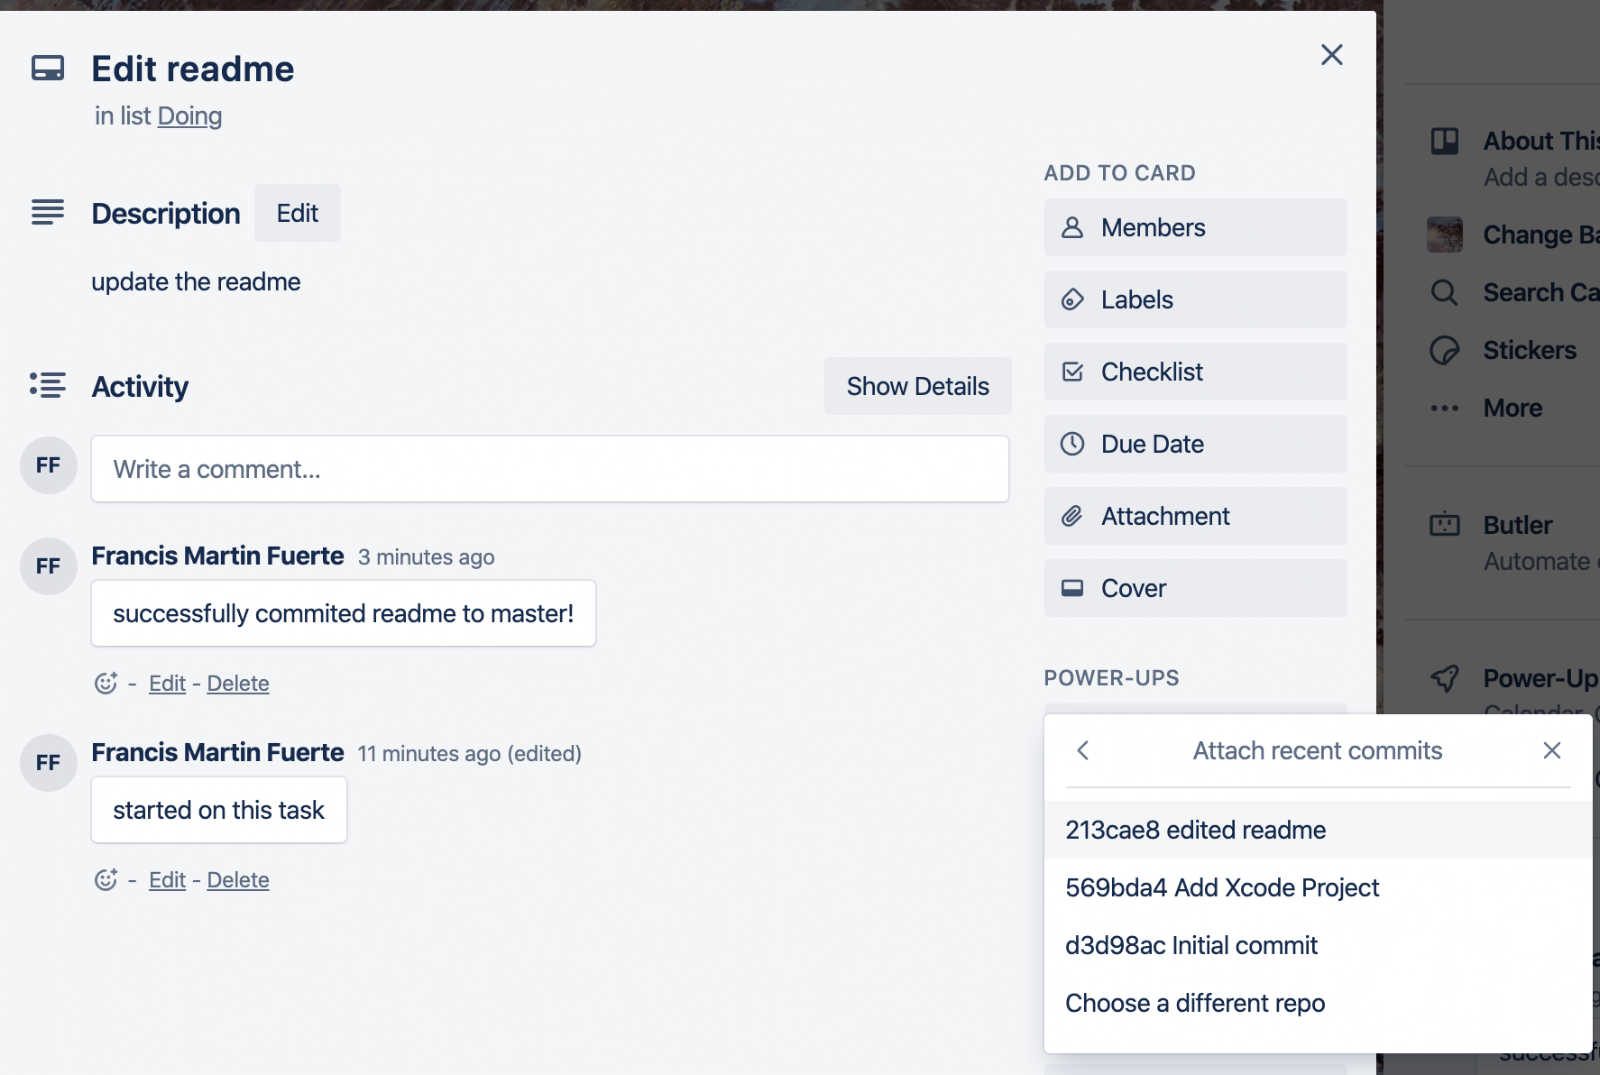
It will then ask which commit to attach from that repository so lets select the commit we just did.
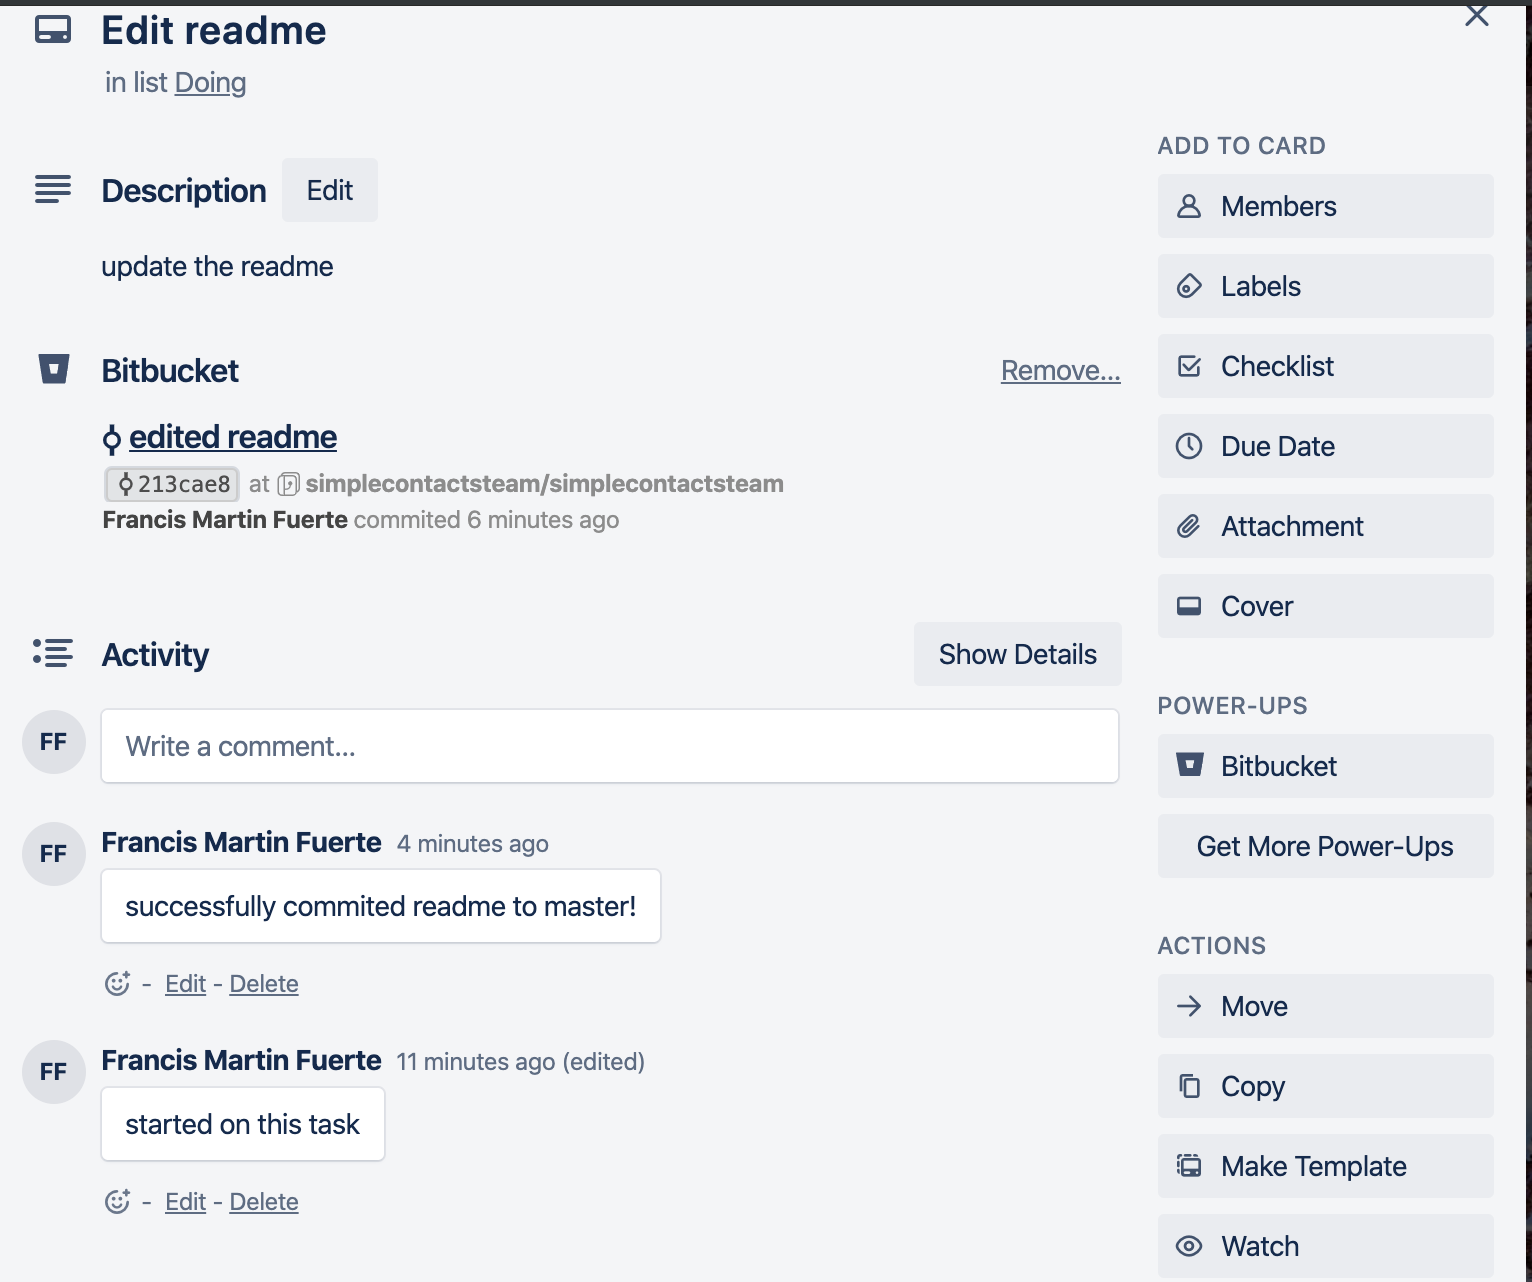
And that’s done, you will see that the task has now an attachment for the commit you just did for your task. Perfect for tracking the progress of your project!
Conclusion
We have now successfully covered all the basics that you need to know when using BitBucket and even it’s Integration with Trello. We successfully created our repository, updated the files, created a team repository and even cloned an existing project. We also demonstrated how to add connect our Trello task to our BitBucket commits to see how helpful it is when dealing with a project. Hope this tutorial will help you on your way to creating the app of your dreams. Happy Coding! 🙂