
Table of Contents
- Introduction
- Part 1: Memory Management using PhotoKit
- Part 2: Memory Management practices for a photo-grid UI
- Part 3: Creating the photo gallery app
- Part 4: Adding Multiple Gestures
Hello, and welcome back! This is part 2 of 4 of the Building a Photo Gallery app in SwiftUI series.
In Part 1 of the series, we discussed the basic requirements of memory management for a photo gallery app. We also talked about how to use PhotoKit to do all of the memory management heavy lifting work for us. Managing memory is really important, especially since we’ll be showing a lot of photos in our photo gallery app. We don’t want the app to either crash or perform slowly due to poor management of memory.
In this post, we will continue our discussion about memory management from the perspective of the user interface. The UI will be the one to show the photos in a grid, so it’s important to apply memory management practices so the app’s memory consumption won’t grow as we scroll along the photos.
The User Interface

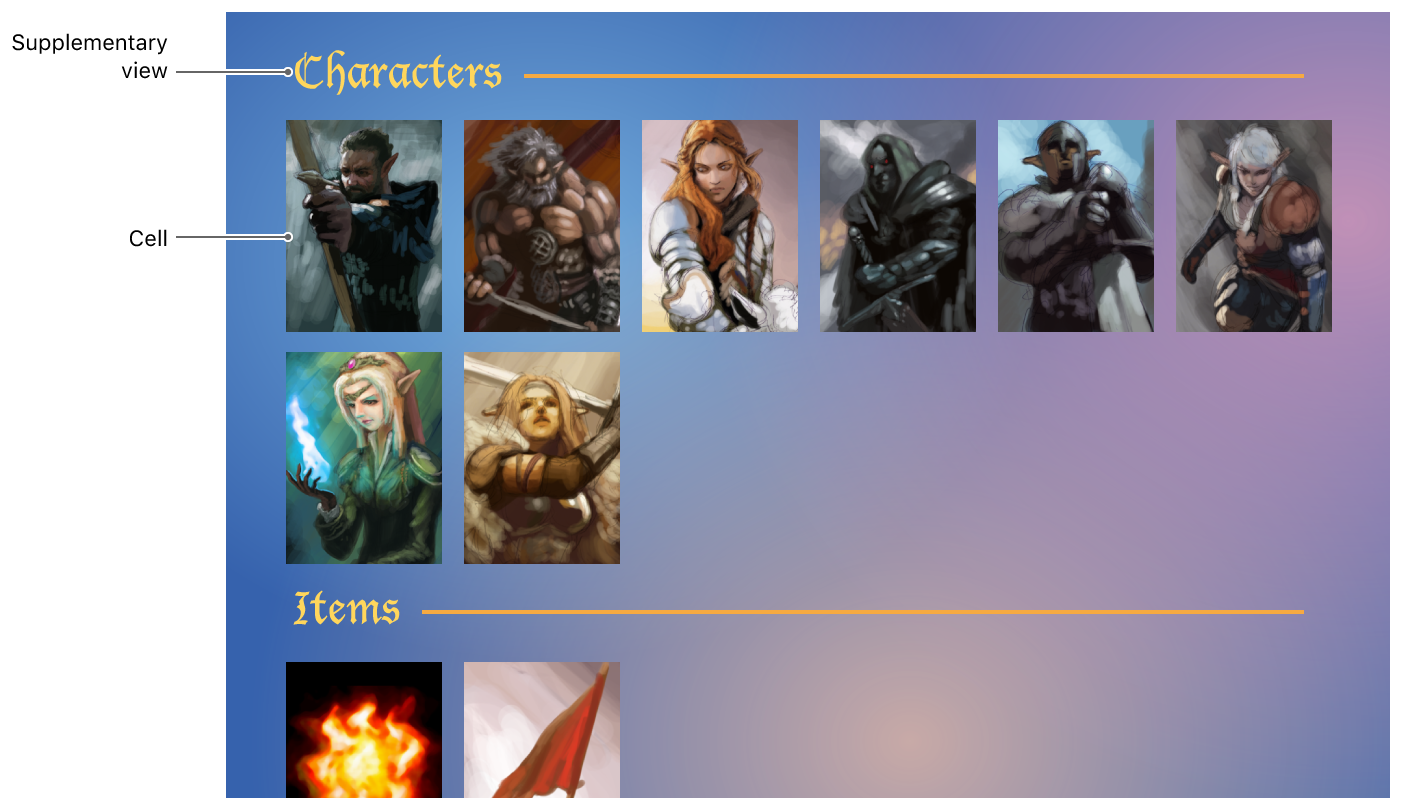
The user interface that we are going to create is similar to the screenshot above – a grid of photos from the user’s photo library. The grid will have a 3-column row for iPhones in portrait orientation. Each photo will be center cropped and contained in a square Image SwiftUI view. We’ll use LazyVGrid wrapped in a ScrollView so we can scroll as more images are loaded into the grid.
LazyVGrid
The LazyVGrid SwiftUI view has a built-in memory management mechanism that only loads its elements when needed (hence, the lazy keyword). This behaviour is ideal for the photo gallery app since users can have a pretty large photo library. The LazyVGrid will only load photos that are needed to be shown onscreen, so photos are only added in memory on demand. However, the memory management mechanism of lazy loading is insufficient since photos that were loaded into memory, but scrolled past the view area, will remain in memory.
Over time, as new photos get loaded into memory and viewed into the scroll area, memory consumption accumulates until the system runs out of memory, causing app sluggishness, or worse a crash.
The ideal mechanism to manage the memory consumption for the photo grid UI is to:
- Load photos when they are needed to be shown, ideally from a cache.
- Free up photos that go past the scroll area.
LazyVGrid covers mechanism#1, but lacks mechanism#2. To avoid memory accumulation over time as the user scrolls, we must add new memory management mechanisms that are familiar to UIKit views, such as the cell-reuse mechanism.
UICollectionView Cell Reuse Mechanism
In UIKit, the closest equivalent of the LazyVGrid SwiftUI view would be the UICollectionView using either a UICollectionViewFlowLayout (iOS 12 below) or a UICollectionViewCompositionalLayout (iOS 13 and later).
The idea of cell reuse is to load several cells that can be visible on the grid at a time, and release the cells from the memory as soon as the cell becomes hidden away from view. The cell released from memory would be later reused to show other items as the user continues to scroll into the grid or list.
The very idea of cell reuse is quite simple. If 20 items can be shown onscreen at once, only 20 cells are loaded at once, even when you have a million items to show onscreen. When any of the cells go past the scroll area, they should be released from the memory since they are no longer shown on screen. Cells that are released will be reused by another item to be shown on screen. This mechanism does two effective things to manage memory:
- Only a limited number of cells are shown on screen and are loaded in memory at a time
- You are guaranteed to have a limited number of cells regardless of the number of items your UI needs to show.
Applying Cell-Reuse Mechanism to LazyVGrid
The solution to apply the cell-reuse mechanism to LazyVGrid is surprisingly simple. We can use the .onDisappear() modifier on the GridItem so it frees up the image every time the modifier is called.
To do this, we need to create our GridItem and call it the PhotoThumbnailView.
import Photos
import SwiftUI

/// The photo thumbnail view is responsible for showing a photo
/// in the photo grid.
struct PhotoThumbnailView: View {
	...
}
The PhotoThumbnailView should contain an optional photo which we can free up from memory at a later point in time.
struct PhotoThumbnailView: View {
	/// The image view that will render the photo that we'll be
	/// fetching. It is set to optional since we don't have an actual
	/// photo when this view starts to render.
    ///
    /// We need to give time for the photo library service to
    /// fetch a copy of the photo using the asset id, so
    /// we'll set the image with the fetched photo at a later time.
    ///
    /// Fetching make take time, especially if the photo has been
    /// requested initially. However, photos that were successfully
    /// fetched are cached, so any fetching from that point forward
    /// will be fast.
    ///
    /// Also, we would want to free up the image from the memory when
    /// this view disappears in order
    /// to save up memory.
    @State private var image: Image?
    ...
}
Since we’ll be getting photos from the photo library using PhotoKit, we need to store the photo’s asset local ID so we can tell the photo library service that we need a copy of it to show into our UI.
Let’s add the PhotoLibraryService as a dependency to our PhotoThumbnailView. In Part 1, the PhotoLibraryService was created to abstract away all of our PhotoKit-related code into a single service layer. If you haven’t read it yet, please go check Part 1 of this series.
struct PhotoThumbnailView: View {
	...
    /// We'll use the photo library service to fetch a photo given an
    /// asset id, and cache it for later use. If the photo is already
    /// cached, a cached copy will be provided instead.
    ///
    /// Ideally, we don't want to store a reference to an image
    /// itself and pass it around views as it would cost memory.
    /// We'll use the asset id instead as a reference, and allow the
    /// photo library's cache to handle any memory management for us.
    @EnvironmentObject var photoLibraryService: PhotoLibraryService
    ...
}
Now that we have the photo library service as a dependency, we need to add a property that would hold the photo’s local asset ID that we’ll use for fetching the copy of the photo.
struct PhotoThumbnailView: View {
	...
	/// The reference id of the selected photo
    private var assetLocalId: String

    init(assetLocalId: String) {
        self.assetLocalId = assetLocalId
    }
    ...
}
Then we’ll define a function that will do the actual loading of assets from PhotoKit using the easier abstraction of the PhotoLibraryService.
extension PhotoThumbnailView {
	func loadImageAsset(
		targetSize: CGSize = PHImageManagerMaximumSize
	) async {
	        guard let uiImage = try? await photoLibraryService
	        .fetchImage(
		        byLocalIdentifier: assetLocalId,
		        targetSize: targetSize
			) else {
	            image = nil
		        return
		    }
	    image = Image(uiImage: uiImage)
	}
}
Next would be to create the actual body of the PhotoThumbnailView and use our learnings thus far including the cell reuse memory management mechanism.
struct PhotoThumbnailView: View {
	...
	var body: some View {
        ZStack {
            // Show the image if it's available
            if let image = image {
                GeometryReader { proxy in
                    image
                        .resizable()
                        .aspectRatio(contentMode: .fill)
                        .frame(
	                        width: proxy.size.width,
	                        height: proxy.size.width
	                    )
                        .clipped()
                }
                // We'll also make sure that the photo will
                // be square
                .aspectRatio(1, contentMode: .fit)
            } else {
                // Otherwise, show a gray rectangle with a
                // spinning progress view
                Rectangle()
                    .foregroundColor(.gray)
                    .aspectRatio(1, contentMode: .fit)
                ProgressView()
            }
        }
        // We need to use the task to work on a concurrent request to
        // load the image from the photo library service, which
        // is asynchronous work.
        .task {
            await loadImageAsset()
        }
        // Finally, when the view disappears, we need to free it
        // up from the memory
        .onDisappear {
            image = nil
        }
    }
	...
}
This photo GridItem supports the concurrency API from iOS 15 and uses the built-in task support to allow SwiftUI views to interact with the concurrency API. When this view loads, the view lifecycle triggers the task to loadImageAsset() which will ask PhotoKit to fetch a copy of the photo with the local asset ID. When the GridItem goes way past the viewable scroll area, the image is freed up from memory so it won’t unnecessarily accumulate memory usage, mimicking the cell-reuse mechanism of UICollectionView.
In this post, you learned about the built-in memory management mechanisms of LazyVGrid, and improved its memory management behaviour by adding the cell-reuse mechanism that UIKit views have.
In the next part of the series, we’ll continue building the grid UI to use the PhotoThumbnailView as the LazyVGrid‘s GridItem. I hope that you have learned a lot from this post. I’ll see you at the next one!