


Using custom fonts in SwiftUI follows the same basic setup as UIKit: add the font file to the project, make sure the app bundle includes it, register it in Info.plist, then use the correct font name in your code.
The common place people get stuck is the final font name. The file name is not always the same as the name you pass to SwiftUI, so it is worth verifying the actual registered font name before wiring it into your views.
Step 1: Add a font file to your project
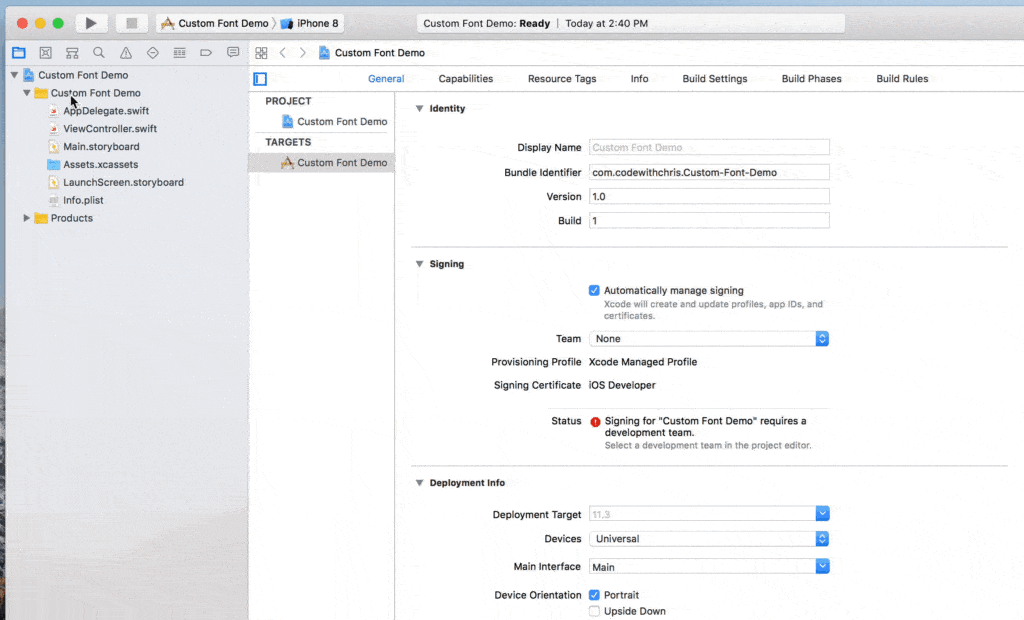
Start with a font file you want to use, usually a .ttf or .otf file. Drag the font file into your Xcode project navigator.
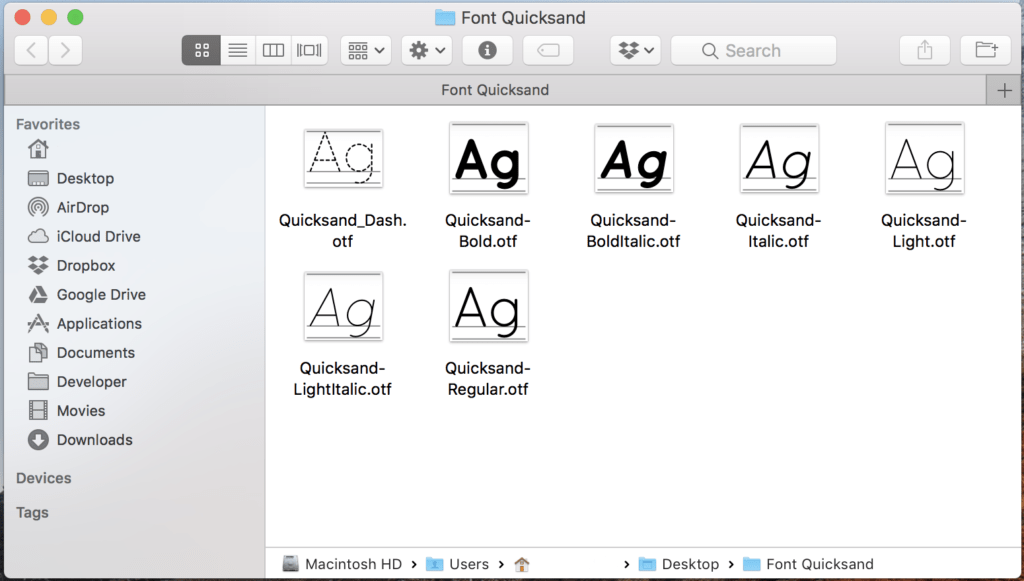
When Xcode shows the import dialog, make sure your app target is checked and choose to copy the file into the project if needed.
Step 2: Register the font in Info.plist
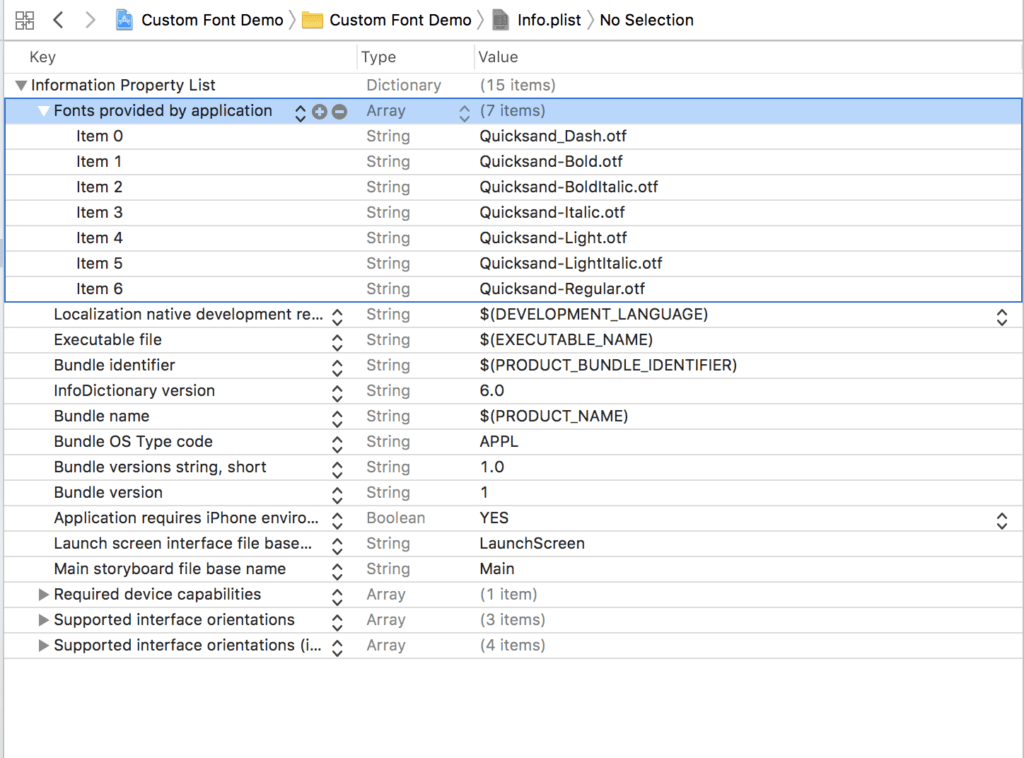
Open your app's Info.plist file and add a new key named Fonts provided by application. Xcode may display the raw key as UIAppFonts.
Make the key an array, then add each bundled font file name as an item. Include the file extension, such as IndieFlower.ttf or QuicksandDash-Regular.otf.
Step 3: Find the exact font name
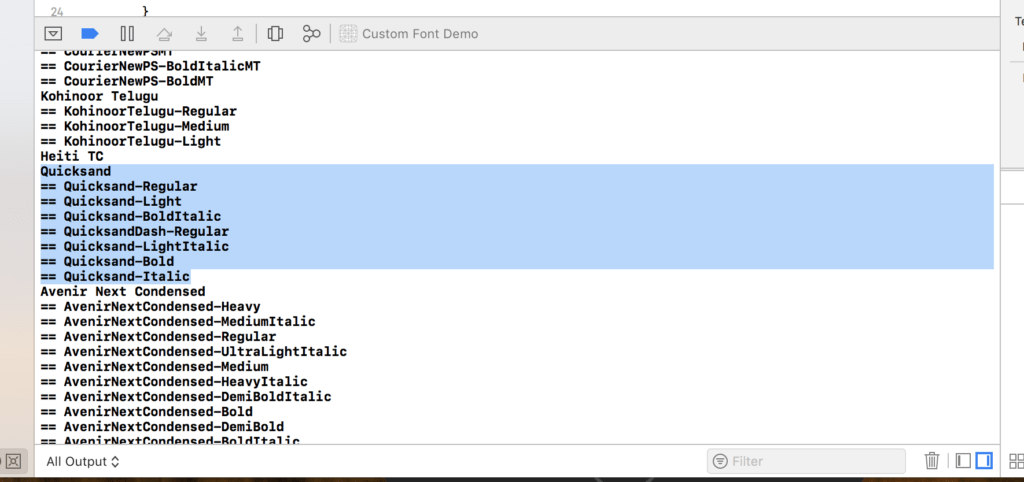
The name you pass to Font.custom may not match the font file name. To confirm the exact name, temporarily log the registered font families and names.
for family in UIFont.familyNames.sorted() {
    let names = UIFont.fontNames(forFamilyName: family)
    print("Family: \(family) Font names: \(names)")
}
Run the app and check the debug console. Find your custom font in the output, then use that exact font name in SwiftUI.
Important: remove the logging loop after you find the font name you need. It is only a temporary debugging helper.
Step 4: Use the custom font in SwiftUI
Once you know the exact font name, use Font.custom(_:size:) with a SwiftUI Text view.
import SwiftUI

struct ContentView: View {
    var body: some View {
        Text("Hello, custom font!")
            .font(.custom("IndieFlower", size: 36))
    }
}
You can also combine custom fonts with other SwiftUI styling, such as color, alignment, and layout modifiers.
VStack(spacing: 16) {
    Text("Custom Fonts")
        .font(.custom("IndieFlower", size: 44))
        .foregroundStyle(.blue)

    Text("Use the exact registered font name.")
        .font(.custom("IndieFlower", size: 24))
        .multilineTextAlignment(.center)
}
Troubleshooting checklist
- Confirm that the font file is included in the app target.
- Confirm that
Info.plistincludesFonts provided by applicationorUIAppFonts. - Confirm that the array item includes the font file extension.
- Use the logged font name, not just the file name.
- Clean and rebuild the app if Xcode does not appear to pick up the font immediately.
After those pieces are in place, SwiftUI can render the font anywhere you use .font(.custom(...)).