The UIApplication class provides a way for apps to control and coordinate user events with other apps on the device, One of the features is being able to open Apple Maps app through our own app!
More specifically we will be working with the LSApplicationQueriesSchemes is a type of Launch Services Keys which is used to provide support launching apps and matching document types to apps. It utilizes URL Types in order to coordinate the execution environment of another app.
Prepare the Info.plist
The first step in setting up Launch Services is registering the URL Scheme that we will be using in our app, without this your app won’t know that you are trying to utilize Launch Services to open up another app when trying for the URL.
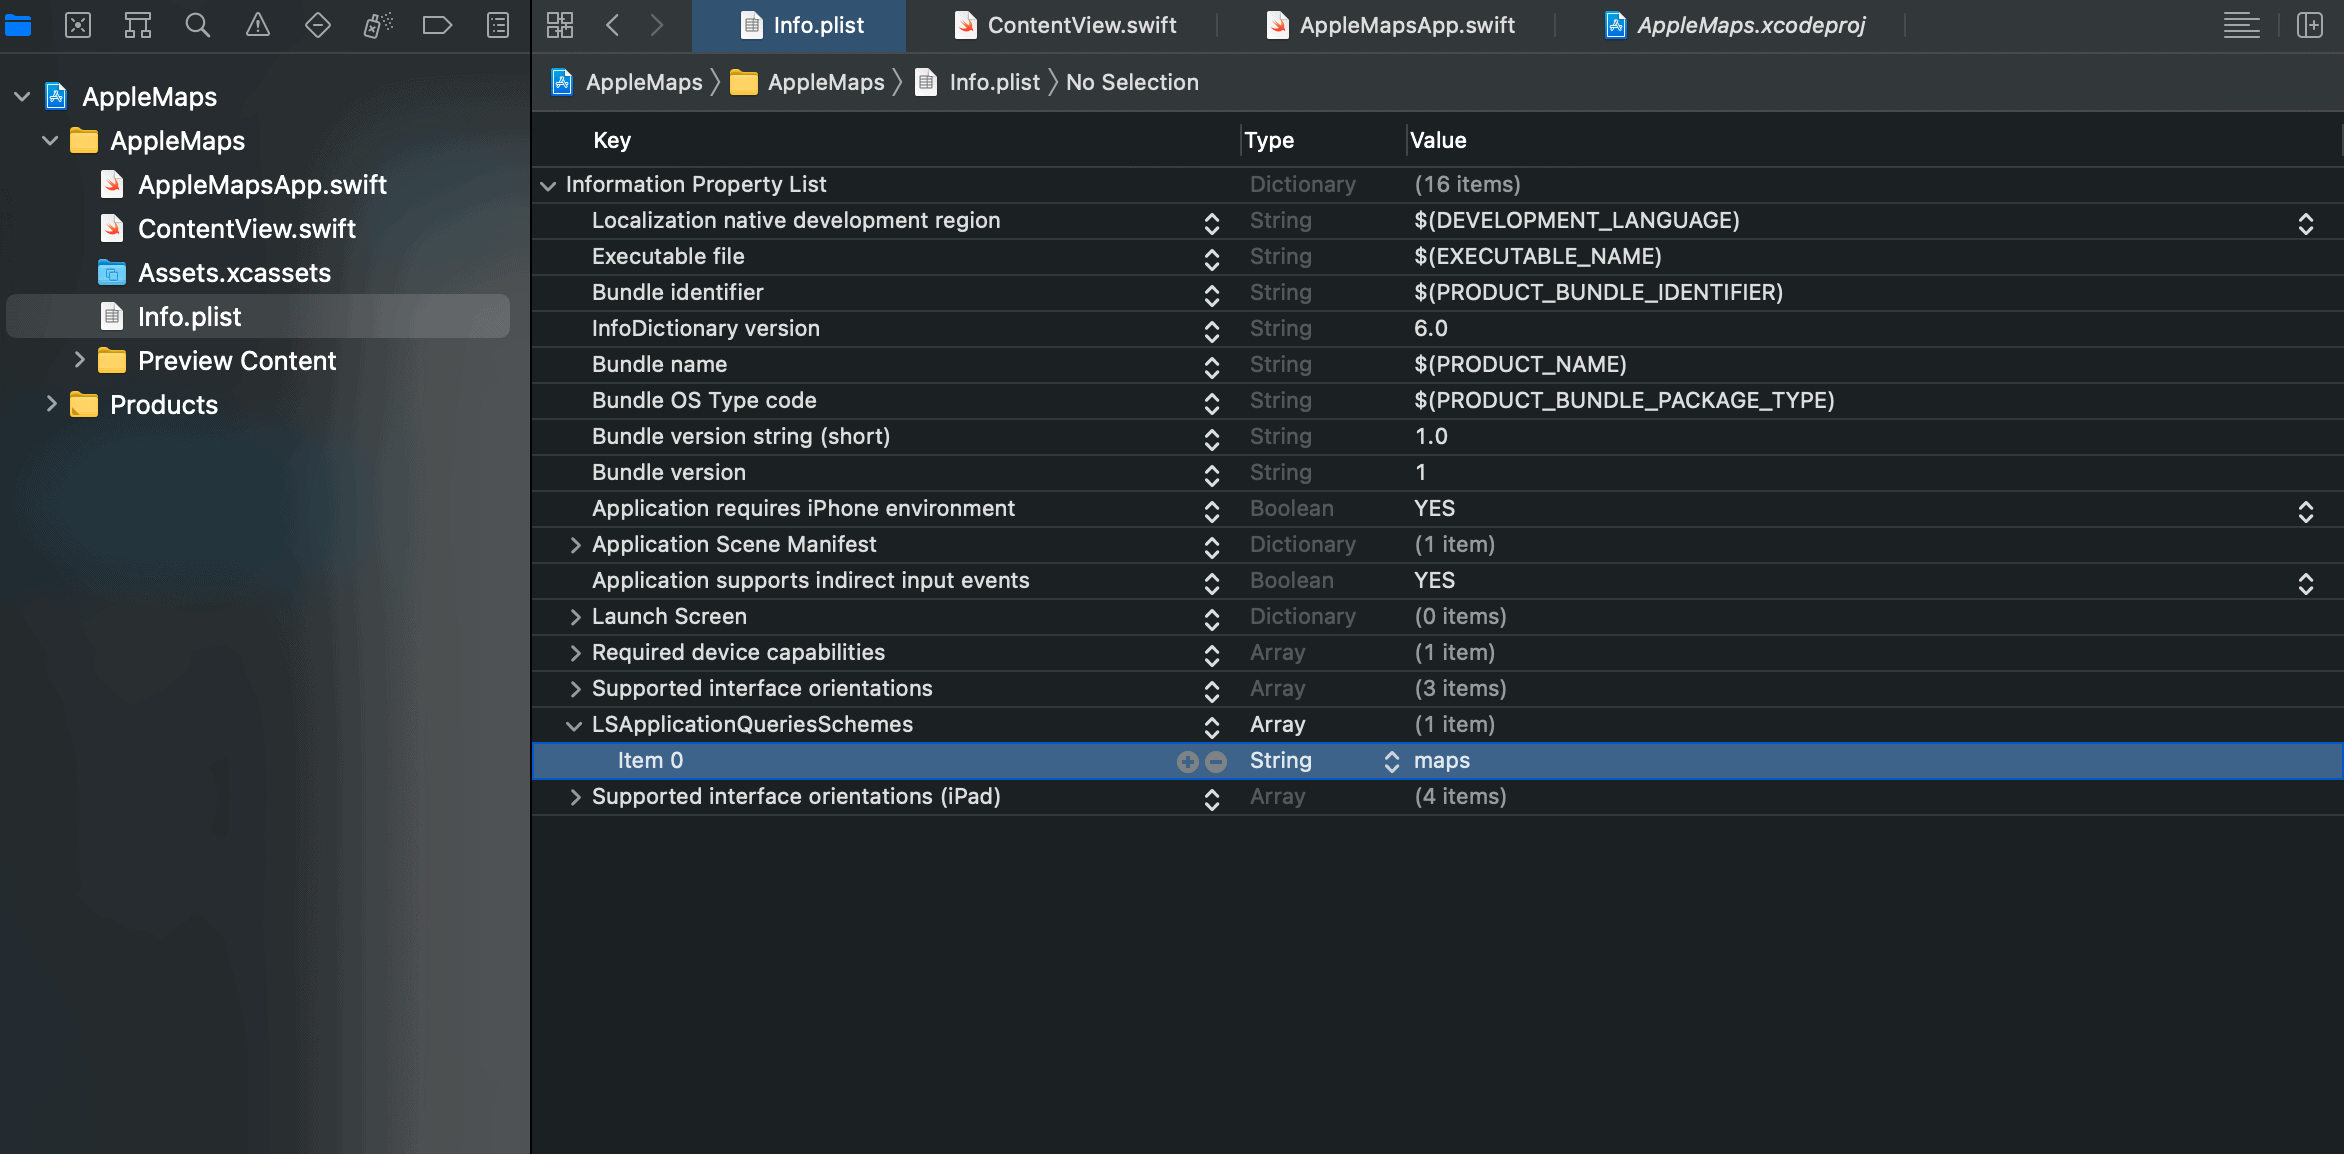
Open your Info.plist file just right click and add a new row (add row). You can then type in LSApplicationQueriesSchemes and change the type to Array.
Once done select the new row and right click and add a new row (add row), it will add a new item under the LSApplicationQueriesSchemes called Item 0, go to the Values part of that row and put in maps.
Opening Apple Maps
When dealing with URL Schemes or Launch Services it would be ideal to work with it using trigger events. One such common control that can be triggered would be a Button.
A basic Button has this format:
Button(
  "Some Text",
  action: {
    //some code
  }
)
As you can see a Button’s title text and action can easily modified which makes it the perfect candidate for setting up a quick and simple triggered event.
Inside your action create two separate constants that will be used to feed your latitude and longitude values easily. Of course you are free to change the values anytime you want, or even have it read from a textfield.
let latitude = 7.065306
let longitude = 125.607833
Next, create a constant of type URL(string: [string] ), the string should be the text from your latitude and longitude, remember to add the prefix maps://
Important! the whole url should have an saddr (meaning starting address) and daddr (meaning destination address), put your latitude and longitude on the daddr. The full string should look like this “maps://?saddr=&daddr=7.065306,125.607833” when typed manually
let url = URL(string: "maps://?saddr=&daddr=\(latitude),\(longitude)")
If you are interested to know more about the other options for the
Apple map schemes just check the official documentation
Next we need to check your URL if it can be opened by using the .canOpenUrl([url]) of the UIApplication shared properties, remember to unwrap your URL
if UIApplication.shared.canOpenURL(url!) {
//code here
}
if it goes through then it means our URL is valid and can be loaded.
Inside your IF open your url by using the .open([url], options: [options], completionHandler: [{}]), put your URL, [:] for the options, and nil for the completionHandler
if UIApplication.shared.canOpenURL(url!) {
      UIApplication.shared.open(url!, options: [:], completionHandler: nil)
}
After everything has been successfully ran and the button is triggered this command will then open up Apple Maps and sends the info to be automatically loaded to it.
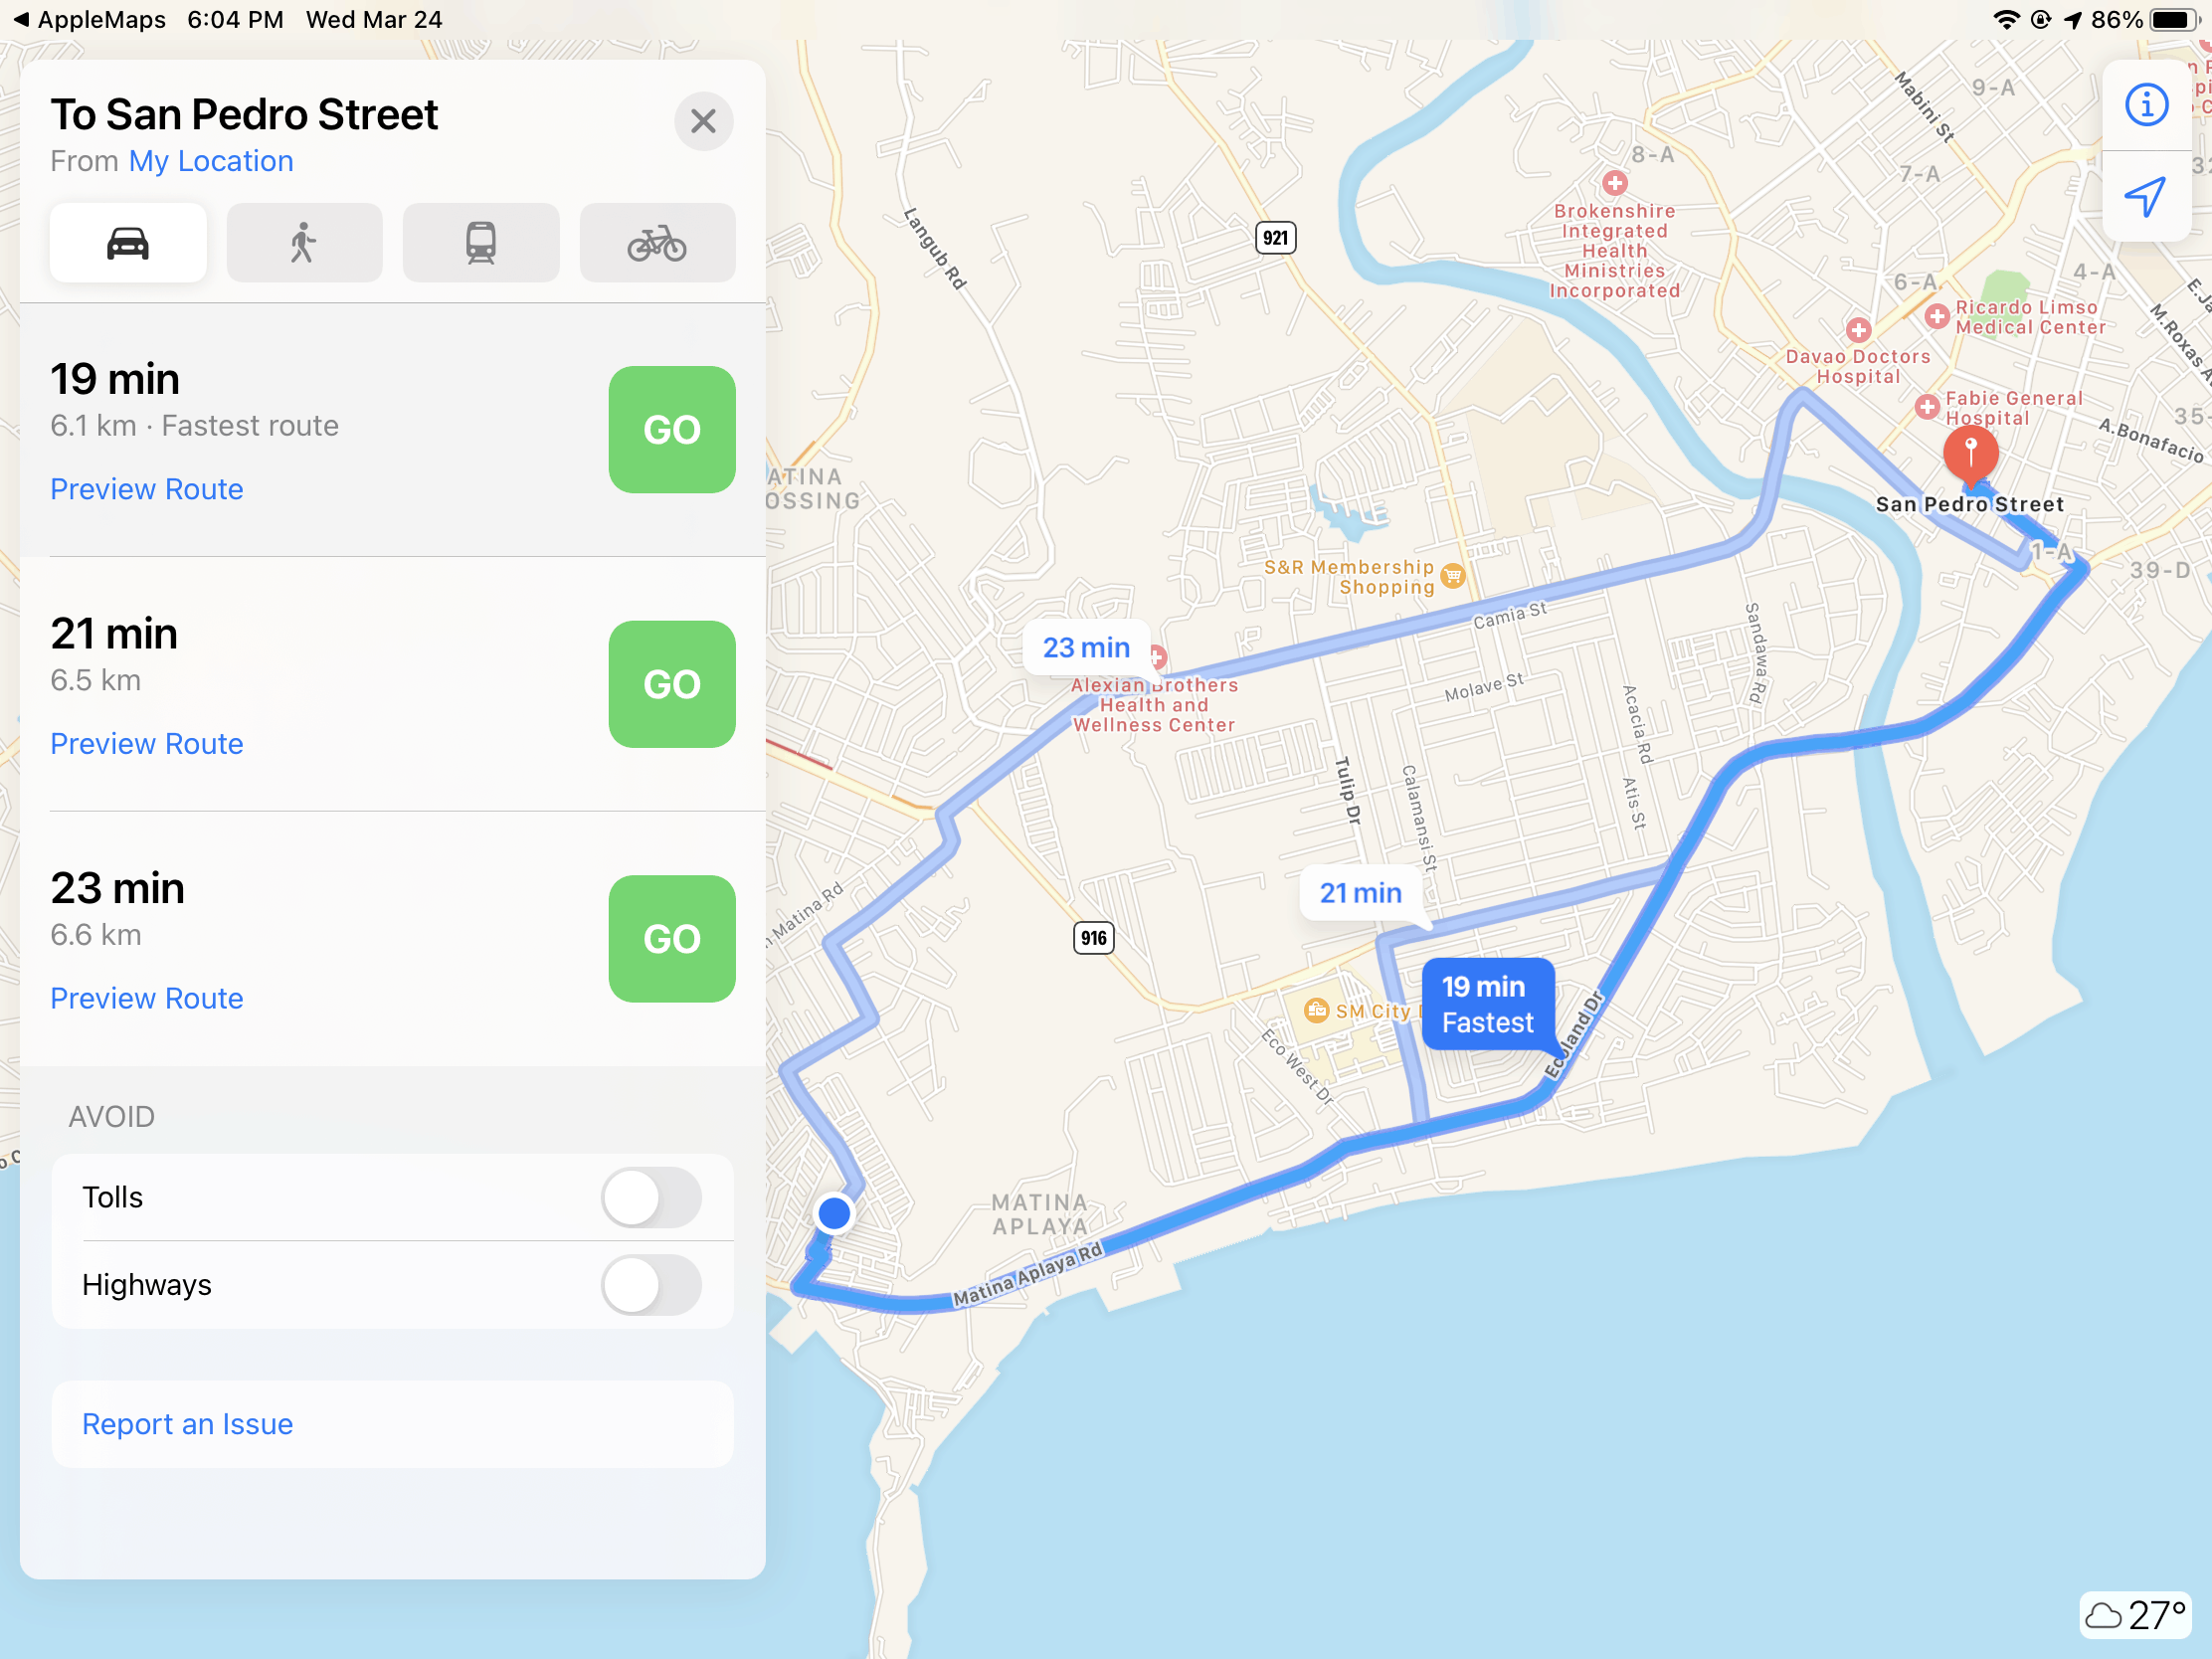
Here is a sample of what it will look like then apple maps is opened, you will notice that the latitude and longitude that we set is now the destination reference of our map.