


Everything you need to know to start building iOS apps with Apple’s official development tool, including the new AI features in Xcode 26.
If you want to build apps for iPhone, iPad, Mac, or Apple Watch, Xcode is the tool you’ll use to do it. It’s Apple’s official application for writing code, designing user interfaces, testing on simulators, debugging, and submitting your finished app to the App Store. Everything happens in one place.
Xcode 26 is the biggest update to the tool in years. Apple added a built-in AI coding assistant, support for agentic coding with Claude and ChatGPT, faster builds, a new way to embed playgrounds inline, and a redesigned interface for macOS Tahoe. If you’ve been away from iOS development for a while, the changes are significant enough to warrant a fresh look.
This guide walks you through every part of Xcode the way I’d explain it to a friend learning iOS development from scratch. By the end, you’ll know where everything lives, how to navigate the interface, how to use the new AI features without becoming dependent on them, and how to actually ship something.
What you’ll learn
- Where to download Xcode and how to set it up
- The five main areas of the Xcode interface and how to navigate them
- How to write Swift code, build SwiftUI interfaces, and run your app in the Simulator
- How to use Xcode 26’s new built-in AI coding assistant the right way
- How to debug, profile, and submit your app to the App Store
Chapter 1
What’s New in Xcode 26
Xcode 26 was released alongside macOS Tahoe and iOS 26 in late 2025. If you’ve used an older version like Xcode 15 or 16, the changes are significant enough that I want to cover the highlights up front so you know what’s actually new and what’s worth paying attention to as a beginner.
Built-in Coding Intelligence
ChatGPT works out of the box with free usage. Add Claude or run a local model. Generate code, explain concepts, and write tests right inside Xcode.
Agentic Coding
Claude Agent and OpenAI Codex can now create files, run builds, run tests, and verify changes by capturing preview screenshots.
#Playground Macro
Drop a Playground block directly inside any Swift file and run it inline. Great for quick testing without creating a separate file.
Icon Composer
A new tool for designing layered Liquid Glass icons that adapt to iOS 26’s lighting effects, exported for every Apple platform from one source.
Predictive Code Completion
Multi-line suggestions appear as you type. Hold the Control key to accept them piece by piece instead of all at once.
Faster, Smaller
Xcode 26 is 24% smaller to download than Xcode 16, and workspaces load 40% faster. Compilation caching speeds up clean builds.
UI Test Recording
A redesigned recorder generates clean test code as you tap through your app in the Simulator. Replay tests across locales and conditions.
SwiftUI & Power Instruments
A new SwiftUI instrument tracks view updates and re-renders. The Power Profiler measures battery impact across components.
Chapter 2
System Requirements and Download
Before you install Xcode 26, make sure your Mac can run it. Here’s what you need:
- A Mac running macOS Sequoia 15.5 or later
- For Coding Intelligence features: macOS Tahoe 26 and an Apple silicon Mac (M1 or later)
- Around 40GB of free disk space for the install (Xcode is large)
- An Apple ID (free) to sign in
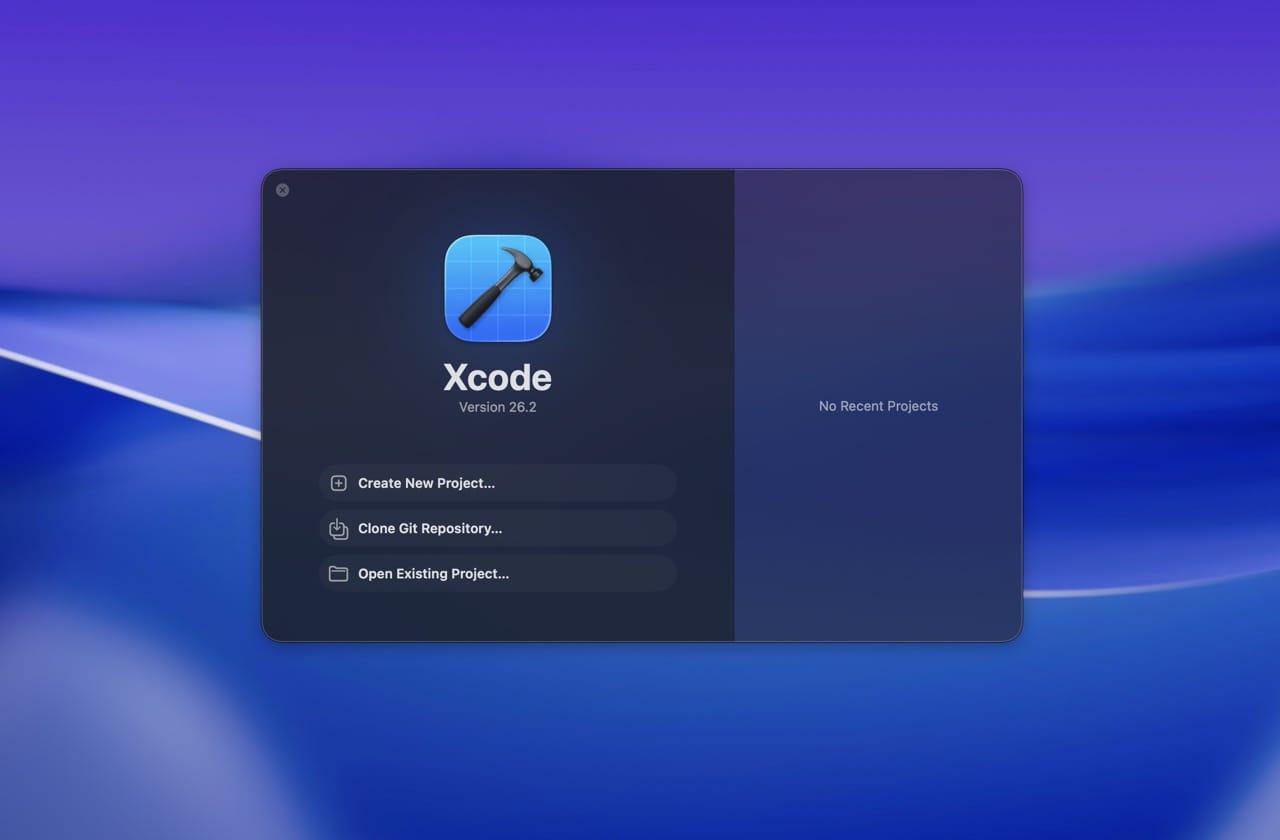
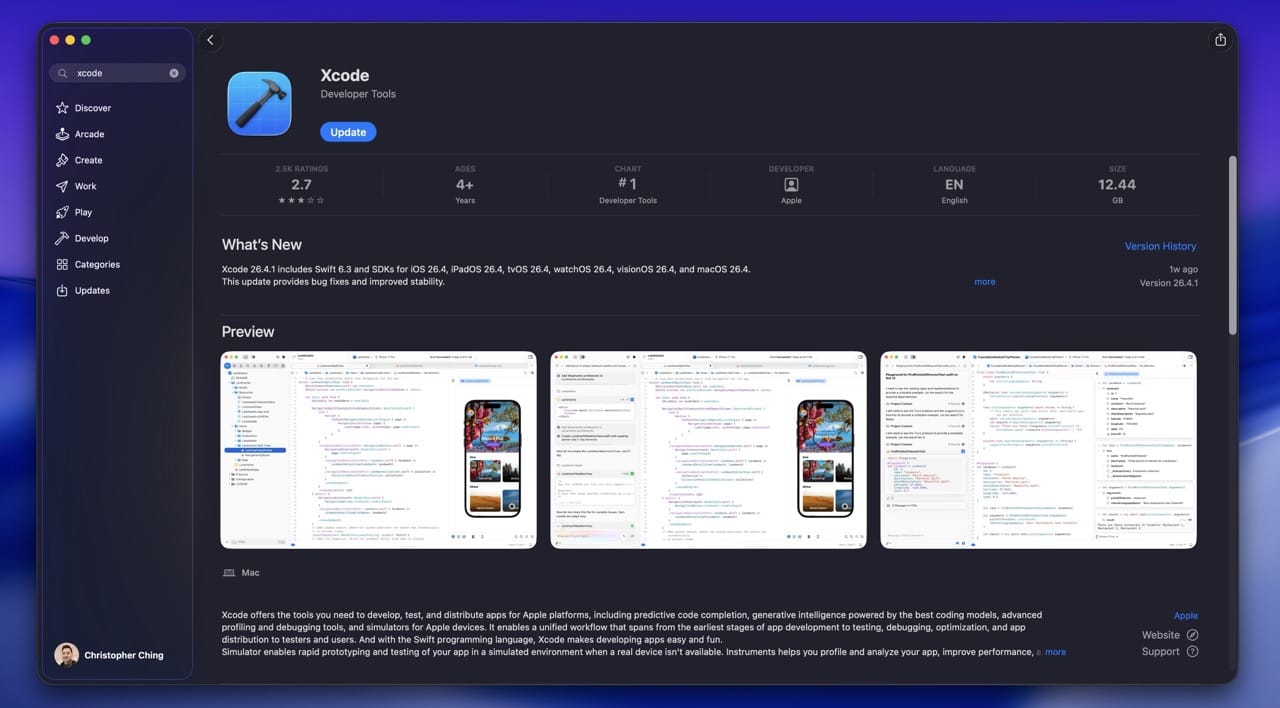
Download from the Mac App Store
The easiest way to get Xcode is the Mac App Store. Search for “Xcode,” click Get, and the download starts. From here on, updates come automatically through the App Store, which is much less painful than the manual upgrade path.
Older Versions of Xcode
If you need a specific older version, perhaps to work on a legacy project or to match a tutorial that hasn’t been updated, the unofficial site xcodereleases.com archives every version going back years, including beta builds. You’ll need a free Apple ID to download from Apple’s servers.
Xcode on Windows
Xcode only runs on macOS. There’s no official Windows version and there isn’t likely to be one. If you’re on a PC and want to develop iOS apps, your realistic options are:
- Cloud-based macOS services like MacInCloud (rent a Mac by the hour)
- A used Mac mini (the cheapest reliable long-term option)
- Cross-platform tools like Flutter or React Native (which still need a Mac for final builds and submission)
I have a more detailed guide on Xcode for Windows if you want to dig into the options.
Chapter 3
Should You Upgrade to Xcode 26?
Short answer: yes, if your Mac supports it.
I want to update some advice I gave in earlier versions of this guide. In the past, I sometimes told beginners it was fine to learn on an older Xcode if their Mac couldn’t run the latest version. That’s no longer my recommendation.
The gap between Xcode 26 and older versions is too wide now. Predictive completion, the inline AI assistant, the new SwiftUI features, and modern Swift concurrency are all things you’ll actually use as a beginner. Learning on Xcode 14 or 15 means learning on a tool that doesn’t behave like the tutorials and AI-generated code you’ll encounter today.
If your Mac is too old for Xcode 26, my honest advice is to budget for a Mac mini or a used Apple silicon Mac before going deep into iOS development. Even an entry-level M1 Mac mini handles Xcode 26 comfortably and will last you years.
Chapter 4
SwiftUI or Storyboards?
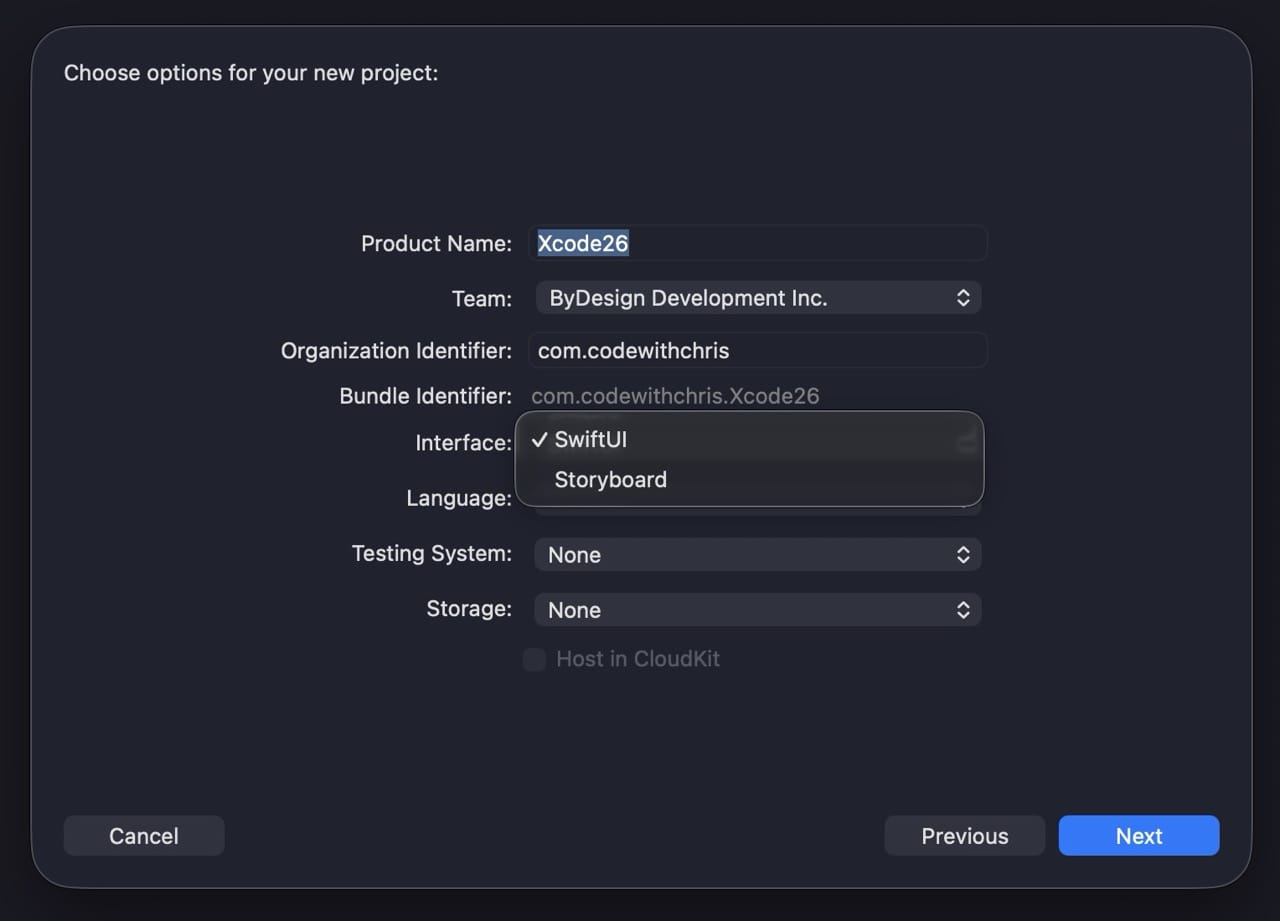
When you create a new Xcode project, one of the first decisions is whether to build your interface with SwiftUI or Storyboards. Here’s the honest answer for 2026:
Choose SwiftUI. Apple has made SwiftUI the default for new projects for several years now, and every new framework feature ships with SwiftUI support first. It’s also what every modern tutorial, course, and AI tool generates by default.
Storyboards still exist for legacy reasons. Many apps in the App Store today were originally built with Storyboards and UIKit, and they still work. But if you’re learning fresh in 2026, you should learn SwiftUI first. You’ll be more productive faster, you’ll find better learning materials, and you’ll match what most teams are hiring for.
This guide covers both interfaces because you’ll occasionally see Storyboards in the wild, but the focus is SwiftUI.
Chapter 5
The Five Main Areas of Xcode
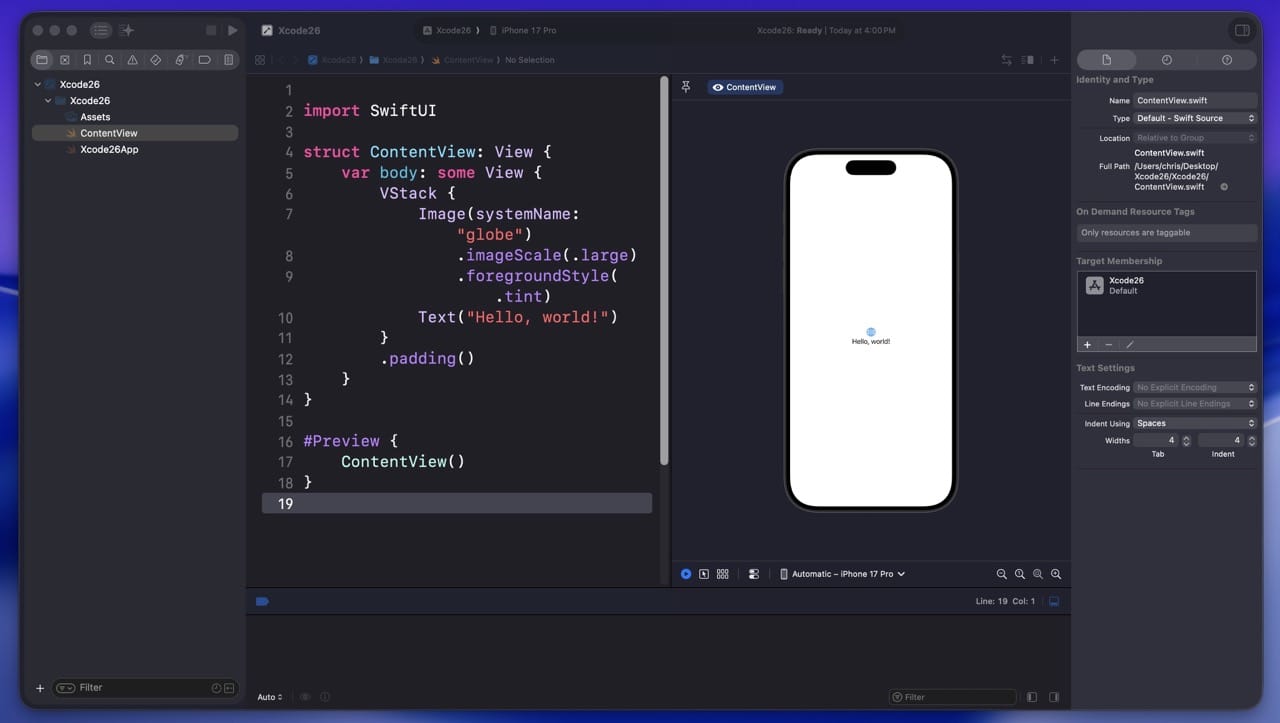
Open Xcode for the first time and the interface can feel intimidating. There’s a lot going on. The good news is that everything you see falls into one of five main areas. Once you know what each one does, navigating Xcode becomes second nature.
The five main areas are:
- Toolbar at the top, with the Run button and project controls
- Navigator on the left, showing your project files and tools for finding things
- Editor in the center, where you write code and design interfaces
- Utility Area on the right, showing details about whatever you have selected
- Debug Area at the bottom, showing console output and runtime information
You can show or hide each area independently using the small toggle icons at the top-right of the toolbar. When you’re focused on writing code, hiding the navigator and utility area gives you more room. When you’re designing UI, you’ll want them visible.
The next several chapters walk through each of these areas in detail.
Chapter 6
The Navigator Area
The navigator is the panel on the left side of Xcode. It’s your file explorer, your search bar, your error console, and several other things rolled into a tabbed pane. There are eight different navigator tabs, but as a beginner you’ll mostly use three: Project, Search, and Issue.
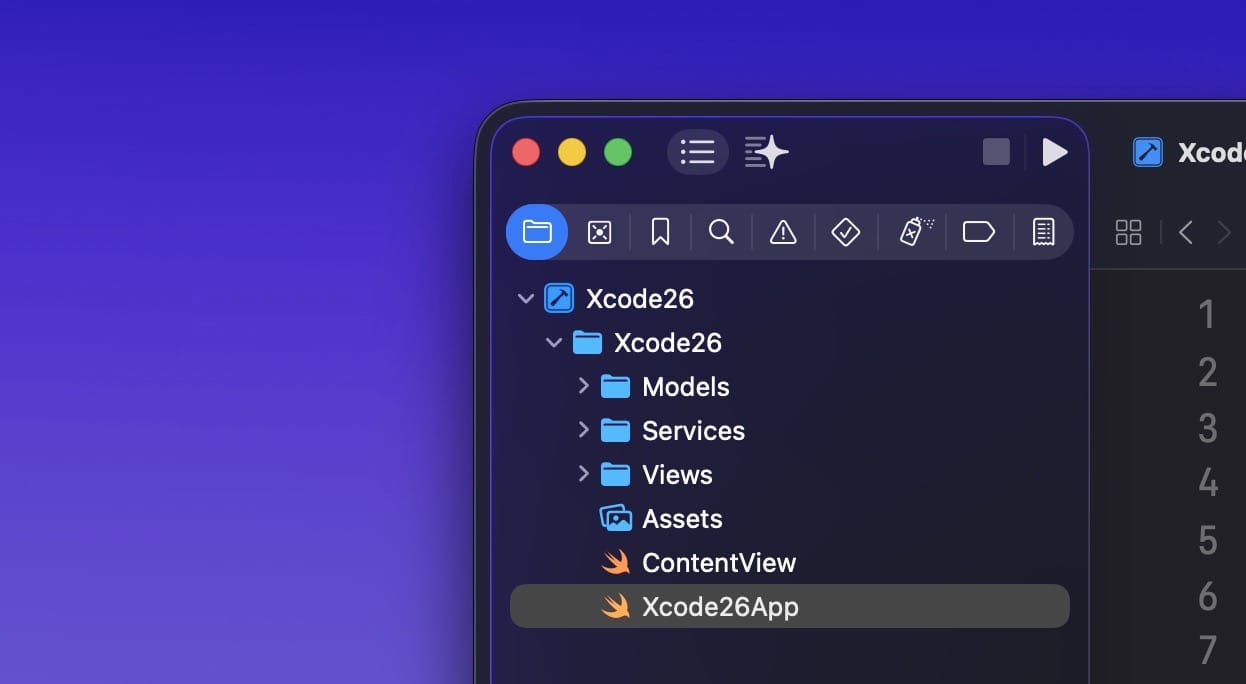
Project Navigator
This is the default tab, the one that shows when you first create a project. It lists every file your project contains: Swift files, your asset catalog, the Info.plist, configuration files, everything. Click any file and it opens in the editor area in the middle.
You can right-click in the project navigator to add new files (from a template) or import existing ones. You can also drag files in from Finder. Files can be organized into Groups, which work like folders.
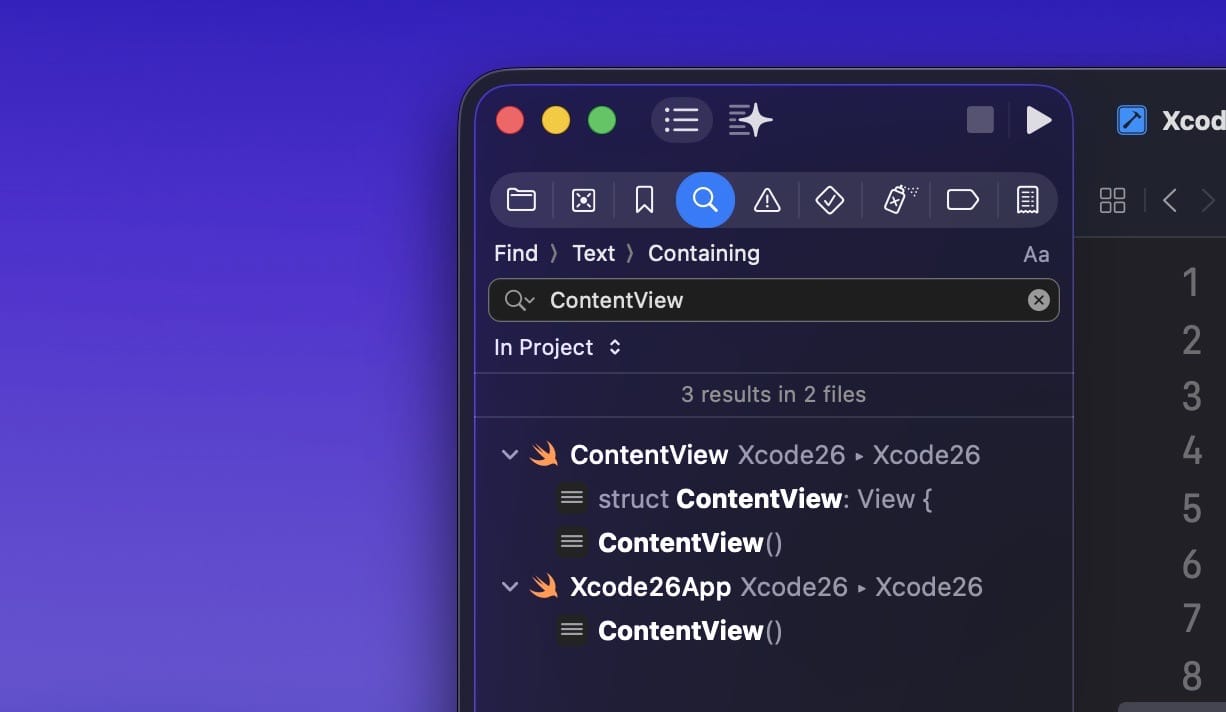
Search Navigator
Press Cmd + Shift + F or click the magnifying glass tab. Type any text and Xcode searches your entire project for it. This is a shortcut you’ll use constantly. You can also do find-and-replace across the whole project from this view.
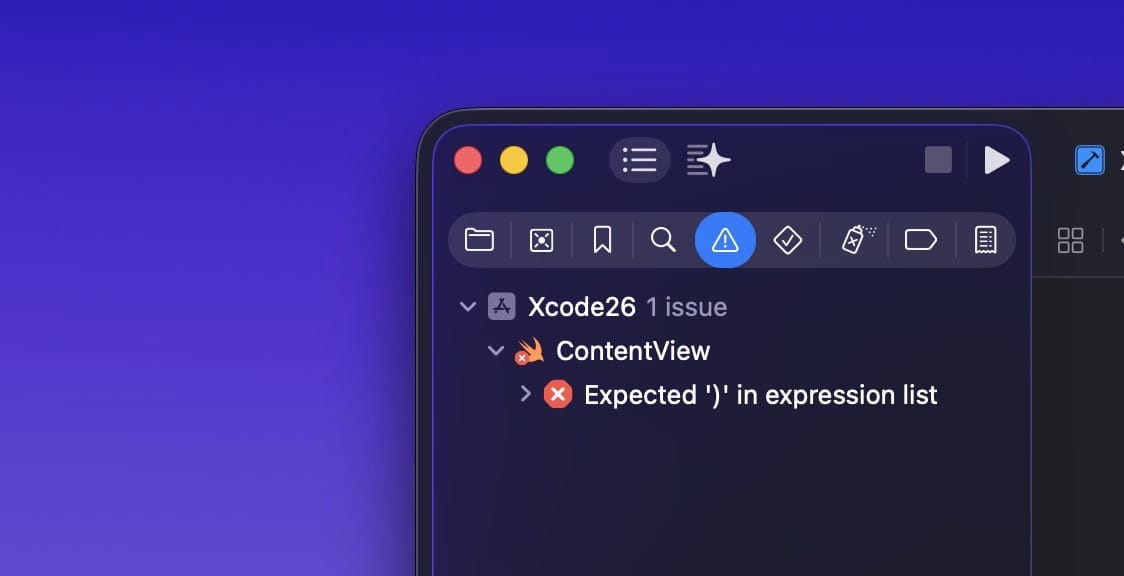
Issue Navigator
When you build your app and something goes wrong, the issue navigator is where errors and warnings show up. Errors are red and stop the build. Warnings are yellow and let the build continue but flag potential problems. Click any issue and Xcode jumps straight to the line that caused it.
Chapter 7
The Editor Area
The editor is the largest area and the one you’ll spend most of your time in. It changes depending on what kind of file is selected. Swift files show the code editor. Storyboard files show Interface Builder. SwiftUI files show code on one side and a live preview on the other.
Writing Code
When you click a Swift file, you see the code editor. The big text area in the middle is where you type. Here are the things worth knowing as a beginner:
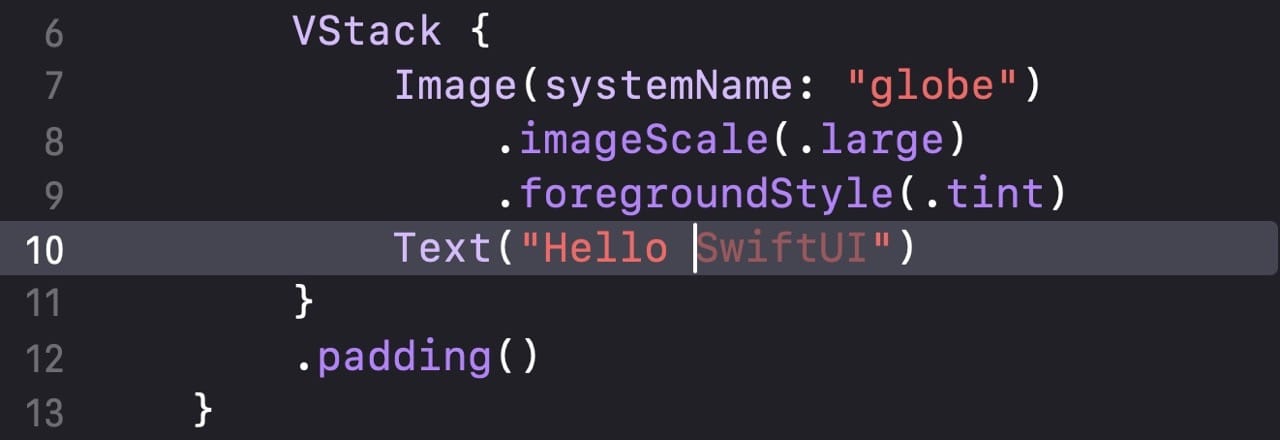
Line numbers. Off by default. Turn them on in Xcode → Settings → Text Editing → Display. Line numbers are useful when you’re following a tutorial or asking for help, since you can reference an exact line.
Predictive completion. As you type, Xcode suggests entire blocks of code in light gray text. New in Xcode 26: hold the Control key and tap to accept suggestions one word at a time instead of all at once. This is great for learning, because you can see what’s being suggested and decide how much to take.
Jump to Definition. Hold Cmd and click any class, method, or variable name and Xcode jumps to where it’s defined. Cmd-click on Int to see Int’s source file, for instance. This is invaluable for exploring how things work.
Cmd + F. Find within the current file. The search popup appears in the upper-right corner of the editor.
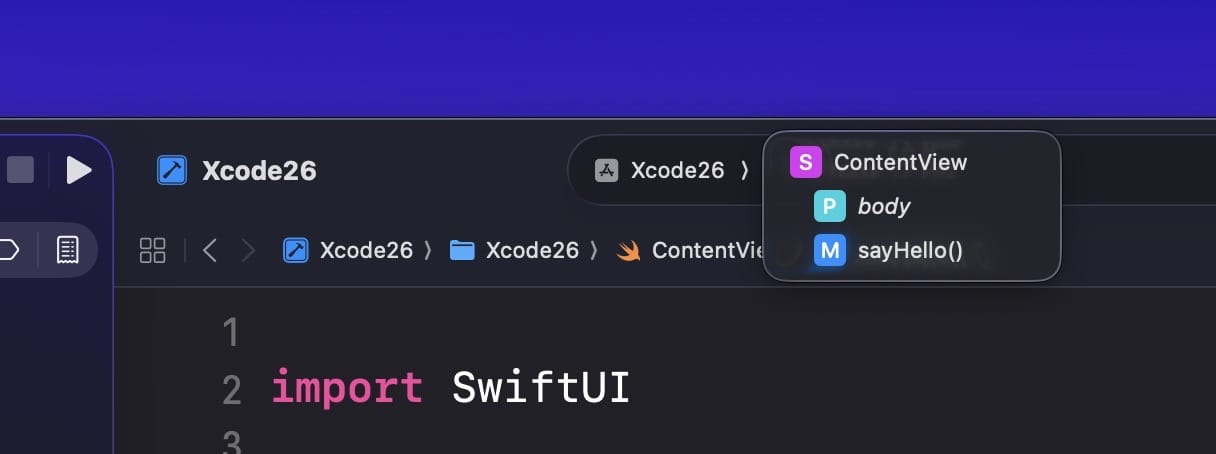
The Jump Bar. At the top of the editor, there’s a breadcrumb showing the path to the current file. Click any segment and you get a menu of files at that level. Click the last segment (the current file) and you get a list of every method in the file, so you can jump straight to one. This is one of the fastest ways to navigate a long file.
Breakpoints
The thin column to the left of the line numbers is the breakpoint gutter. Click any line and a blue marker appears. When you run your app, execution pauses at that line and lets you inspect what’s happening. Click the marker again to disable it. Drag it off the gutter to delete it entirely.
Learning to use breakpoints is the single biggest debugging upgrade for most beginners. They’re more powerful than peppering your code with print statements.

Chapter 8
Building Your User Interface
Xcode lets you build your UI two ways: SwiftUI (the modern approach) or Storyboards (the older drag-and-drop approach). I’ll cover both, but as I said earlier, SwiftUI is what you should focus on as a beginner.
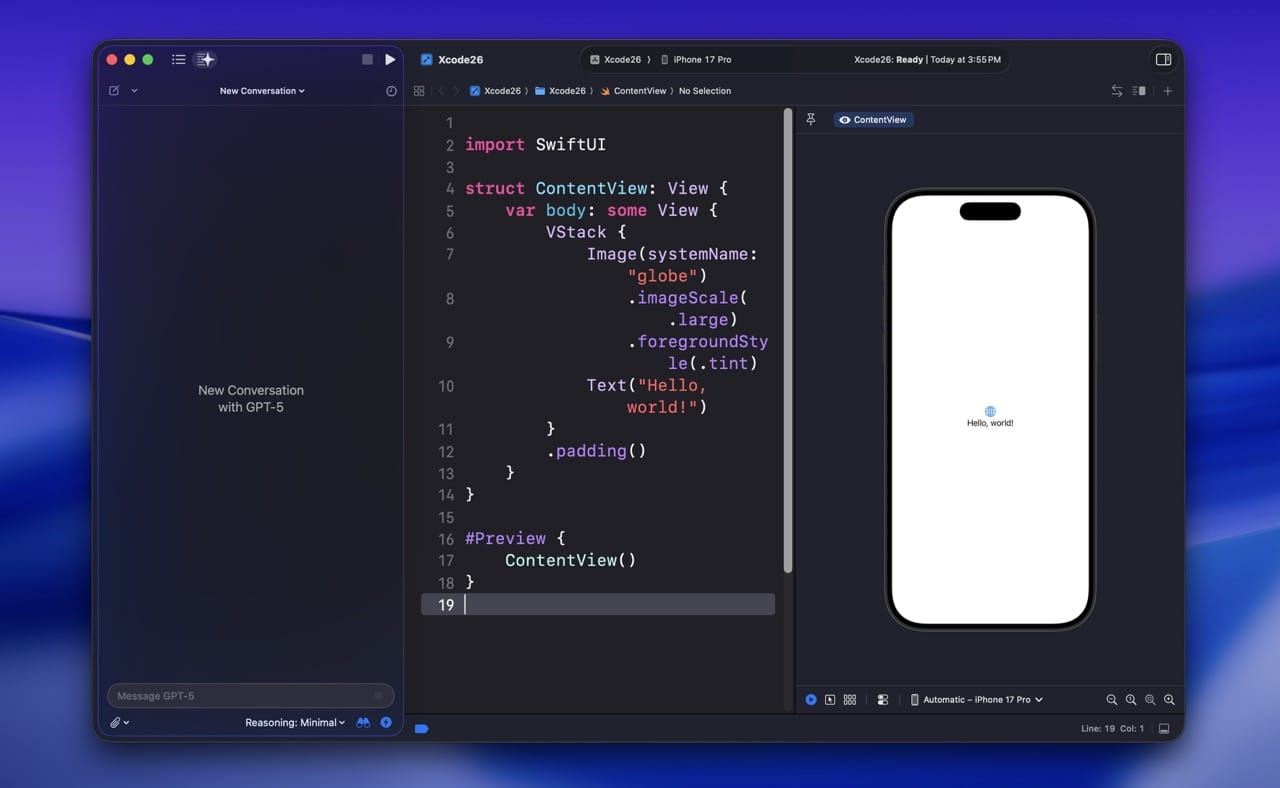
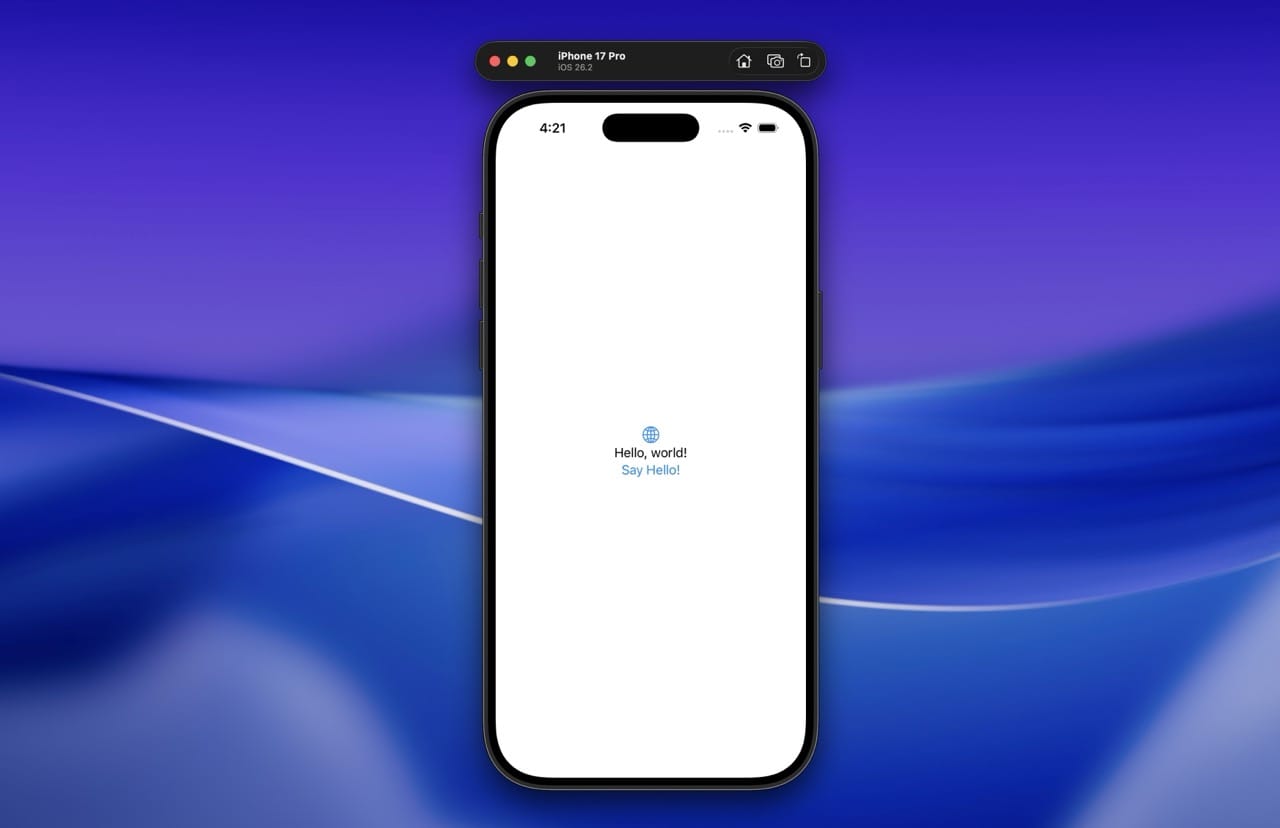
SwiftUI and the Preview Canvas
When you create a new project with SwiftUI selected, your interface lives in a file called ContentView.swift. Open it and you see two things side by side: code on the left, and a live preview on the right. The preview updates automatically as you type.
struct ContentView: View {
    var body: some View {
        VStack {
            Text("Hello, world!")
                .font(.largeTitle)
            Text("Welcome to Xcode 26")
                .foregroundStyle(.secondary)
        }
    }
}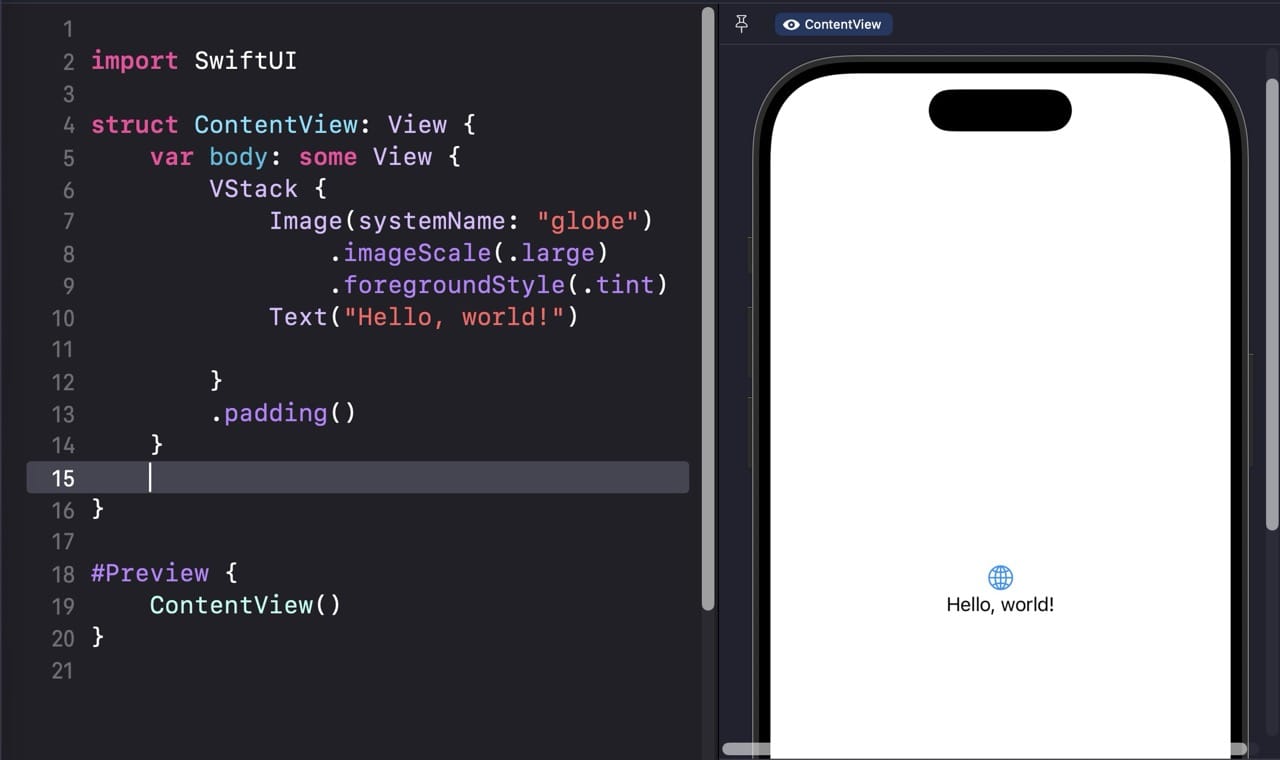
If you don’t see the preview canvas, go to Editor → Canvas to enable it. The canvas requires macOS 10.15 or later, which any Xcode 26 user has.
The Object Library
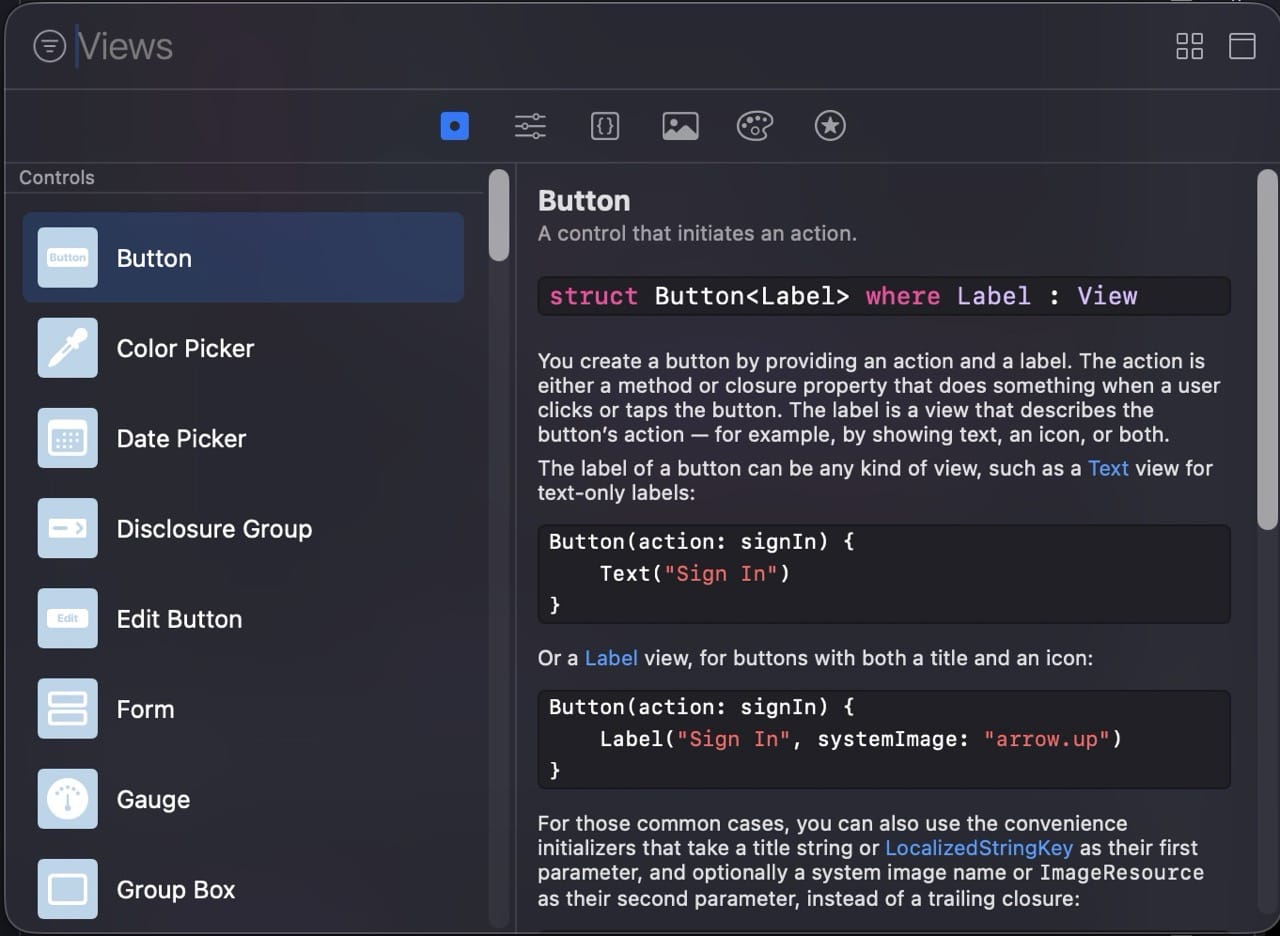
Press Cmd + Shift + L (or click the + button in the toolbar) to open the Object Library. It’s a searchable list of every UI component you can use. For SwiftUI, that means views like Button, TextField, Image, List, and so on. You can drag and drop from the Object Library directly into your code, and Xcode generates the syntax for you.
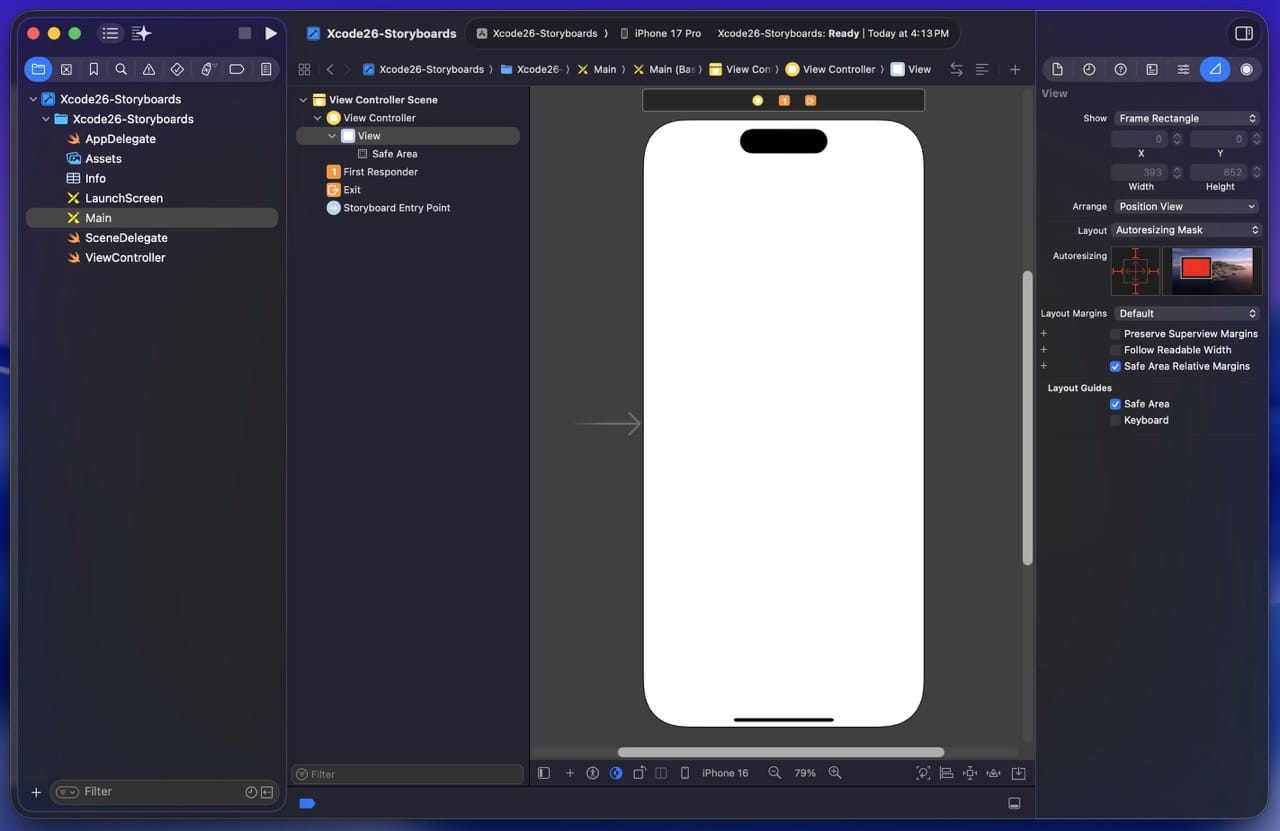
Storyboards and Interface Builder
If you create a project with Storyboard selected, you get a Main.storyboard file. Click it and the editor switches to Interface Builder, a visual UI designer. You drag elements from the Object Library onto the canvas, position them, and connect them to your code via Outlets and Actions.
Interface Builder relies on a system called Auto Layout. You define rules called constraints, like “this button should be 20 points below the top of the screen,” and Auto Layout figures out the rest. This works, but it’s where Storyboards get fiddly. Beginners often spend hours fighting constraint conflicts.
Chapter 9
The Utility Area
The utility area is the panel on the right side of Xcode. It shows you details and settings for whatever’s selected in the editor. Different inspectors appear depending on what you’re working on.
File Inspector
The first tab. Shows where the file lives on disk, what targets it belongs to, and a few other meta-properties. You’ll occasionally use this when troubleshooting why a file isn’t being included in a build.
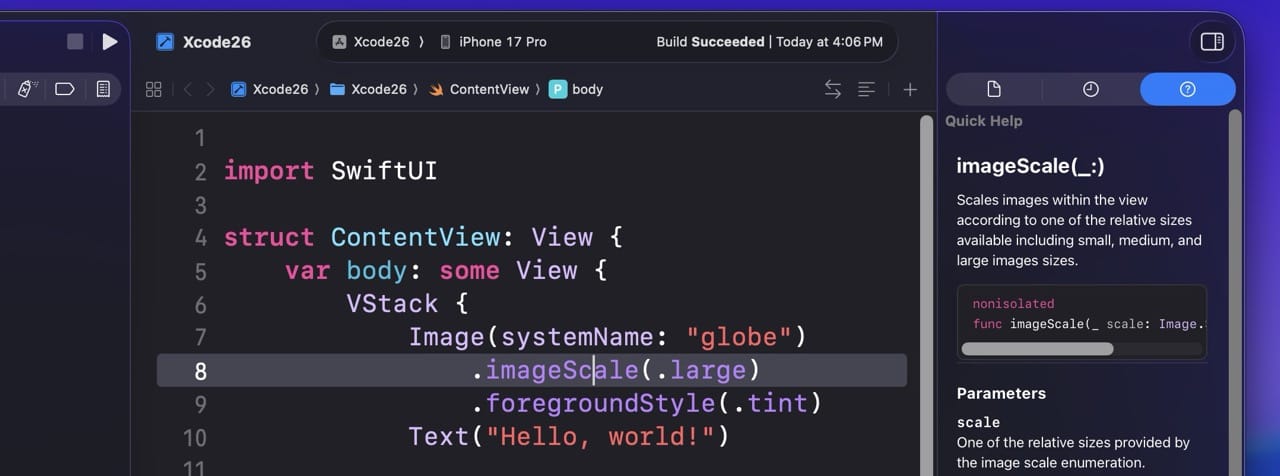
Quick Help Inspector
The second tab. Shows the documentation for whatever your cursor is currently on. Click on print and the Quick Help shows you the docs for that function. This is the fastest way to look up an API without leaving Xcode.
Attributes & Size Inspectors
These only appear when you’re working in Interface Builder with a UI element selected. They let you customize colors, fonts, sizes, and positioning constraints. SwiftUI doesn’t use these because everything is configured in code, so you’ll mostly see them if you’re working with Storyboards.
Chapter 10
The Toolbar
The toolbar runs across the top of the Xcode window. Most of the controls you’ll use day to day live here.
Run Button
The leftmost button (a small play arrow) builds your project and launches it. Click and hold the Run button to get more options:
- Test runs your unit tests if you have any
- Profile launches Instruments to measure performance and memory
- Analyze looks for memory leaks, bad patterns, and other potential issues
Stop Button
Right next to Run. Stops your running app and returns control to Xcode. The keyboard shortcut is Cmd + . (period).
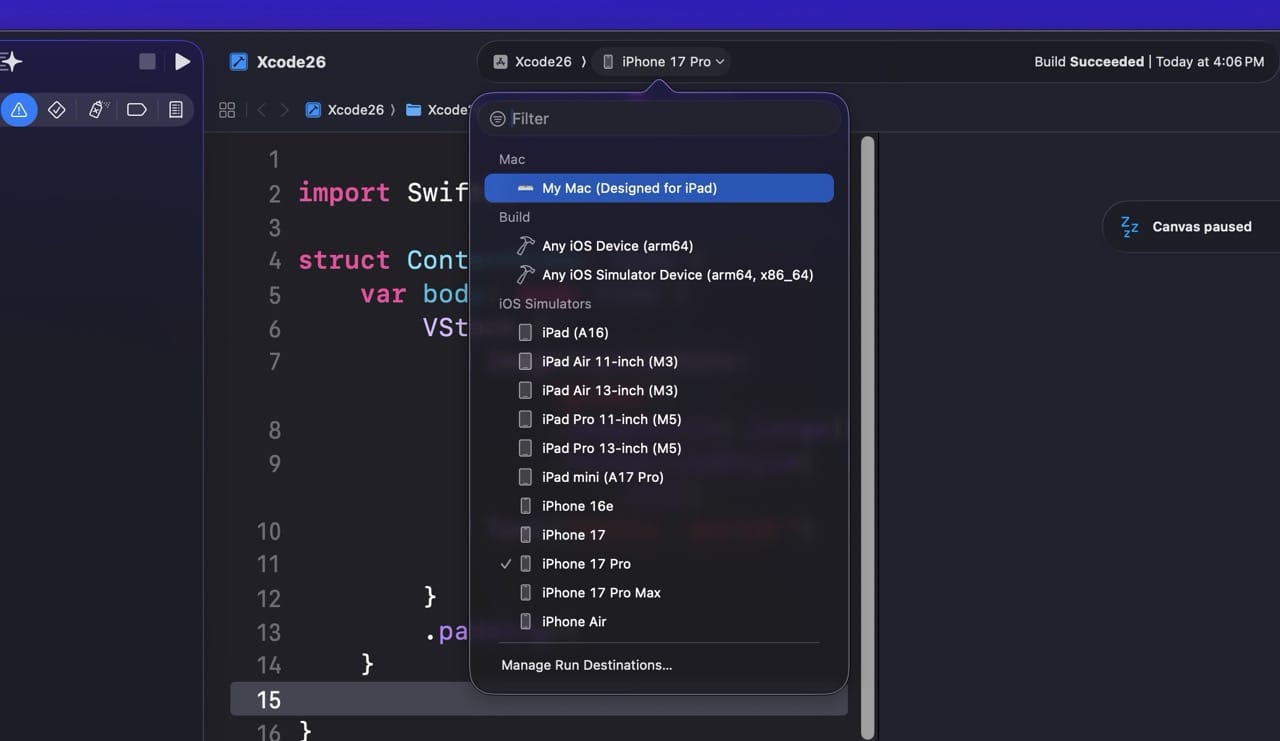
Scheme & Destination
Next to Stop, there’s a dropdown showing your current scheme (basically, which target to build) and another showing where to run it. The destination dropdown lists every available simulator (iPhone 17 Pro, iPad Pro, Apple Watch, etc.) plus any physical device you have plugged in.
Status Bar
The center of the toolbar shows what Xcode is currently doing: building, indexing, running tests. If errors or warnings exist, you’ll see counters here.
Library, Inspector, and Toggle Buttons
Far right of the toolbar. The first button opens the Object Library. The next ones toggle the visibility of the left navigator, the bottom debug area, and the right utility area. New in Xcode 26 is the Coding Intelligence button (a sparkle icon) that opens the AI assistant sidebar. We’ll cover that in Chapter 13.
Chapter 11
The Debug Area
The debug area sits at the bottom of the window and only matters when your app is running. It shows two things: variables on the left, console output on the right.
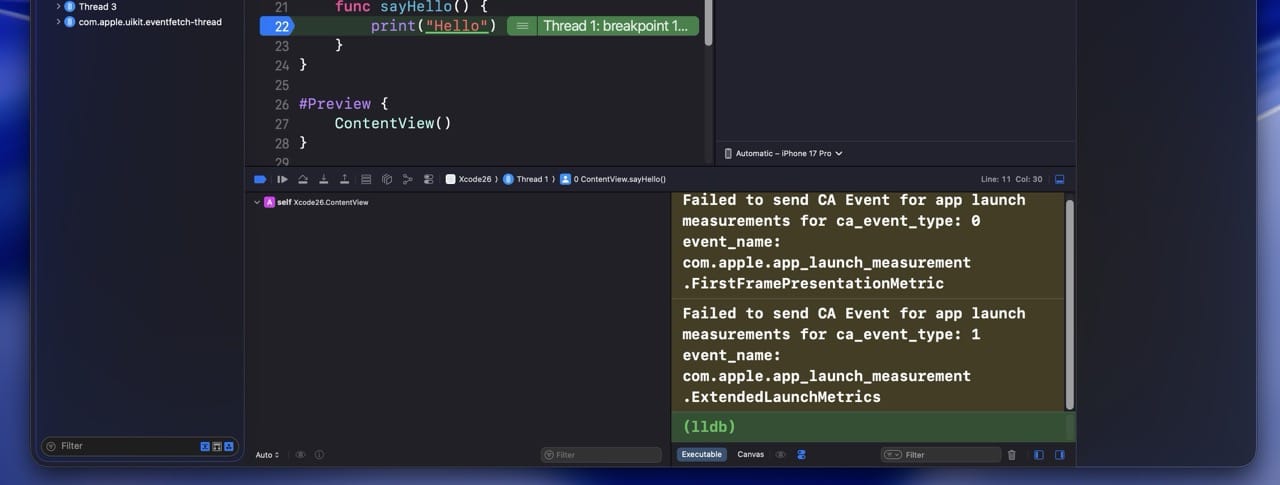
Console
This is where print() statements show up, along with any system logs. When something goes wrong at runtime, errors and stack traces appear here.
Variables View
When your app pauses at a breakpoint, the variables view shows you everything that’s currently in scope: local variables, properties, and their current values. You can drill into objects to see their state.
The debug area is one of the most powerful tools in Xcode and most beginners ignore it. Learning to use breakpoints and step through code beats print() debugging every single time.
Chapter 12
Running Your App in the Simulator
Xcode comes bundled with a full iOS Simulator that lets you test your app without a physical iPhone. For most development work, the simulator is enough.
To run your app in the simulator:
- Pick a simulator from the destination dropdown in the toolbar
- Click the Run button (or press Cmd + R)
- Xcode builds your project and launches it in the Simulator window
The Simulator can do much more than just run your app. From its menu bar you can:
- Rotate the device
- Simulate different GPS locations
- Trigger a “shake” gesture
- Simulate low-memory warnings
- Take screenshots and screen recordings
- Adjust the device’s appearance (light/dark mode, dynamic type size)
Running on a Real Device
At some point you’ll want to run your app on a real iPhone or iPad. Plug it in via USB:
- The phone asks if you trust this computer. Tap Yes.
- Xcode asks if you want to use this device for development. Click Yes.
- Your device shows up at the top of the destination dropdown.
For local testing on your own device, a free Apple ID works. For full distribution and TestFlight beta testing, you’ll need to sign up for the Apple Developer Program at $99 per year.
Chapter 13 · New in Xcode 26
Coding with AI in Xcode 26
This chapter is the one I’d most pay attention to if you’ve used older versions of Xcode. Apple built a serious AI coding assistant directly into Xcode 26, and how you use it will affect how quickly you learn (and how good you get).
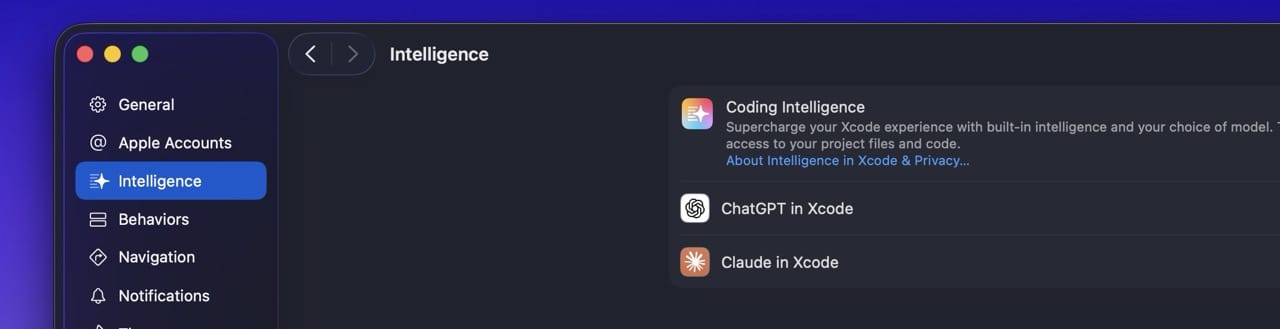
Setting Up Coding Intelligence
Open Xcode → Settings → Intelligence. You’ll see a list of providers:
- ChatGPT is set up out of the box. You can use it for free (with a daily request cap) without signing in. Sign in with a ChatGPT account to get higher limits, or use your own API key.
- Claude (from Anthropic) can be added by entering an API key. Many developers prefer Claude for code generation because of its strong code reasoning.
- Custom Provider lets you plug in any compatible API or run a local model on your Mac. Services like OpenRouter give you access to dozens of models through a single key.
The Coding Assistant Sidebar
Once set up, you’ll see a small sparkle icon in the toolbar. Click it to open the assistant sidebar. From here you can:
- Ask questions about your project (“Why is this view not updating?”)
- Generate new code from a description
- Ask for explanations of existing code
- Request unit tests for a function
- Have it refactor or document code

Coding Tools (Inline)
Inside any Swift file, place your cursor on a piece of code and the Coding Tools menu lets you take quick actions: generate a preview, generate a playground, fix this issue, write tests for this. These are quick contextual actions that don’t require a full chat conversation.
Predictive Completion (Improved)
As you type, Xcode now suggests multi-line completions. New in Xcode 26: you can accept these progressively by holding the Control key. This is a small UX change but a big learning improvement, because you can see what’s being suggested and pick how much of it to take instead of accepting blindly.
Agentic Coding (Xcode 26.3 and later)
Released in February 2026, Xcode 26.3 added something more ambitious: agentic coding. Instead of just chatting with an AI, you can give it a goal and let it work. Claude Agent and Codex (OpenAI’s agent) can:
- Create and modify files across your project
- Run builds and tests on their own
- Capture screenshots of your SwiftUI previews to verify changes visually
- Search Apple’s documentation
- Iterate on a task until it’s complete
This is opt-in and clearly indicated when active. You’ll see a security indicator in Xcode whenever an agent is connected.
If you use external tools like Cursor or Claude Code, Xcode 26.3 also supports the Model Context Protocol (MCP). This means you can drive Xcode from your terminal-based tools by adding xcrun mcpbridge as an MCP server.
How to Use AI in Xcode Without Becoming Dependent on It
Here’s the part nobody else covers, and it matters more than the technical setup. The developers I see thriving in 2026 use AI as a tool, not a crutch. The ones who struggle “vibe code” their way through tutorials, generating code they don’t understand, and then can’t fix anything when it breaks.
A few rules that have served me and my students well:
1. Ask AI to explain before you ask it to write. Before asking the assistant to generate a function, ask it to explain how that function would work, in plain English, step by step. You’ll learn the concept and you’ll catch bad suggestions before they hit your code.
2. Read every line of generated code. If the AI writes 30 lines and you accept them, you’d better be able to explain every single one. If you can’t, ask the AI to explain them. Don’t move on until you can.
3. Use it to learn, not to skip learning. “Quiz me on Swift optionals” is a great prompt. “Write me a Swift app” is a bad one. The first builds your understanding. The second does the work for you that you should be doing yourself.
4. Stay in the driver’s seat with agentic features. Agentic coding is genuinely useful, but for beginners I’d avoid letting agents do open-ended work. Use them for narrow, well-defined tasks where you can evaluate the result.
Chapter 14
Xcode Playgrounds
A Playground is a lightweight editor for testing code. It’s not a full Xcode project, just a single file where you write Swift and see results immediately. They’re perfect for learning, experimenting, or working through a problem without the overhead of creating an app.
Traditional Playgrounds
Go to File → New → Playground. Pick a template (Blank is fine for most cases). Start typing Swift code and the results appear in the right margin or in the console.
#Playground Macro (New in Xcode 26)
Apple introduced a new macro that lets you embed playground-like execution directly inside any Swift file in your project. Write #Playground followed by curly braces and the contents run inline. This is great for quickly testing a function in your actual project context, without creating a separate file.
// A regular function in your project
func double(_ value: Int) -> Int {
    return value * 2
}

// A playground block right inside the same file
#Playground {
    let result = double(21)
    print(result)
}
Chapter 15
Submitting Your App with the Organizer
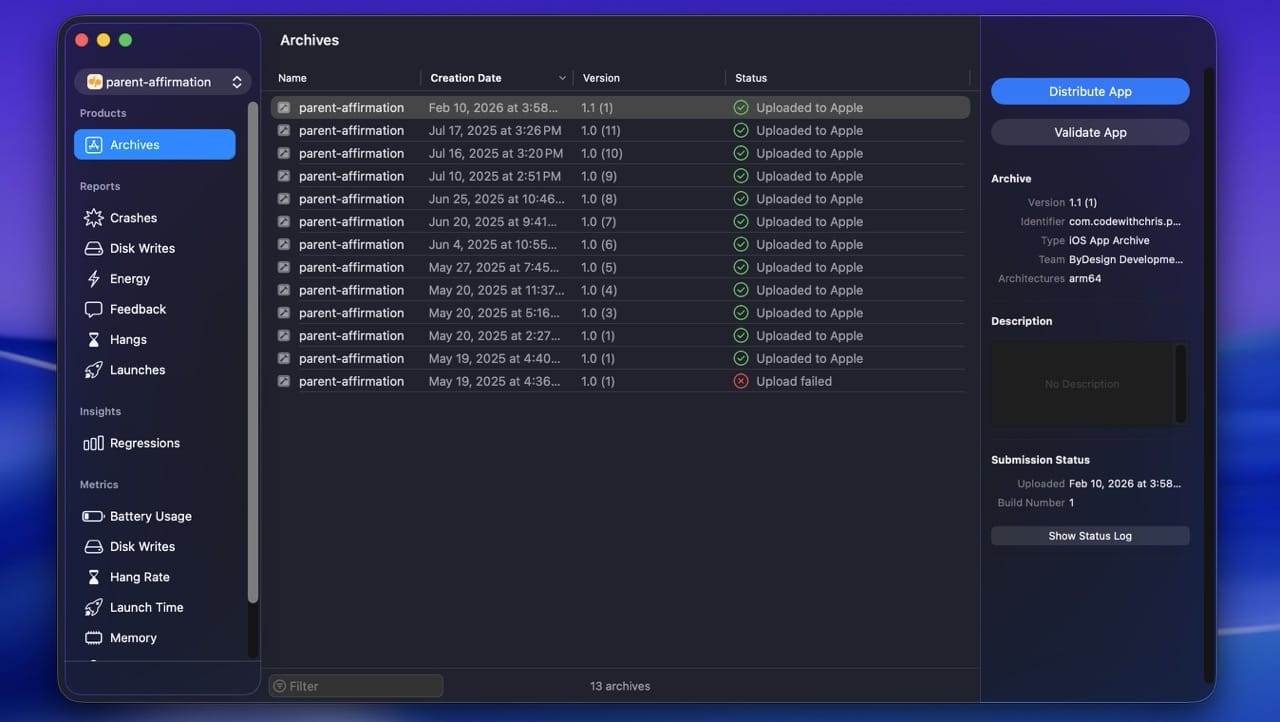
When your app is ready for the App Store, the Xcode Organizer is where you start. Open it from Window → Organizer.
Archives
An Archive is a built version of your app, packaged with everything needed to submit. To create one: Product → Archive in the menu. Once it’s built, the new Archive shows up in the Organizer’s Archives tab. From there you can submit to the App Store, validate the build, or distribute it for testing.
Crashes
When real users run your app and something crashes, those crash reports are sent to Apple and show up here. You can see exactly which line of your code caused the crash, which is invaluable for fixing real-world issues you couldn’t reproduce on your own machine.
Metrics & Trending Insights
Xcode 26 expanded the metrics view with Trending Insights, which highlight performance issues like hangs and excessive disk writes that are getting worse across versions of your app. There’s also Recommendations, which compares your app’s launch time, memory use, and battery impact to similar apps and gives you concrete improvement targets.
Icon Composer
Before submitting, you’ll need an app icon. Xcode 26 ships with Icon Composer, a tool for designing layered icons that adapt to Apple’s new Liquid Glass design language. It exports versions for every platform from a single source, and supports the dynamic lighting effects in iOS 26 and macOS Tahoe.
Chapter 16
Quick Reference: Essential Xcode Keyboard Shortcuts
Knowing a handful of shortcuts speeds you up more than any single tip. Here’s a list of the ones I use every day. Bookmark this section and come back to it as needed.
| Shortcut | What It Does |
|---|---|
| Cmd + R | Build and run your app |
| Cmd + . | Stop the running app |
| Cmd + B | Build without running |
| Cmd + Shift + K | Clean the build folder (fixes a lot of weird issues) |
| Cmd + / | Toggle comment on the selected line |
| Cmd + F | Find within the current file |
| Cmd + Shift + F | Find across the entire project |
| Cmd + click | Jump to definition |
| Cmd + Shift + O | Open Quickly (fuzzy file search, the fastest way to navigate) |
| Cmd + 0 | Toggle the navigator (left panel) |
| Cmd + Opt + 0 | Toggle the utility area (right panel) |
| Cmd + Shift + Y | Toggle the debug area (bottom panel) |
| Cmd + Shift + L | Open the Object Library |
| Cmd + Opt + Enter | Show or hide the SwiftUI preview canvas |
| Ctrl + I | Re-indent the selected code |
| Cmd + Z / Cmd + Shift + Z | Undo / Redo (saves your bacon constantly) |
Want the full printable cheat sheet?
Get my complete Xcode shortcuts cheat sheet that’ll help you learn Xcode faster. Free, just enter your email.
Chapter 17
Frequently Asked Questions
Is Xcode free?
Yes. Xcode is free to download from the Mac App Store and free to use. You only need to pay if you want to publish your apps to the App Store, which requires the Apple Developer Program at $99 per year. You can build and run apps on the simulator and even on your own iPhone for free with just an Apple ID.
Can I use Xcode on Windows?
No. Xcode only runs on macOS and there’s no official Windows version. Your options if you’re on a PC are: rent a Mac through a cloud service like MacInCloud, get a used Mac mini, or use a cross-platform framework like Flutter or React Native (though even those still need a Mac for final builds and App Store submission).
How long does it take to learn Xcode?
You can learn the basics of Xcode in a few hours. The interface, the simulator, running a project, and basic editing are not hard. What takes time is learning to build apps, which means learning Swift and SwiftUI alongside Xcode. Most beginners can build a simple working app within their first month of consistent study.
Is Xcode hard to learn?
Xcode itself is not hard. It’s a tool, and like any IDE it has a learning curve, but the curve isn’t steep. The hard part is what you build with it: Swift, SwiftUI, app architecture, and so on. If you find Xcode confusing at first, that’s normal. After a week of consistent use, the interface fades into the background.
What programming language does Xcode use?
The main language for iOS development in Xcode is Swift. You’ll also see Objective-C in older codebases (it’s still supported), and Xcode supports C, C++, and a few other languages for system-level development. For new projects in 2026, Swift is the right choice.
Do I need to learn Swift before learning Xcode?
You can learn them at the same time. In fact, that’s how most people start. Xcode is the environment where you write and run Swift code, so the two are intertwined. If you want a structured Swift path, my Learn Swift series is built for beginners.
What’s the difference between Xcode and Swift?
Swift is the programming language. Xcode is the application you use to write Swift code, design interfaces, and build apps. Think of Swift as the language and Xcode as the studio.
Does Xcode require a fast Mac?
Not anymore. Even an entry-level M1 Mac mini handles Xcode 26 comfortably. The main requirements are enough storage (around 40GB free) and Apple silicon for the AI features. Older Intel Macs can run Xcode 26 for normal development but won’t support Coding Intelligence.
Can I build Android apps with Xcode?
No. Xcode only builds for Apple platforms (iPhone, iPad, Mac, Apple Watch, Apple TV, Vision Pro). For Android, you’d use Android Studio. If you want to target both with one codebase, look at Flutter or React Native.
What’s the difference between Xcode and Swift Playgrounds?
Xcode is the full professional IDE for building production apps. Swift Playgrounds is a separate, simpler app from Apple (available on iPad and Mac) designed to teach beginners Swift through interactive lessons. They’re complementary: Swift Playgrounds is great for learning the language, Xcode is where you build real apps.
Conclusion
Where to Go from Here
You now know your way around Xcode. Now it’s time to build something with it.
Here are some other links you might find helpful:
- Learn Swift — my structured 12-stage curriculum
- How to Make an App — the full process from idea to App Store
- Xcode for Windows — your options if you’re on a PC
Ready to actually build something?
You’ve got the tool. CWC+ is the path.
I built CodeWithChris because I wanted to create the resource I wish I’d had when I was learning. CWC+ gives you structured paths through Swift and SwiftUI, a community of beginners just like you, weekly live streams, and new content for the AI era.
14-day money back guarantee · Cancel anytime