


So you’ve been developing your app and testing it on the Simulator. However, did you know that there could be bugs that only show up when your app is running on an actual iOS device?
Furthermore, testing your iOS app on a device is the best way to gauge performance issues before you go too far down the road.
For those of us who don’t have actual iOS devices, the Simulator is actually really good. But if you have a spare device lying around, then this tutorial will show you how to put apps on the iPhone or other iOS device.
Why do we have to go through all this trouble?
It’s common to wonder why it takes so many steps just to put your app creation on a real device. The answer is really about security. Although you might not create malicious apps to put on peoples phones, Apple cares that it can identify who created the app and that it can tell if the app has been tampered with or not.
These security measures are ensured by a process known as code signing. When you create an app package (binary) to put on a device, you have to put your “digital signature” on it by code signing it. Otherwise, Apple won’t let that app be deployed on any device.
Requirements:
– You’ll need an actual iOS device.
– You’re going to need to join the Apple Developer Program which costs $99/year.
Yes, you read that right! You don’t need to purchase the $99/year membership to be able to transfer your own app to your own device.
Request your certificates
Xcode is pretty smart as it now takes care of all those little details for us as long as we have our Apple ID registered in Xcode’s Preference Pane. Now it might happen you encounter a little hick-up along the way and so you will have to do it yourself.
Your certificate is used to code sign the apps and they uniquely identify you. In this step, we have to generate and request two certificates: one for development and one for distribution. We only need to do this once (not for each app!).
The development one is used for testing while the distribution certificate is used to sign your app bundle for distribution in the App Store once it’s ready. Launch Xcode 10 and go to your preferences menu. Then go to the “Accounts” tab. Fill in your Apple iOS developer account details here.
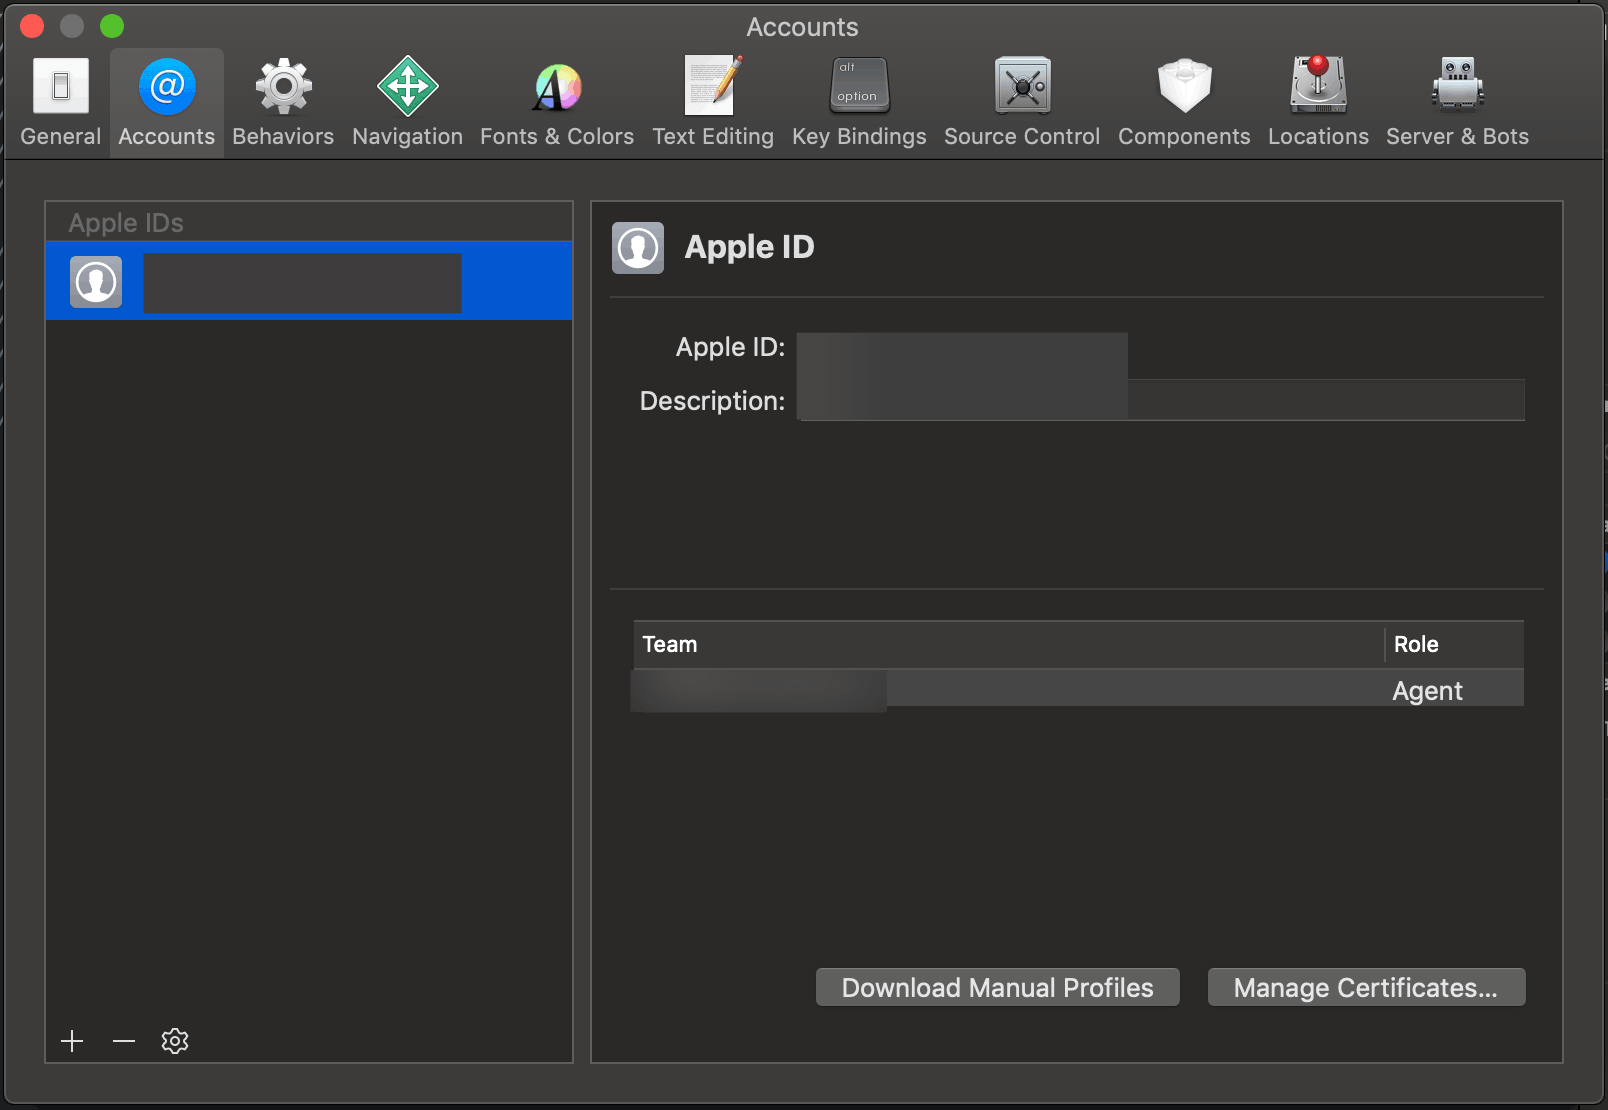
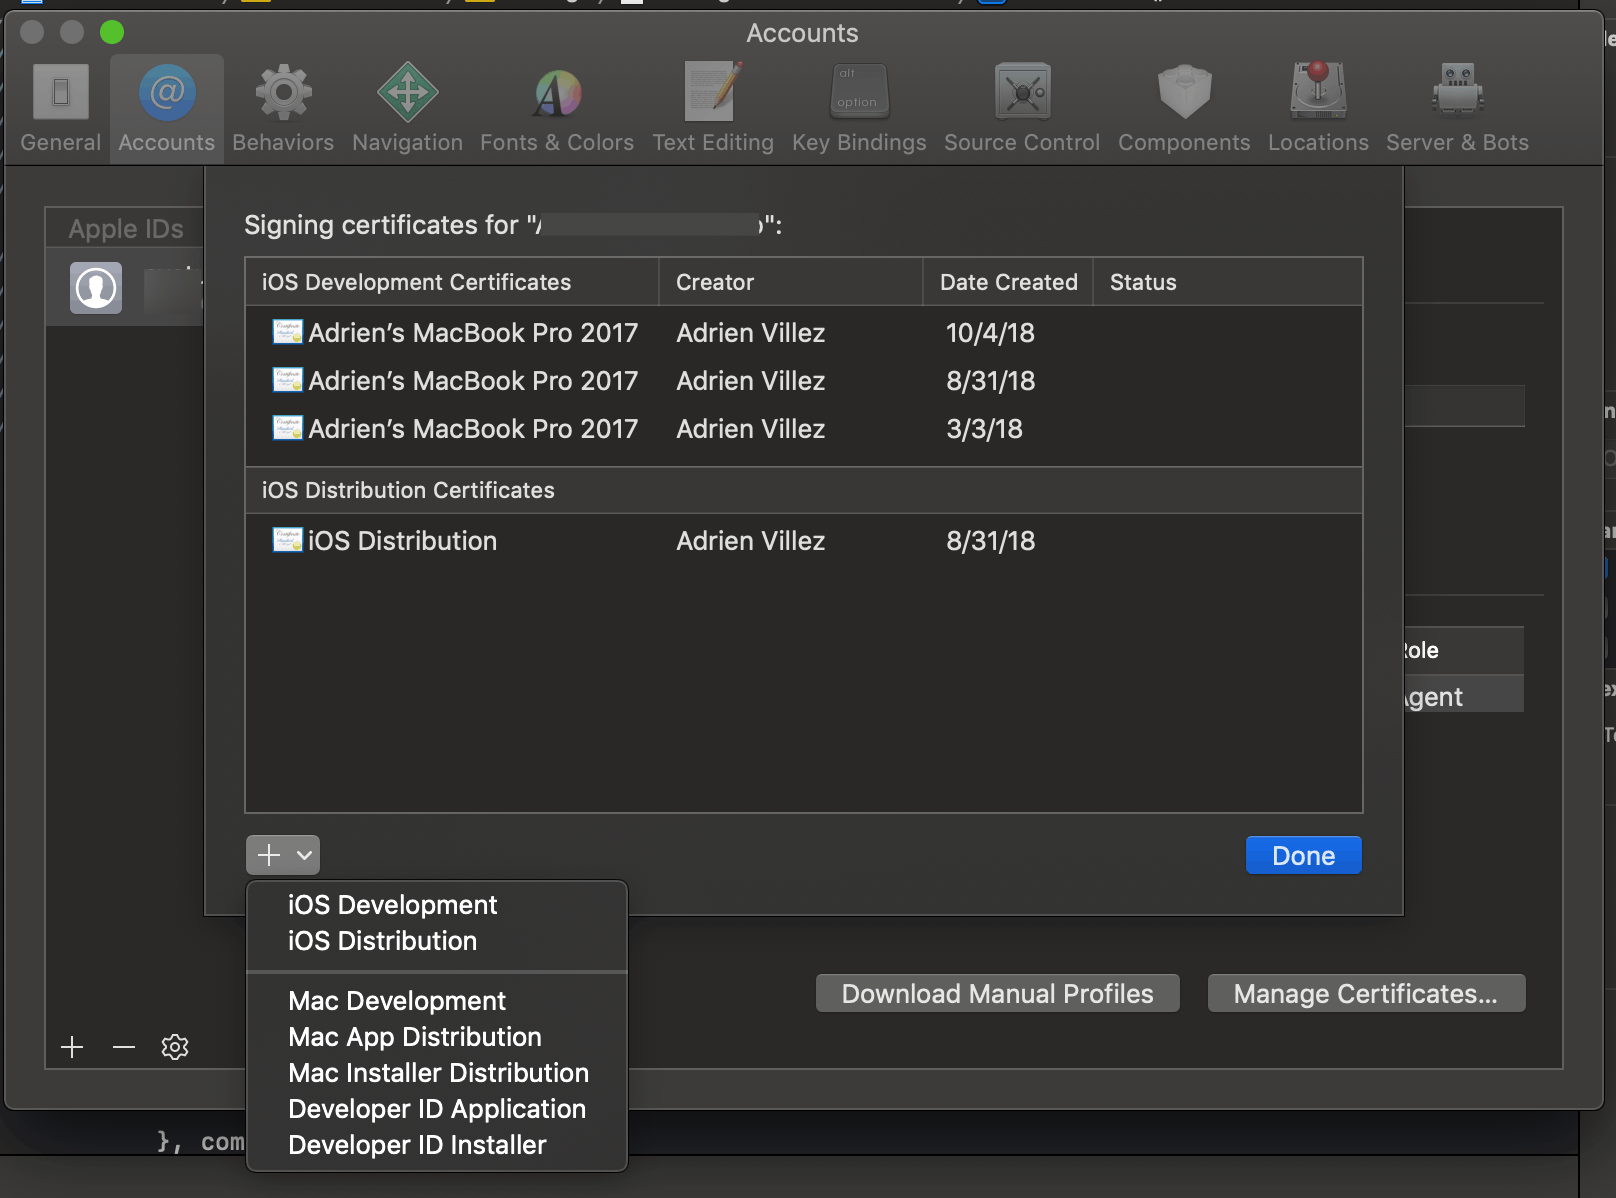
Once you’re signed in, click “Manage Certificate” and you’ll get to this panel where you can see your existing certificates and provisioning profiles.
If you click the “+” icon below the certificates pane, you can request a new iOS Development Certificate. Go ahead and do that now.
Also do the same thing and request an iOS Distribution Certificate as well.
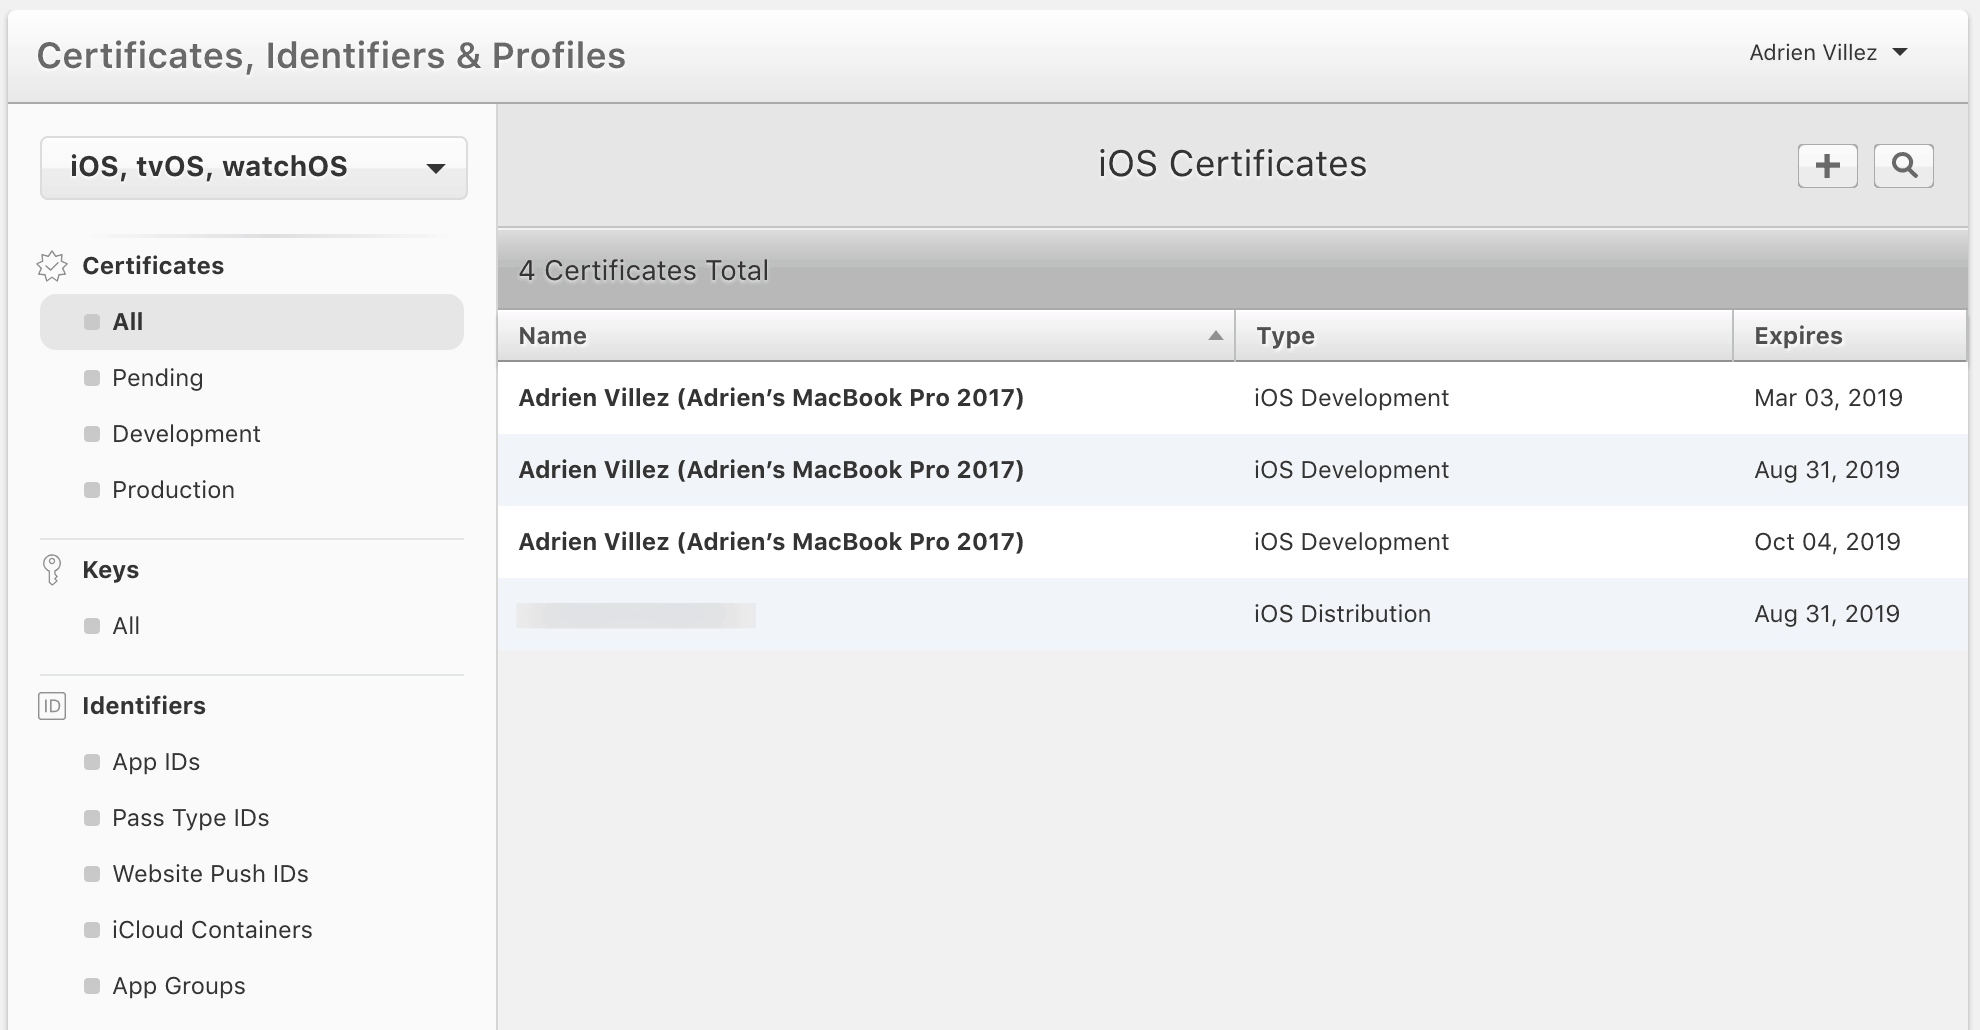
If you want to verify that they’re created, simply login to your your iOS provisioning portal and go to “Certificates”, you can see that it’s actually been created!
In the past, this used to be a lot more tedious and you’d have to go through multiple steps to generate the request on your computer and then upload it to Apple through the provisioning portal. It’s nice that it’s integrated and automated into Xcode 10 now!
Deploy the app to the device
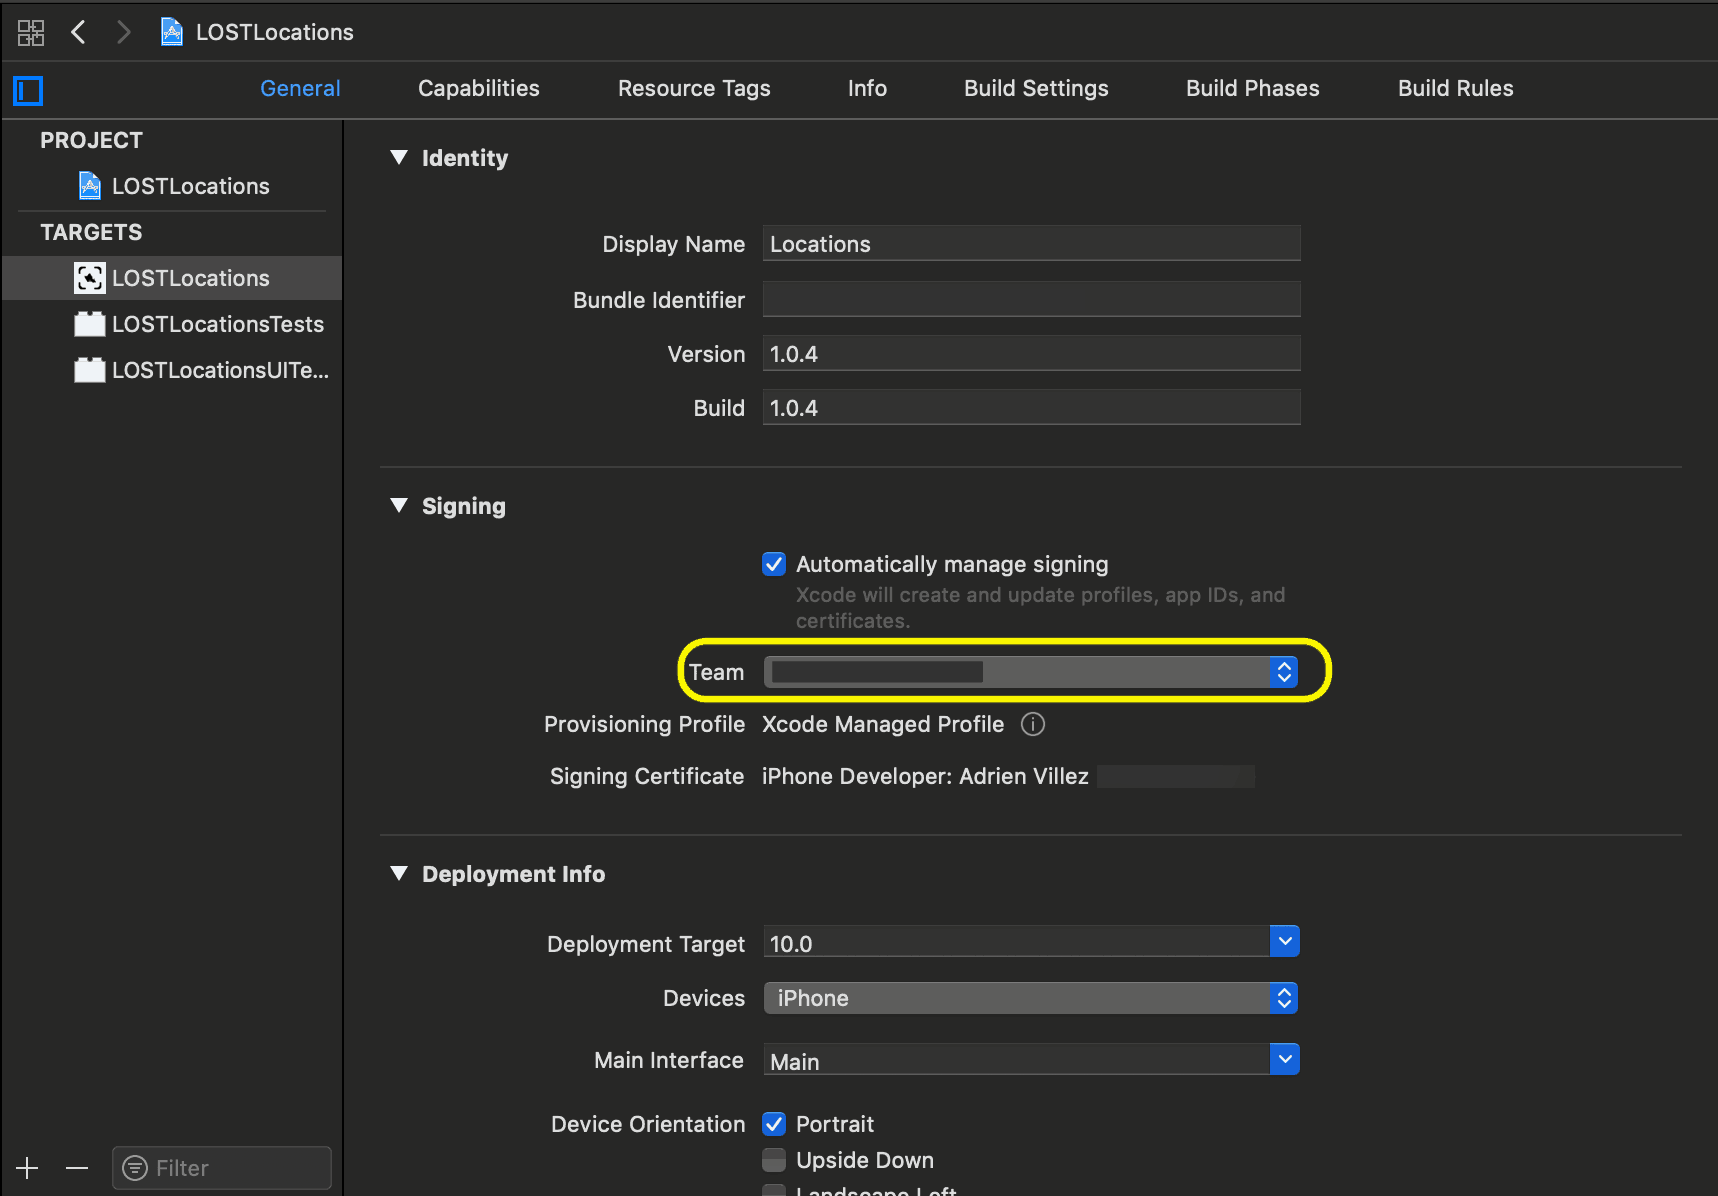
Before sending the app to the device, let’s make sure the project has a Team associated with the Signing option. The use of “Automatically manage signing” takes care of the job in 99% of the case so make sure that is enabled.
Now if everything is set up correctly, you’ll see the name of your phone in the list of deployable targets.
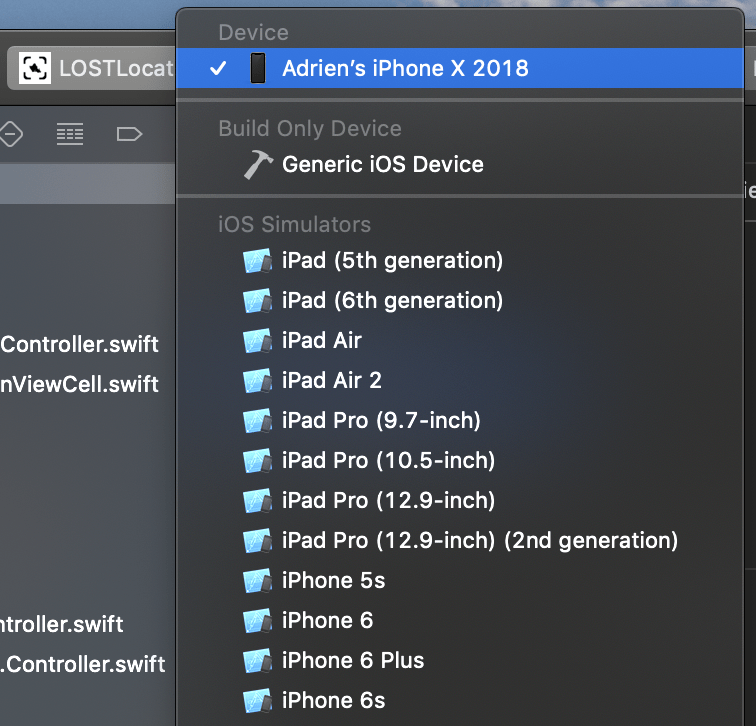
If you only see “iOS Device”, it won’t work. You’ll need to actually see the name of your device in the list.
Troubleshooting
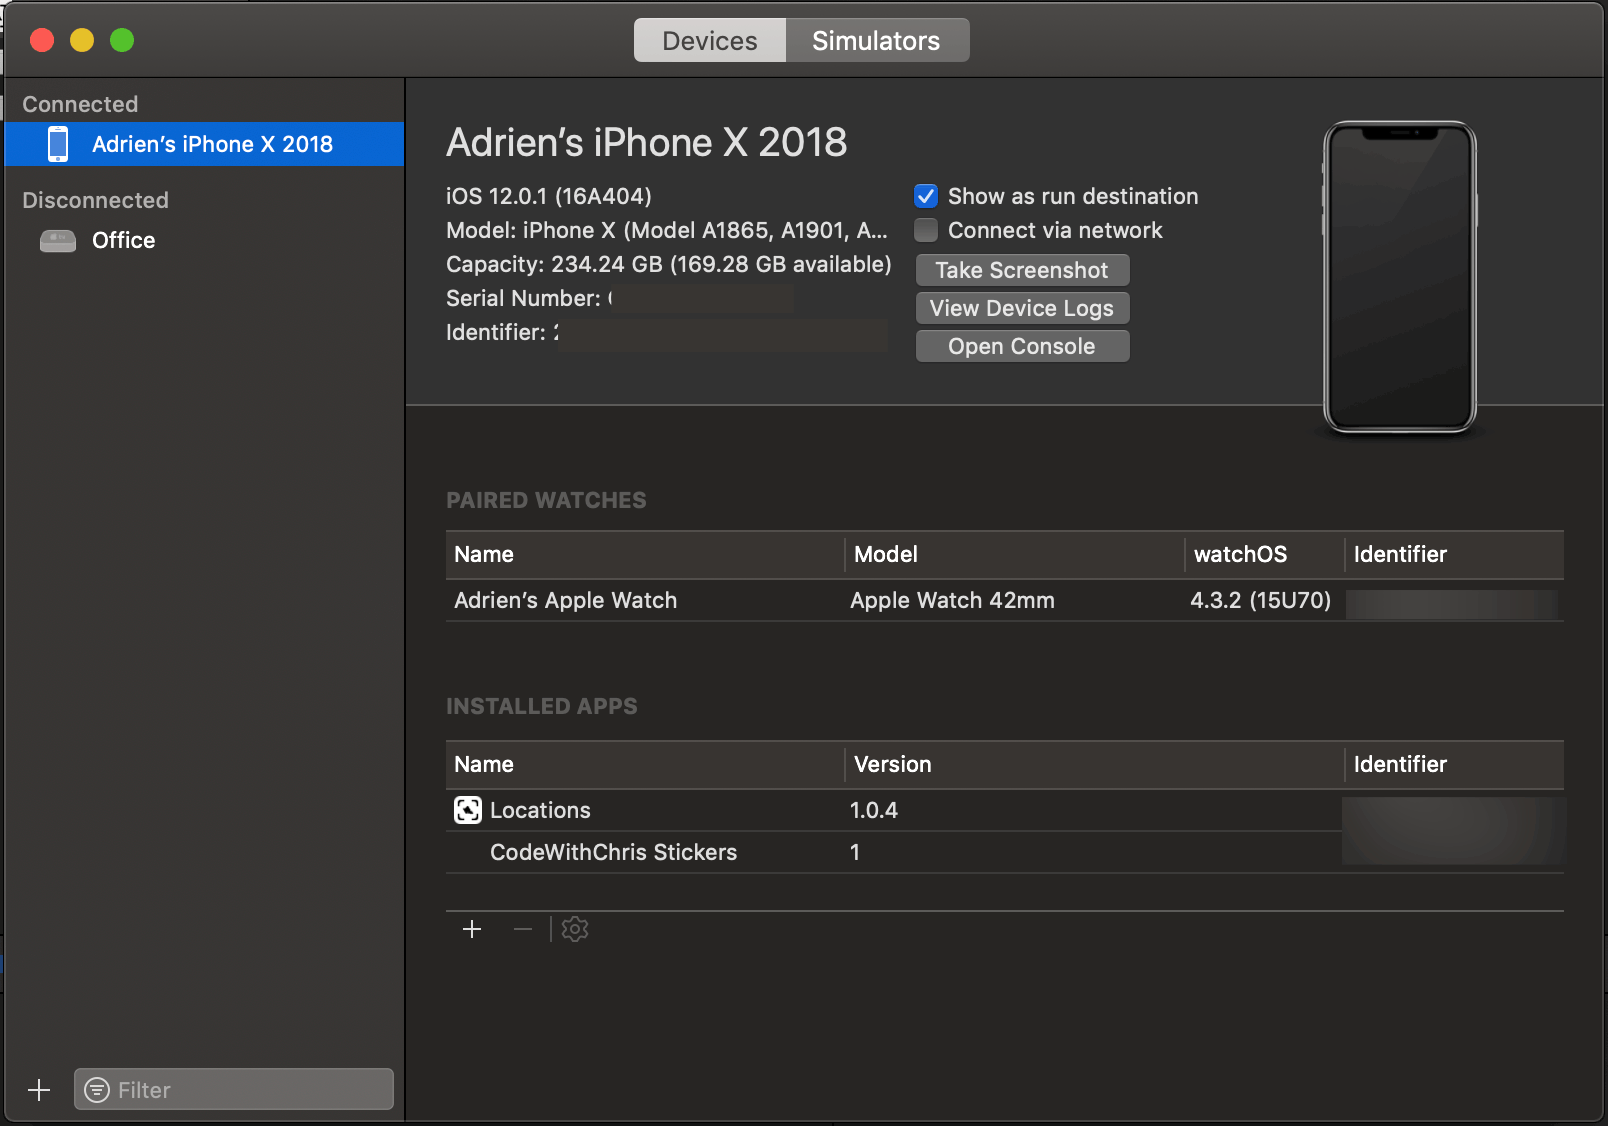
Don’t see your device name on the list of deployment targets? Make sure the USB of your device is well connected on both ends. If after checking the USB your device still does not show up in the list, let’s go check in the Devices and Simulators list of Xcode. You can find this window inside Window >> Devices and Simulators (Shift+Cmd+2).
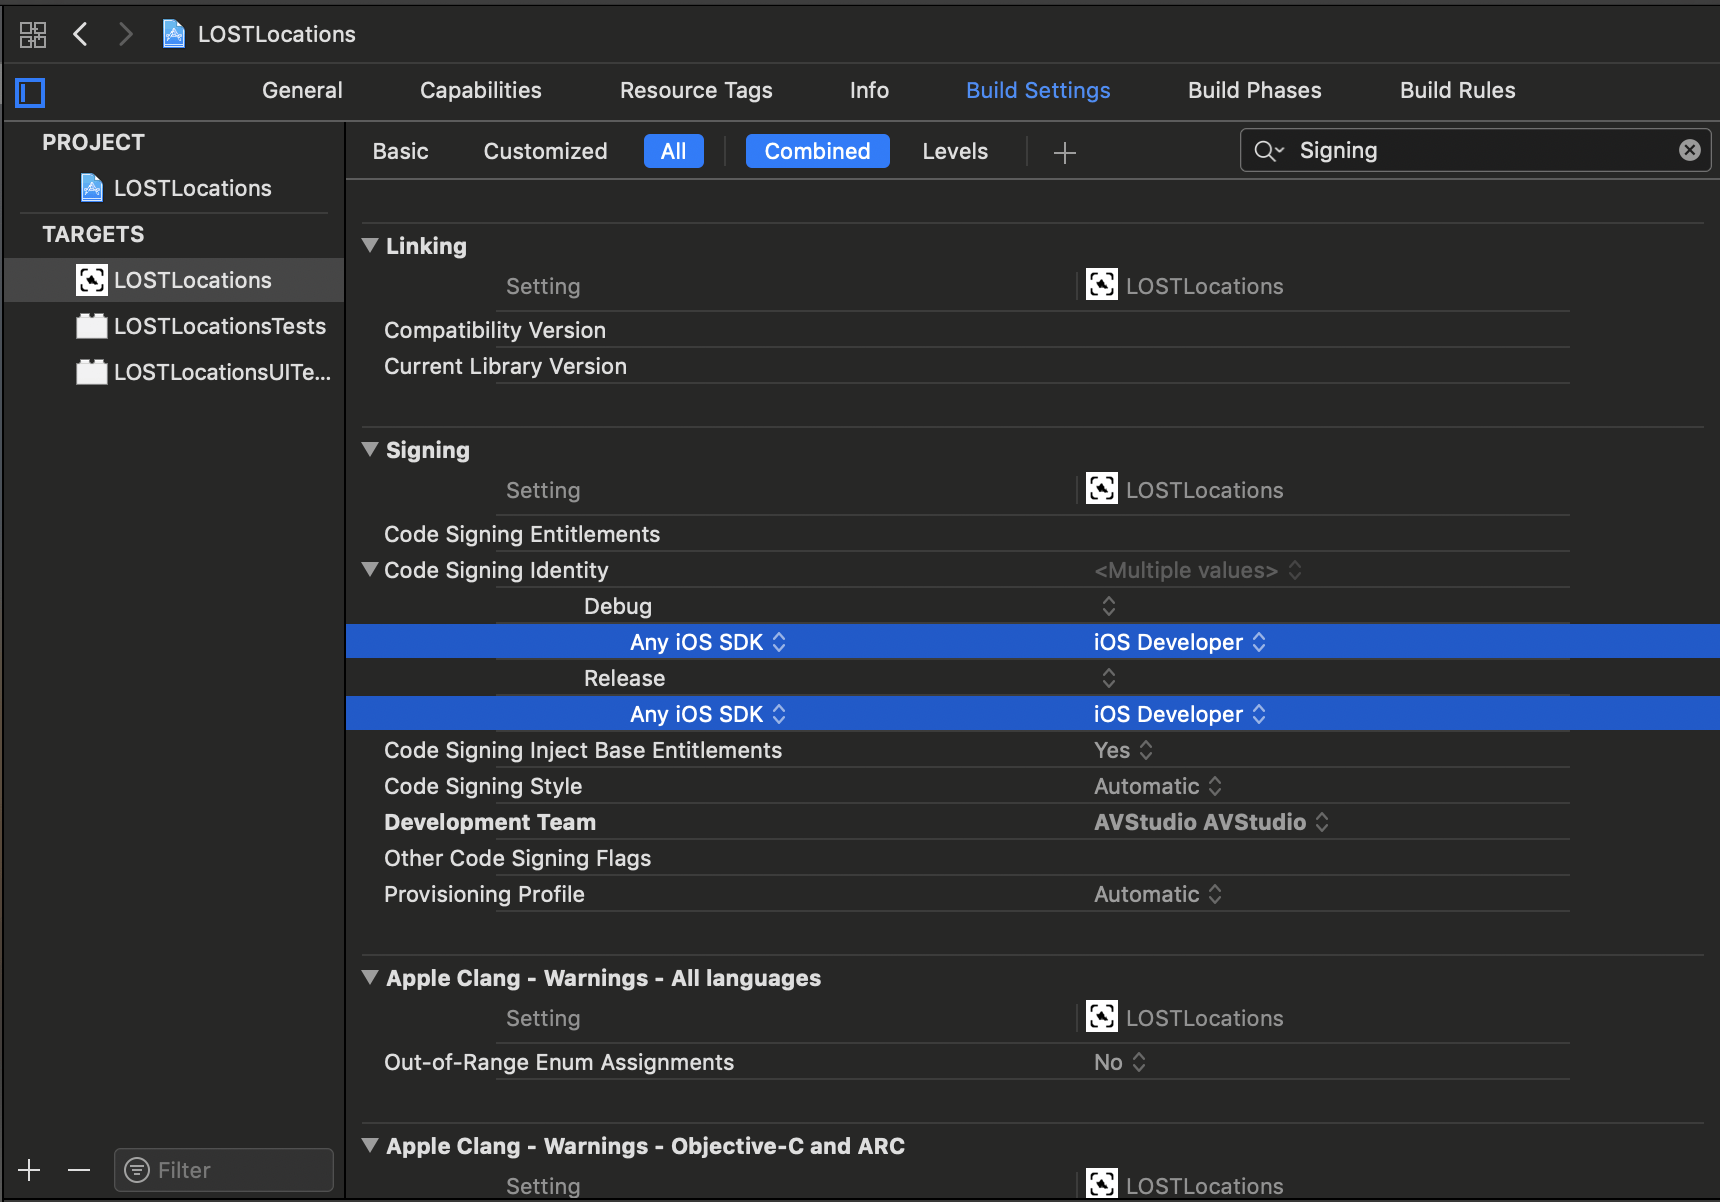
If Xcode gives your some error messages saying that the app is not set for iOS Development you have a couple of solutions:
(1) First is to check the Target’s Build Settings and search for “signing” and make sure that Code Signing Identity is set to iOS Developer.
(2) Second, it happens that your app might just not be on the Developer Portal. This means that The certificate that Xcode create (or not) doesn’t know about the App Bundle Identifier which looks like this:
com.MyName.MyAppName
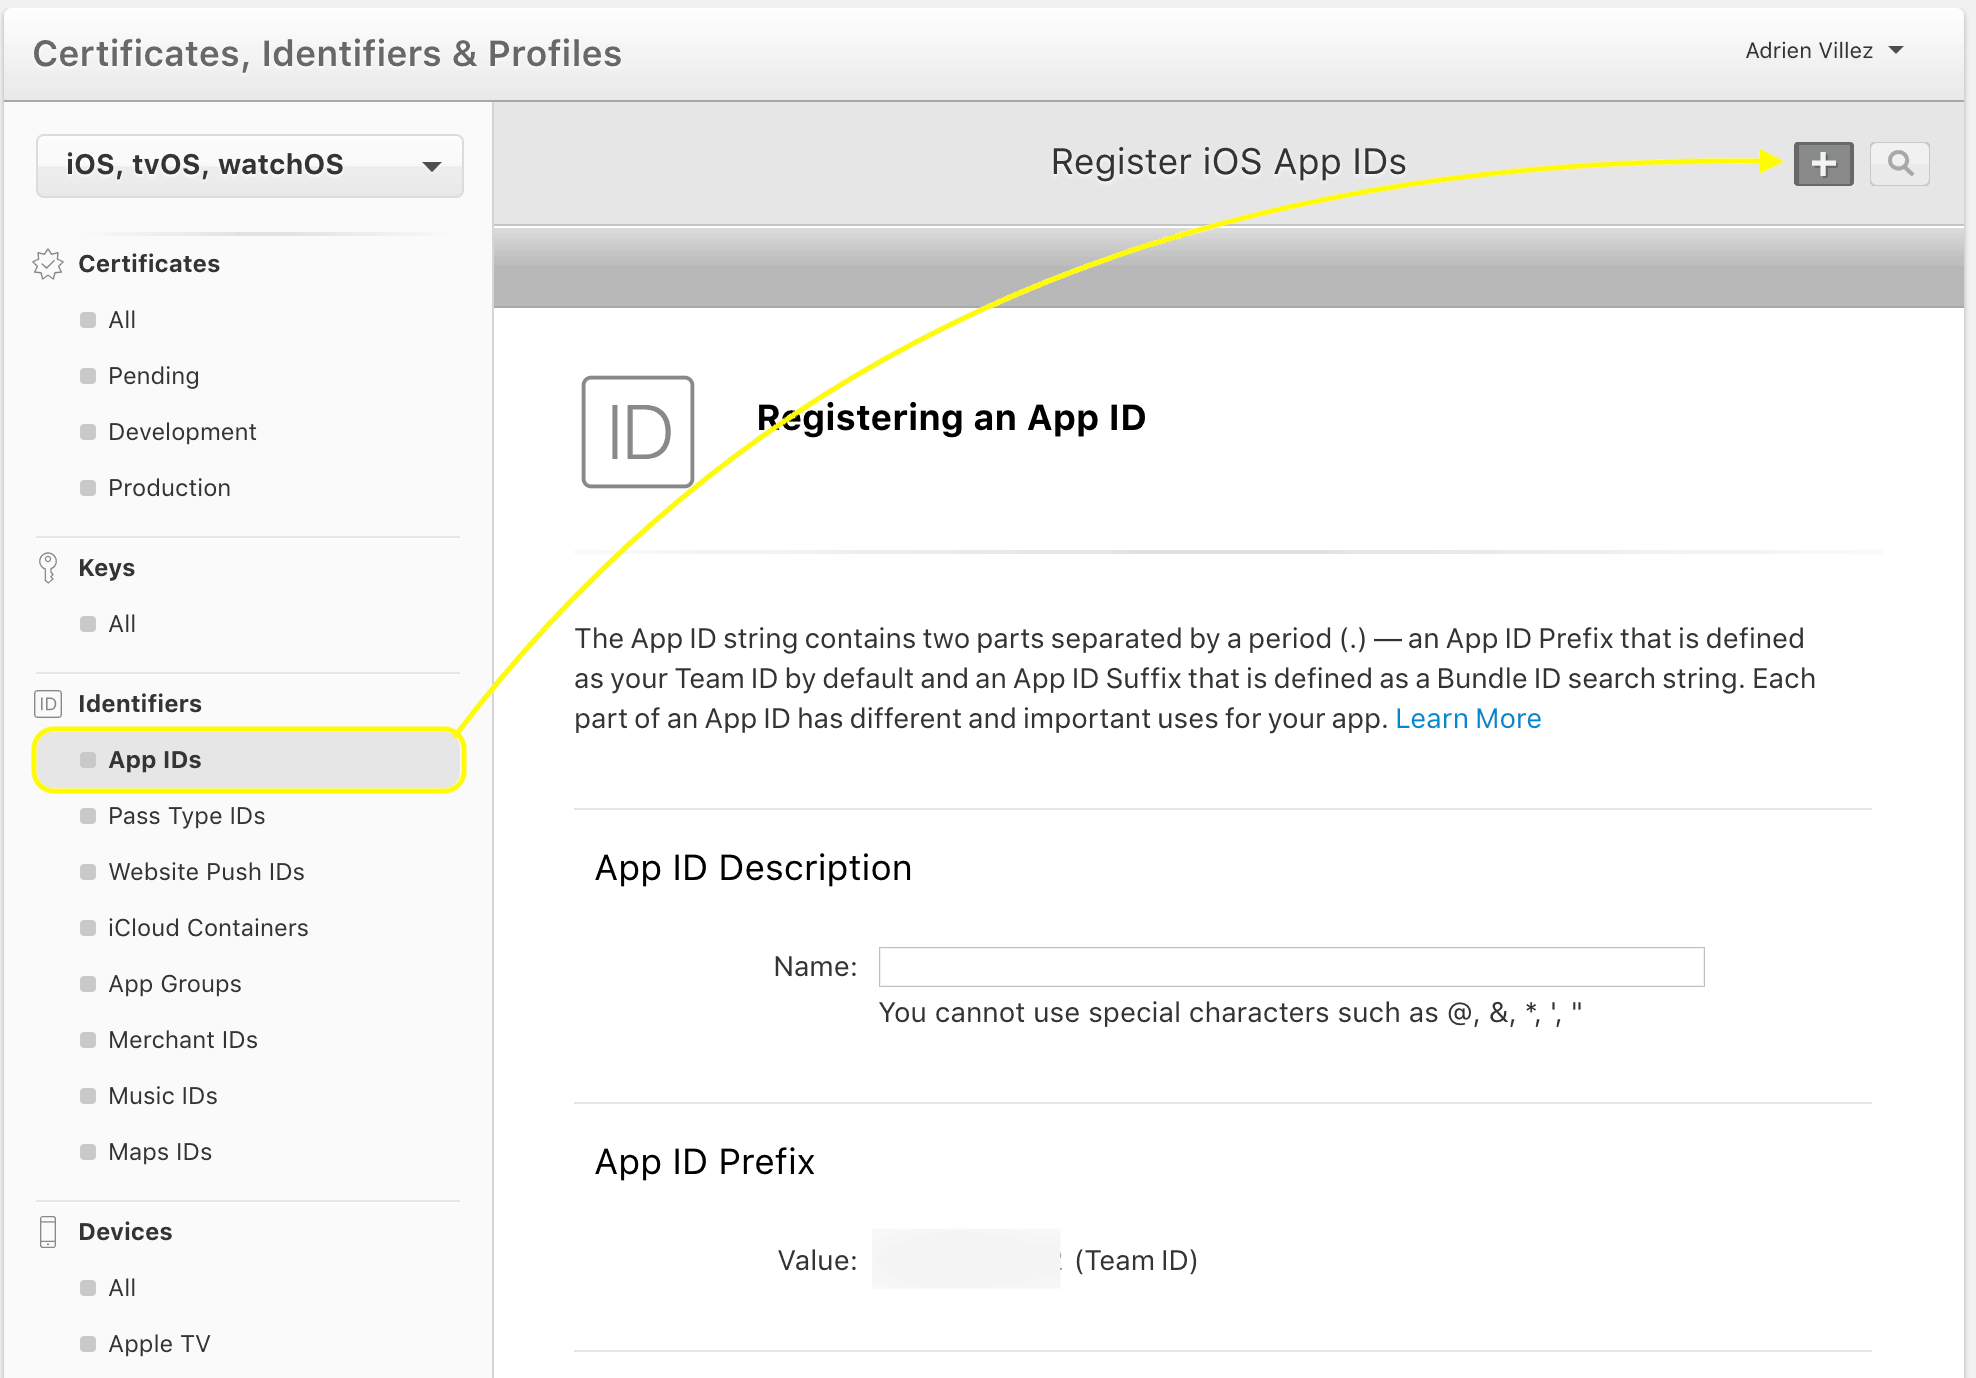
Go back to the Developer Portal and this time go to the App ID menu and select the “+” to create a new one. Give it a name to be able to identify it and scroll down until you find the Bundle ID field. If you select this field, there should be a list of app that currently are connected to your Xcode. Follow the steps to manually create this App ID.
Conclusion
It used to be pretty tedious to set up for the first time but today, Xcode 10 does 99% of the work for you and you probably didn’t even need to follow this whole article!
When you’re ready to publish your app, check out my tutorial that shows you how to submit and publish an app into the App Store.
Thanks for reading this far and if you found it helpful, please help me out by sharing it using the social buttons below. Thanks!
!!BONUS!! – Cut the Cord

When Xcode 9 came out, Apple gave us the ability to work on our apps while having more freedom with our iOS device. You do not have to keep your iPhone connected to your Mac via the USB port anymore! Yes, you can transfer your app to your phone and test it while walking around your office!
How does this work? Here is what you need to set this all up:
– Have a USB cable connected to your iPhone and Mac.
– Have both devices connected on the same WiFi network
– Have Xcode open.
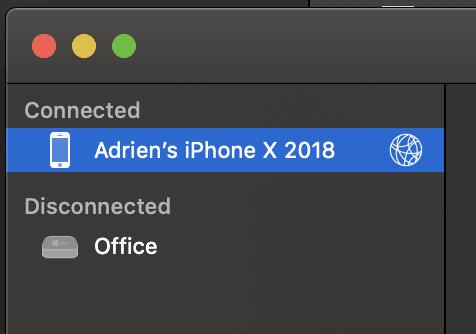
Ok, so first go to Window >> Devices and Simulators. If this is the first time you’ve plugged your phone into your Mac, select the “Trust” option when it pops up a dialog box. Once this is done, your phone should be listed in the list of Connected devices.
Now select the option next to the device image called [√] Connect via Network. Wait a couple of seconds and you should see a little network globe showing up next to your connected device. Disconnect the USB and voila!
Now enjoy the freedom of debugging your apps wirelessly while you spin around with your office chair! 🙂