
This article is the third chapter of my guide on Building Apps With MySQL and WordPress.
This guide shows you how to make three different MySQL/Wordpress powered apps that all leverage the benefit of having a web hosting account.
The first chapter shows you how to sign up for a hosting account.
The second chapter shows you how to set up the MySQL database and create the first app that will read data from it.
In this chapter, I’ll show you how to create a WordPress site and create a companion iPhone app that will display your sites contents.
TABLE OF CONTENTS
1. How to create a wordpress website
1.1 Install WordPress via MOJO
1.2 Making some posts!
2. How to make a companion iPhone app that displays the content from your website
2.1 Creating the Xcode project
2.2 Connecting the table view element as an IBOutlet
2.3 Setting up the model for the data
2.4 Parsing the RSS feed
2.5 Populating the table view
2.6 Displaying items in a UITableView
2.7 Adding a second view controller
2.8 Creating a custom class for the detailed view controller
2.9 Adding a UIWebView to the detail view controller
2.10 Handling table view selection and pass data through the segue
1. How to create a wordpress website
We’re ready to create our second app! The next two are going to be much easier than what you just did in the first app so hang in there!
With this iPhone app, we’re going to do a scenario where you may have a website and you want a companion iPhone app so that your visitors can keep up to date with the latest content from your site. Essentially, it’s going to be an iPhone RSS reader app so you can apply the same concept to other websites, not just ones that you own!
It’s actually very easy to both set up a website and an app that will read the content from it so let’s get started by first creating a new WordPress site which will literally take you less than 5 minutes to set up.
You’ll get a discount, I’ll receive a bonus at no extra cost to you and this supports my efforts in publishing free tutorials. Thank you!
1.1 Install WordPress via MOJO
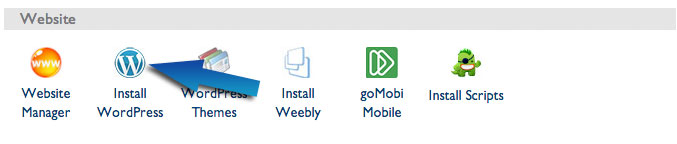
Start off by going to your Bluehost control panel and looking for this icon:
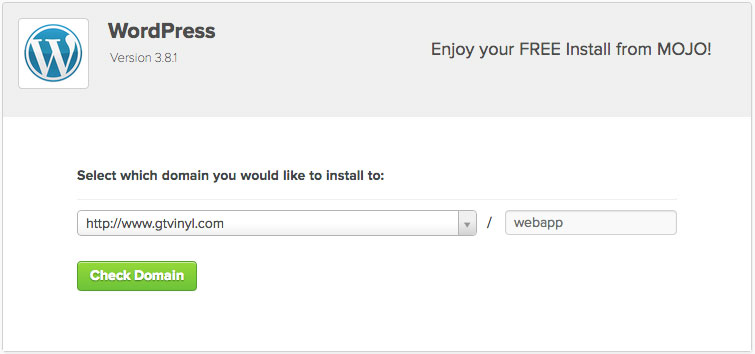
Click it and you’ll go into a loading screen for a few seconds. Then you’ll be presented with this WordPress installation menu. Click “Start a brand new install”.

Next, select the domain that you registered and click “Check domain”.
On the next screen, you can configure some options like the username and email that you want associated with the admin account. This stuff can be changed later so you don’t have to worry too much about it. You’ll want to check “automatically create a new database for this installation”.
Then after you click “Install Now”, you’ll see a progress bar at the top. When it’s done, click the “View Credentials” link. Yours might be a big green bar.
The confirmation page will tell you your username and password.
Before you login to the back end, just visit your domainname.com and you should see your brand new WordPress site! Congratulations!
Now go to http://yourdomain.com/wp-admin and you’ll see a login screen which you can use to go into your WordPress backend.
After you login, hover over the “Posts” menu item on the left hand side and in the floating menu that pops out, click “Add New”.
Now fill in a title and body. You can leave the permalink alone because it’ll set itself.
When you’re satisfied with your post, click the blue “Publish” button on the right hand side.
Repeat this and add one or two more posts so that we have a few more items to display in our app! If you visit the homepage of your site again, you’ll actually see your new posts on the front page.
2. How to make a companion iPhone app that displays the content from your website
In this section, we’re going to create an iPhone app that will read the content we created on our WordPress website.
We’re going to do this by making the iPhone app download the RSS feed that’s exposed by our website.
If you go to http://yourdomain.com/rss you’ll see an RSS feed that lists all of your posts. The iPhone app will download this feed, parse the content and display it in the app interface.
2.1 Creating the Xcode project
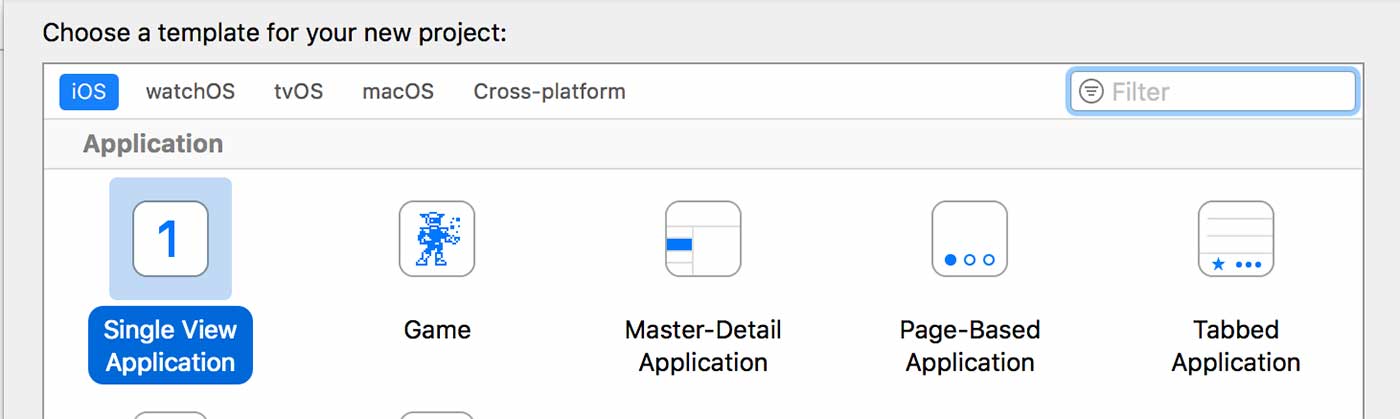
Start off by creating a new “Single View Application” Xcode project.
Next, go into your Main.Storyboard and we’re going to add the tableview and table cell of our main article list, our detail view controller for reading the full article and some UIElements in the detail view to display images and text.
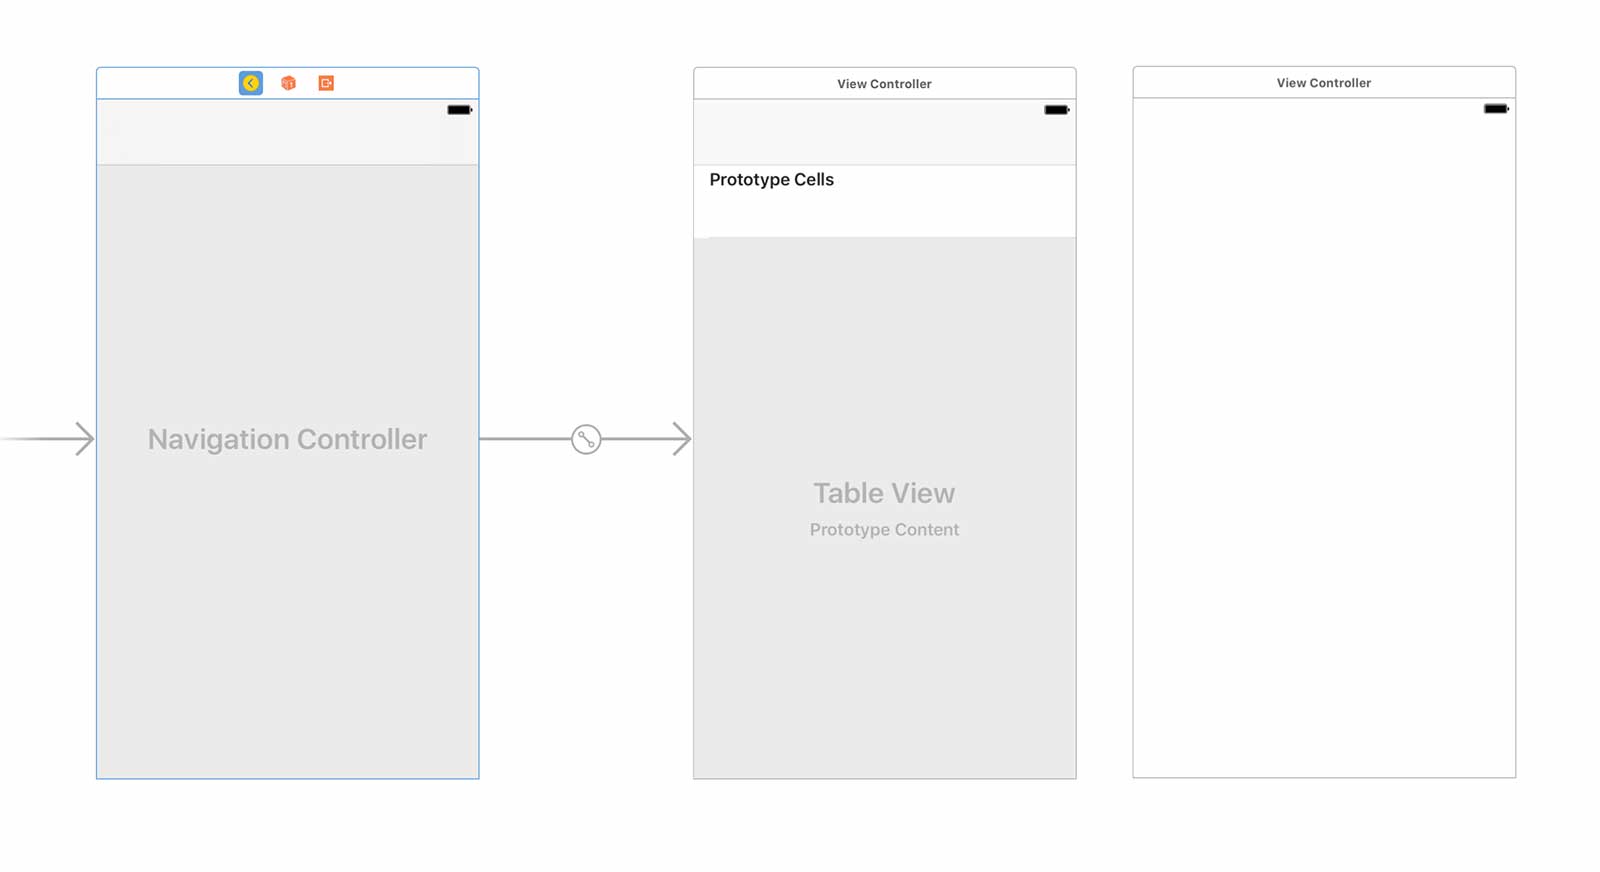
Before we do any of that, let’s start by embedding our single view controller in a navigation controller so that we can go to the next screen.
You need to make sure your view controller is highlighted (a blue outline will appear around it) before you can go to Editor->Embed in->Navigation Controller.

Once you do that, you’ll see a Navigation Controller appear in your storyboard.
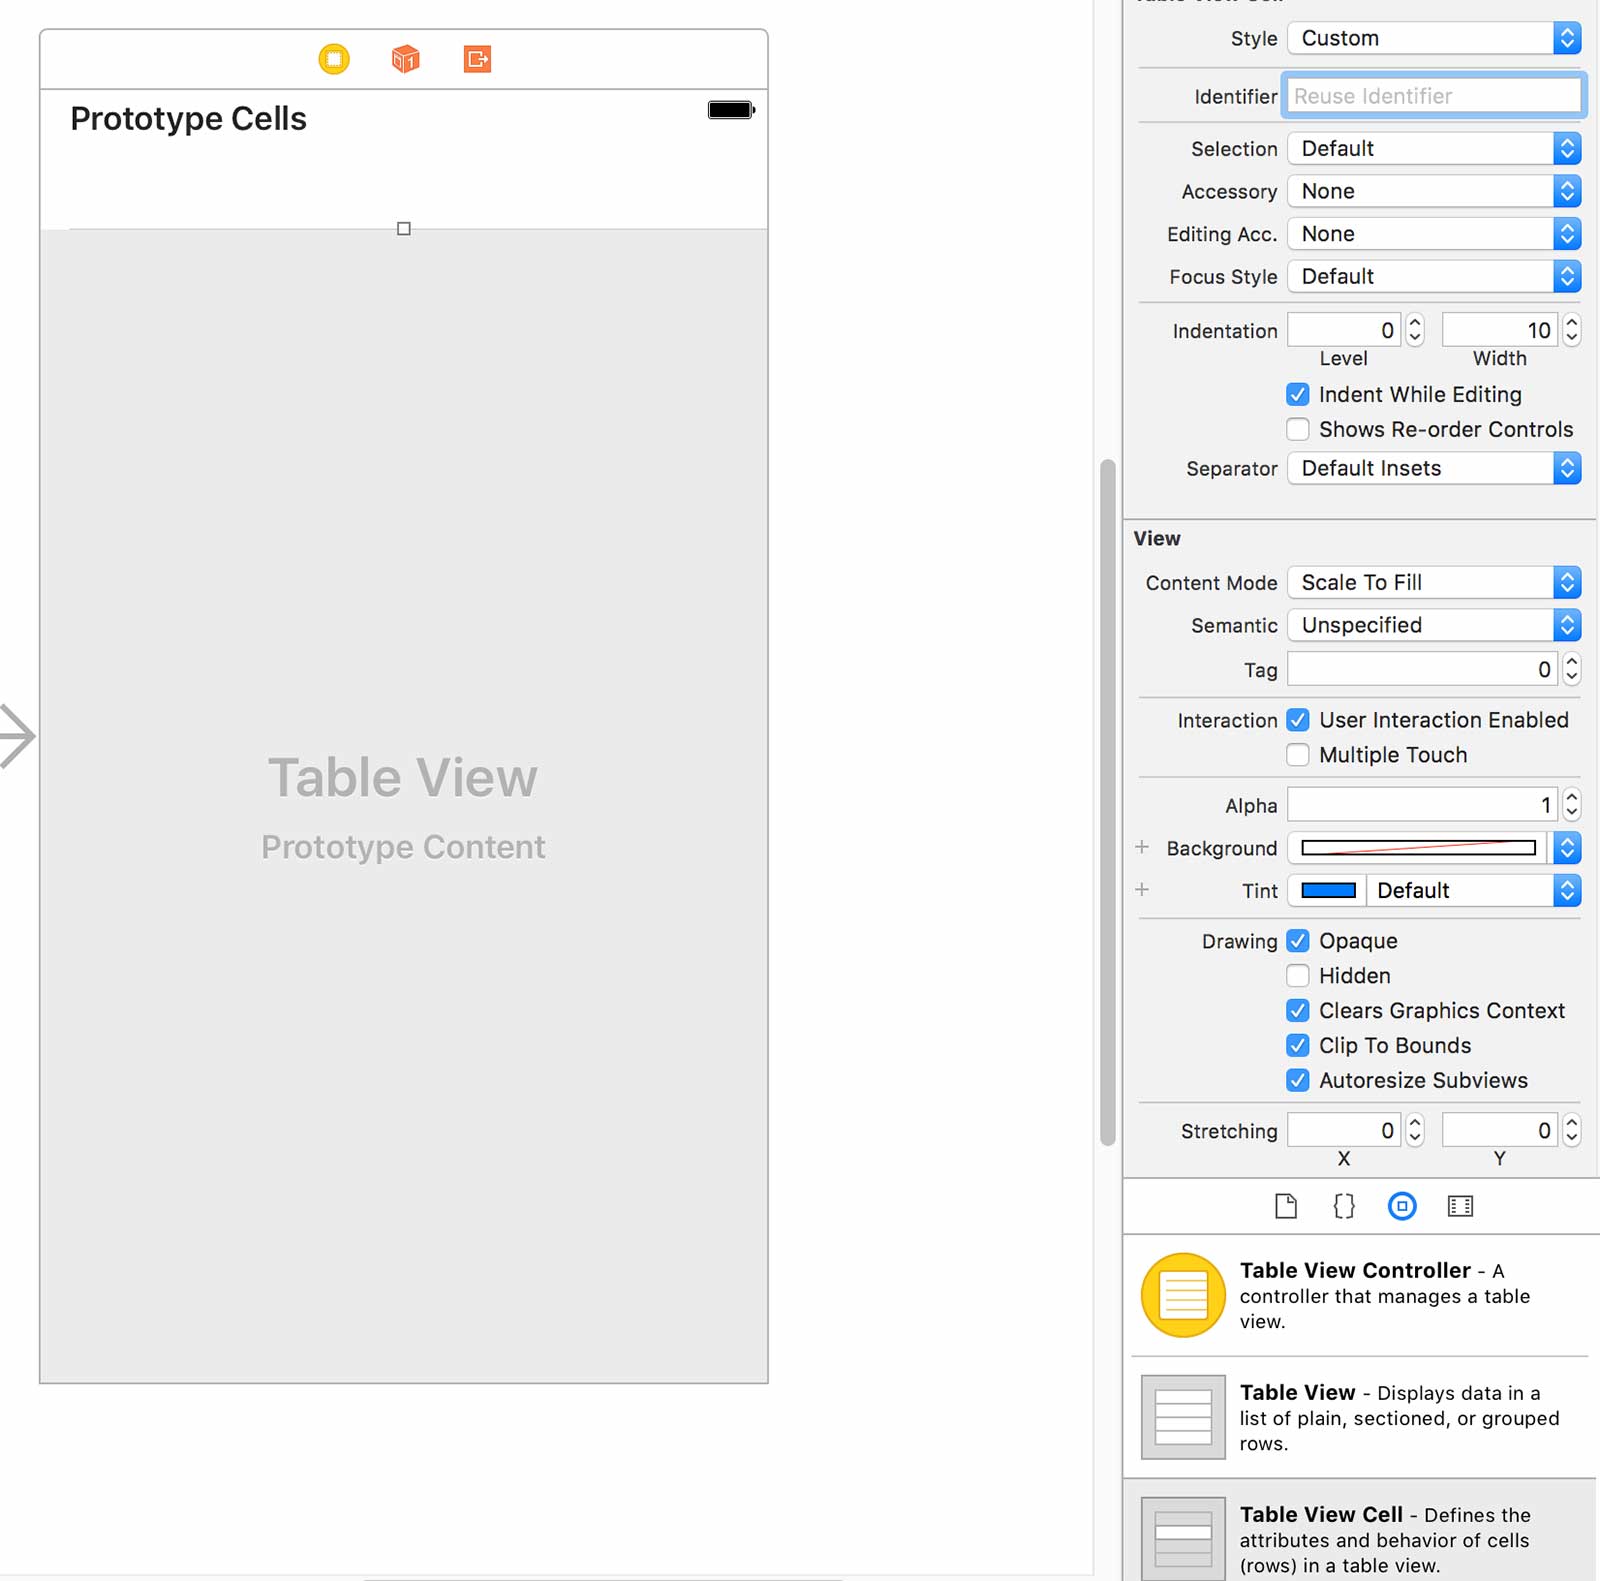
Next in the object library, search for tableview and both the table view element and table view cell element will show up. If it doesn’t, make sure the “objects” tab is selected.
Drag the table view element onto your view controller and if you hover over it for a second before dropping it, it’ll actually expand to fill the entire view.
Note: if you can’t seem to drag and drop elements onto your view, it may be because you’re in zoomed out view. Double click outside of your view controller on some empty space to zoom back in. Now you can add elements onto your view.
Next, drag and drop the table view cell on top of the table view. In the end, you’ll have something like this:
2.2 Connecting the table view element as an IBOutlet
We want to expose this table view to the ViewController code so that when we write our Objective-C code, we can refer to that table view.
What you do is open up assistant editor view (it’s the tuxedo looking icon in the upper right) and on the left pane, you want the storyboard and on the right pane, you want ViewController.h.
Then you’re going to hold down control and click and drag over to the right pane under the @interface tag.
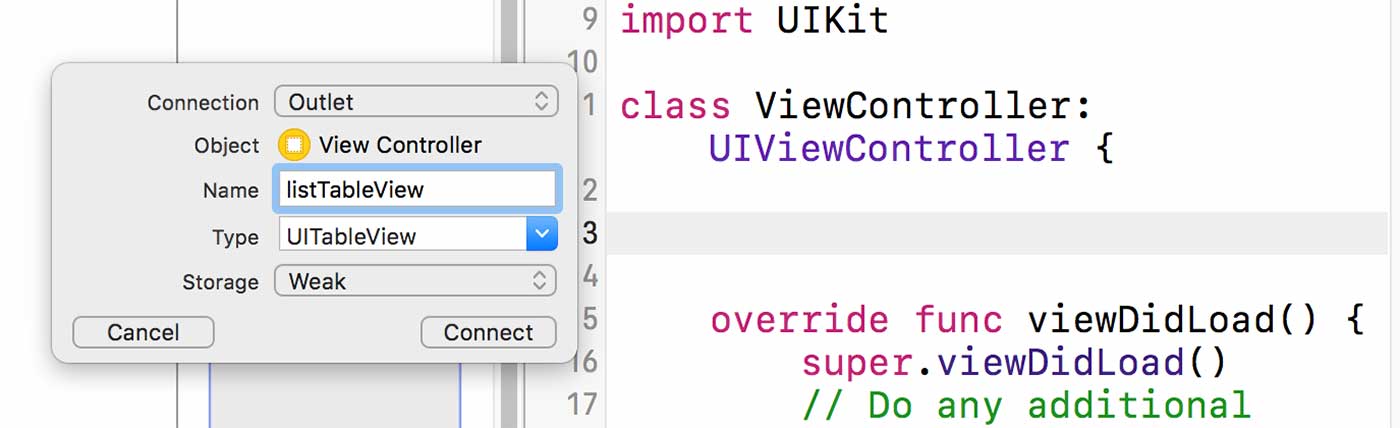
When you let go, you can name your outlet listTableView. You’ll end up with something like this in your ViewController.h:
@interface ViewController : UIViewController

@property (weak, nonatomic) IBOutlet UITableView *listTableView;

@end
2.3 Setting up the model for the data
Next, we’re going to set up a model class to take care of the data so that we’re not doing it in the view controller. Separating the responsibilities like this is a good practice and follows the model view controller pattern.
In your Xcode project, create a new class called HomeModel.
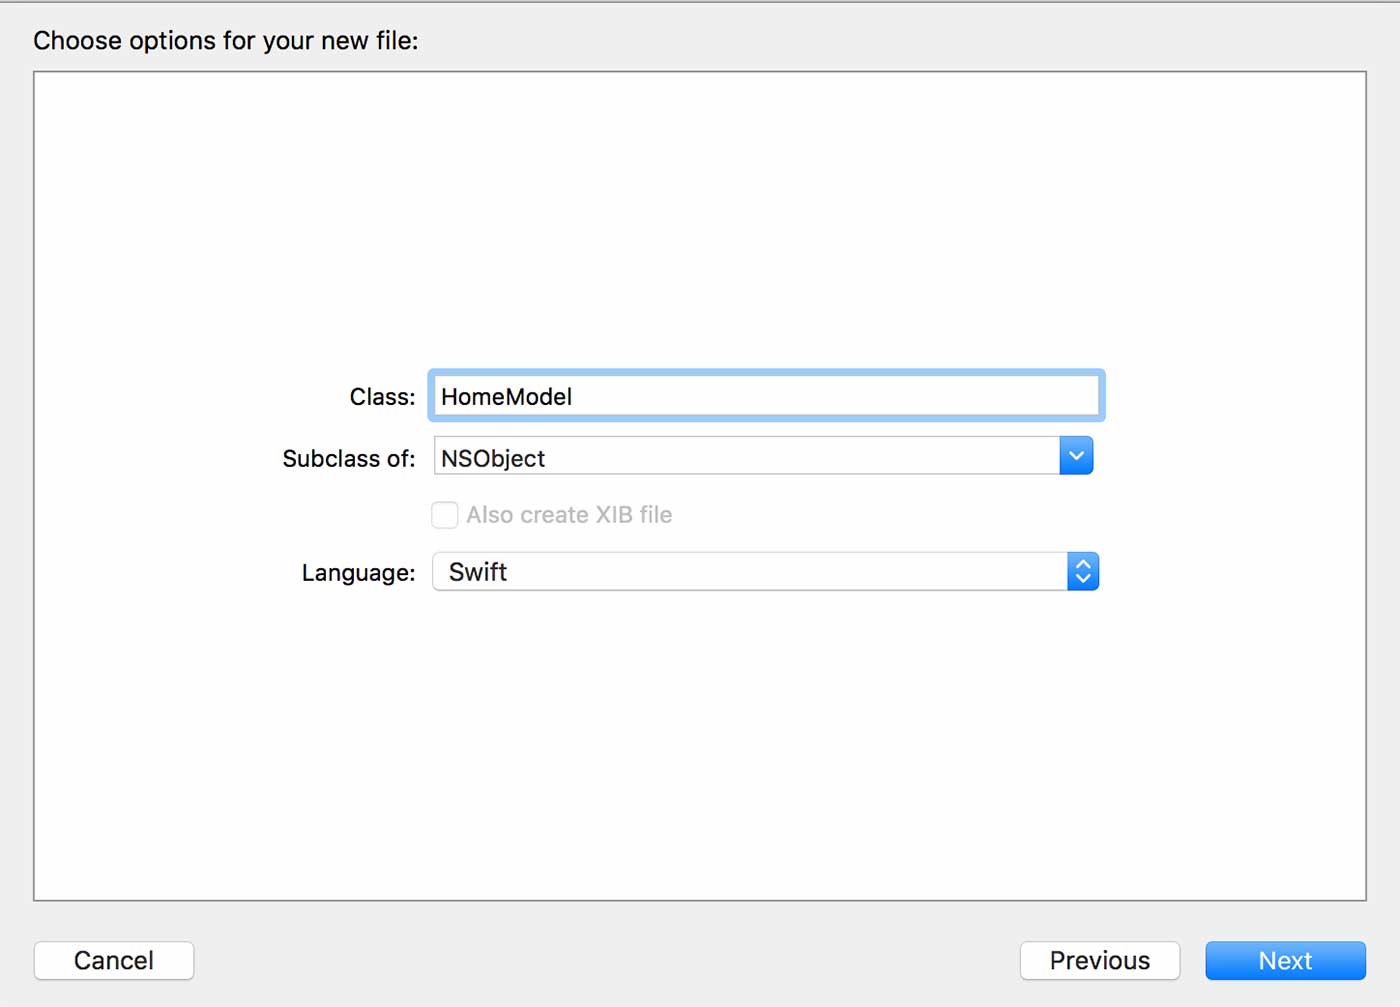
In HomeModel.h, change the code to look like this:
@protocol HomeModelProtocol
- (void)itemsDownloaded:(NSArray *)items;

@end

@interface HomeModel : NSObject

@property (nonatomic, weak) id delegate;

- (void)downloadItems;

@end
In line 11, we’re declaring a method that will trigger the download of the RSS feed and parsing of the items.
In lines 1-5 and line 9, we’re implementing the delegate pattern so that our ViewController can get notified of when the items are downloaded after calling the downloadItems method.
Then in HomeModel.m, we need to implement that method like this:
@implementation HomeModel

- (void)downloadItems
{

}

@end
Next, let’s create a new class to represent the items we’re going to be displaying. Create a new class called FeedItem that subclasses NSObject.
In FeedItem.h, add the following properties:
#import <Foundation/Foundation.h>

@interface FeedItem : NSObject

@property (nonatomic, strong) NSString *title;
@property (nonatomic, strong) NSString *url;

@endI’m going to be using Michael’s feed parser which is located here on GitHub.
First download the project. You want to look for the “Download ZIP” button that’s located on the right hand sidebar, near the bottom.
After you download the project, unzip it and find the “Classes” folder. We’re going to add this folder into our Xcode project.
First, I created a new group in my Xcode project called MWFeedParser so I can keep the feed parser files separated from my other classes. Then I dragged the “Classes” folder from my finder window into the MWFeedParser group I created in Xcode project.
You’ll get a pop-up and you want to make sure that “Copy items into destination group’s folder” is checked. This is copy the files into your project folder on you computer so you can keep all your project files in one place on your computer.
Before we can use this feed parser class in our HomeModel, we need to do 5 things:
1. We need to import the feed parser class so that we can use it.
2. We need to import the FeedItem class.
3. We’re going to conform to the MWFeedParserDelegate protocol so that we can handle events from the parser.
4. We’re also going to declare a new property to reference the parser object.
5. Finally, we’re going to declare a property array to add the parsed items to.
Your HomeModel.h file will look like this:
#import <Foundation/Foundation.h>
#import "MWFeedParser.h"
#import "FeedItem.h"

@protocol HomeModelProtocol

- (void)itemsDownloaded:(NSArray *)items;

@end

@interface HomeModel : NSObject

@property (nonatomic, weak) id delegate;
@property (nonatomic, strong) MWFeedParser *feedParser;
@property (nonatomic, strong) NSMutableArray *feedItems;

- (void)downloadItems;

@end
Now in HomeModel.m, add the code so it looks like the below:
#import "HomeModel.h"

@implementation HomeModel

- (void)downloadItems
{
    // Create feed parser and pass the URL of the feed
    NSURL *feedURL = [NSURL URLWithString:@"https://codewithchris.wpengine.com/rss"];
    self.feedParser = [[MWFeedParser alloc] initWithFeedURL:feedURL];

    // Delegate must conform to 'MWFeedParserDelegate'
    self.feedParser.delegate = self;
    // Parse the feeds info (title, link) and all feed items
    self.feedParser.feedParseType = ParseTypeFull;

    // Connection type
    self.feedParser.connectionType = ConnectionTypeAsynchronously;

    // Begin parsing
    [self.feedParser parse];
}

// Called when data has downloaded and parsing has begun
- (void)feedParserDidStart:(MWFeedParser *)parser
{
    self.feedItems = [[NSMutableArray alloc] init];
}

// Provides info about a feed item
- (void)feedParser:(MWFeedParser *)parser didParseFeedItem:(MWFeedItem *)item
{
    FeedItem *feedItem = [[FeedItem alloc] init];
    feedItem.title = item.title;
    feedItem.url = item.link;

    [self.feedItems addObject:feedItem];
}

// Parsing complete or stopped at any time by 'stopParsing'
- (void)feedParserDidFinish:(MWFeedParser *)parser
{
    if (self.delegate)
    {
        [self.delegate itemsDownloaded:self.feedItems];
    }
}

// Parsing failed
- (void)feedParser:(MWFeedParser *)parser didFailWithError:(NSError *)error
{

}

@end
Inside the downloadItems method, we’re creating a new MWFeedParser object and passing in our websites RSS feed. Don’t forget to change this line to your own feed!
Then we’re setting this HomeModel object as the delegate for the parser so that we can implement its delegate methods and be notified when it has finished downloading. Finally, we’re kicking off the download process.
We go back to ViewController.h and import the HomeModel header file and specify that the ViewController class conforms to the HomeModelProtocol that we declared in HomeModel.h.
#import <UIKit/UIKit.h>
#import "HomeModel.h"

@interface ViewController : UIViewController
@property (weak, nonatomic) IBOutlet UITableView *listTableView;

@end
Line 2 is where we import HomeModel.h so that the ViewController class knows about the HomeModel class. By doing this, the ViewController class must now implement the methods listed in that protocol.
So let’s go to ViewController.m and implement this method as well as set up more plumbing.
#import "ViewController.h"

@interface ViewController ()
{
    HomeModel *_homeModel;
    NSArray *_feedItems;
}
@end

@implementation ViewController

- (void)viewDidLoad
{
    [super viewDidLoad];
    // Do any additional setup after loading the view, typically from a nib.
    // Create array object and assign it to _feedItems variable
    _feedItems = [[NSArray alloc] init];

    // Create new HomeModel object and assign it to _homeModel variable
    _homeModel = [[HomeModel alloc] init];

    // Set this view controller object as the delegate for the home model object
    _homeModel.delegate = self;

    // Call the download items method of the home model object
    [_homeModel downloadItems];
}

- (void)didReceiveMemoryWarning
{
    [super didReceiveMemoryWarning];
    // Dispose of any resources that can be recreated.
}

-(void)itemsDownloaded:(NSArray *)items
{
    // This delegate method will get called when the items are finished downloading

    // Set the downloaded items to the array
    _feedItems = items;
}

@end
Broadly speaking, the ViewController will create a new HomeModel object, set itself as the delegate, call the download method and then receive the items when it’s ready.
2.6 Displaying items in a UITableView
In order to populate the table view with our downloaded items, we need our ViewController class to conform to some protocols of the UITableView class.
So in ViewController.h, conform to some more protocols like this:
@interface ViewController : UIViewController <HomeModelProtocol, UITableViewDelegate, UITableViewDataSource>Before we implement the protocol methods in the .m file, go to Main.Storyboard, highlight the Table Cell that we added and on the right side inspector pane, switch tabs until you see an “identifier” box. In that box, type in BasicCell. You’ll see why in a second.
Then in ViewController.m, add the following tableview delegate methods and code:
#import "ViewController.h"

@interface ViewController ()
{
    HomeModel *_homeModel;
    NSArray *_feedItems;
}
@end

@implementation ViewController

- (void)viewDidLoad
{
    [super viewDidLoad];
    // Do any additional setup after loading the view, typically from a nib.
    // Set this view controller object as the delegate and data source for the table view
    self.listTableView.delegate = self;
    self.listTableView.dataSource = self;

    // Create array object and assign it to _feedItems variable
    _feedItems = [[NSArray alloc] init];

    // Create new HomeModel object and assign it to _homeModel variable
    _homeModel = [[HomeModel alloc] init];
    // Set this view controller object as the delegate for the home model object
    _homeModel.delegate = self;

    // Call the download items method of the home model object
    [_homeModel downloadItems];
}

- (void)didReceiveMemoryWarning
{
    [super didReceiveMemoryWarning];
    // Dispose of any resources that can be recreated.
}

-(void)itemsDownloaded:(NSArray *)items
{
    // This delegate method will get called when the items are finished downloading

    // Set the downloaded items to the array
    _feedItems = items;

    // Reload the table view
    [self.listTableView reloadData];
}

#pragma mark Table View Delegate Methods
- (NSInteger)tableView:(UITableView *)tableView numberOfRowsInSection:(NSInteger)section
{
    // Return the number of feed items (initially 0)
    return _feedItems.count;
}

- (UITableViewCell *)tableView:(UITableView *)tableView cellForRowAtIndexPath:(NSIndexPath *)indexPath
{
    // Retrieve cell
    NSString *cellIdentifier = @"BasicCell";
    UITableViewCell *myCell = [tableView dequeueReusableCellWithIdentifier:cellIdentifier];
    // Get the listing to be shown
    FeedItem *item = _feedItems[indexPath.row];

    // Get references to labels of cell
    myCell.textLabel.text = item.title;

    return myCell;
}

@end
By calling the reloadData method, it will trigger the table view element to call the table view delegate and data source methods.
The numberOfRowsInSection delegate method expects us to tell it how many rows the table view should request data for. The cellForRowAtIndexPath delegate method will fire once for each row that it’s trying to display.
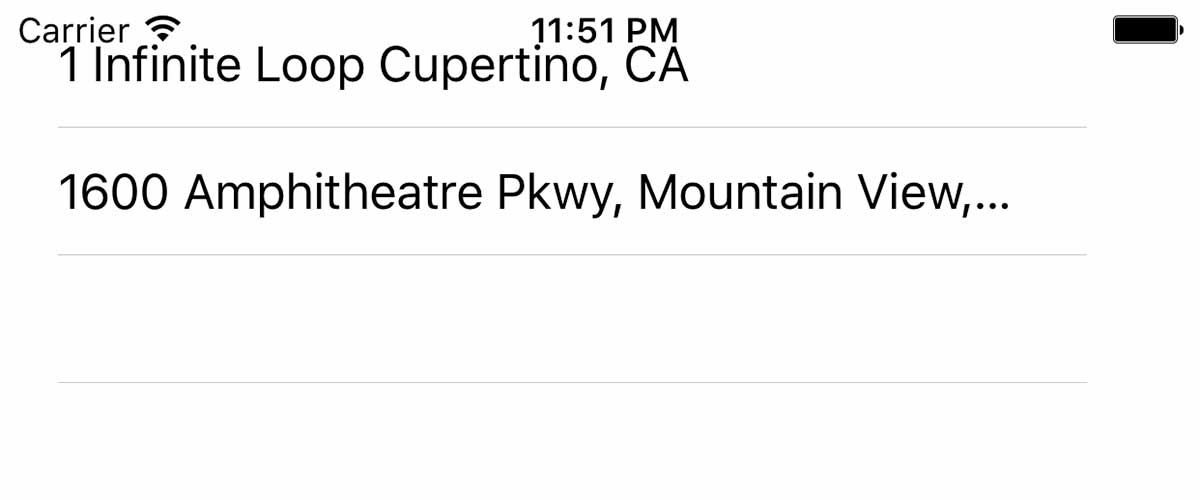
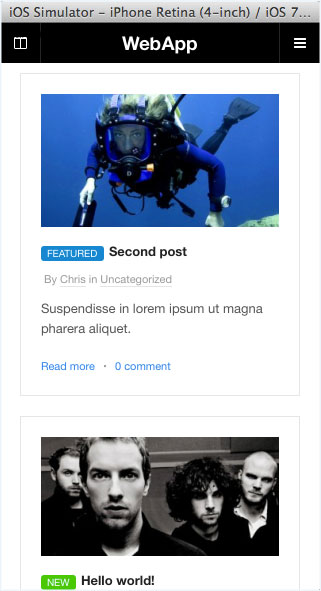
When you run the app now, it’ll download the feed, parse the items and display it in the tableview.
If you’re seeing a different border in your simulator or getting a black screen, check out my article on common Xcode errors.
2.7 Adding a second view controller
Let’s add our detailed view controller to the storyboard. In the UIElement box, search for “viewcontroller” and the View Controller element should show up. Click and drag that onto your storyboard.
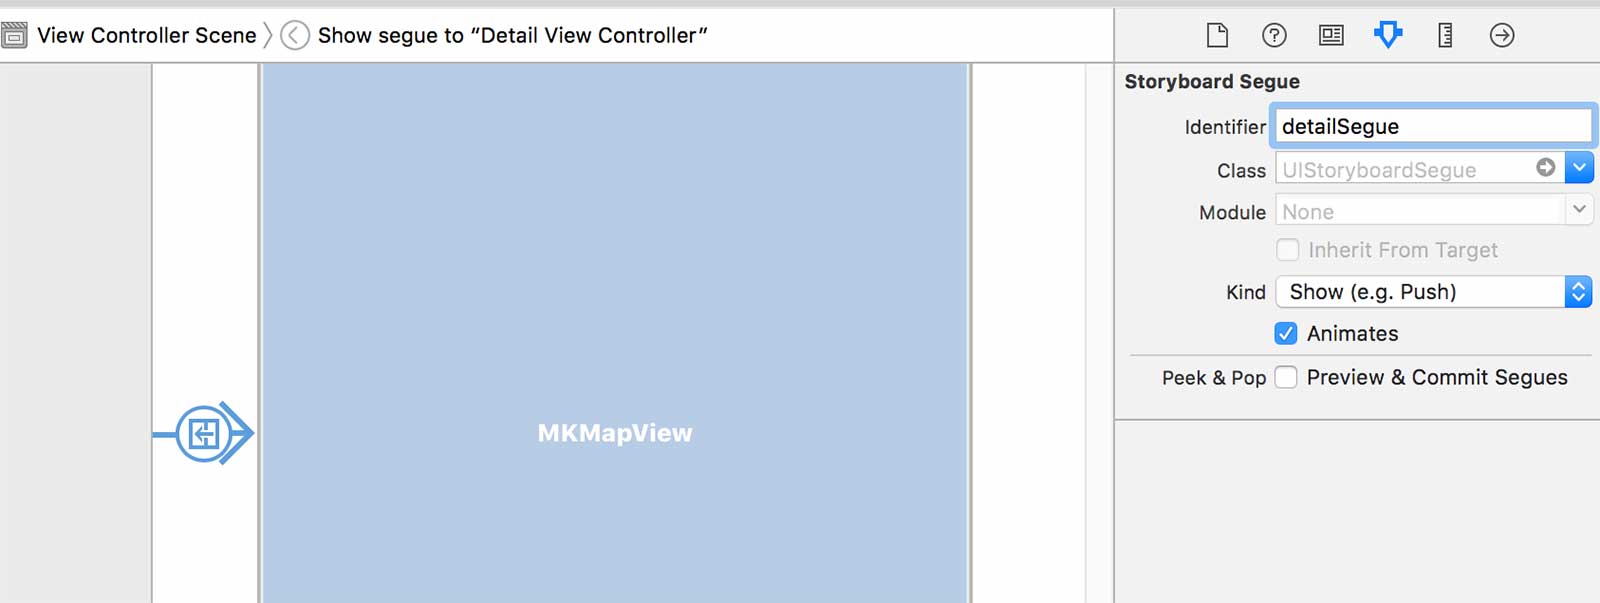
Now we want to add a segue to this second view. The segue is like a transition that we can call in our code to trigger a screen transition.
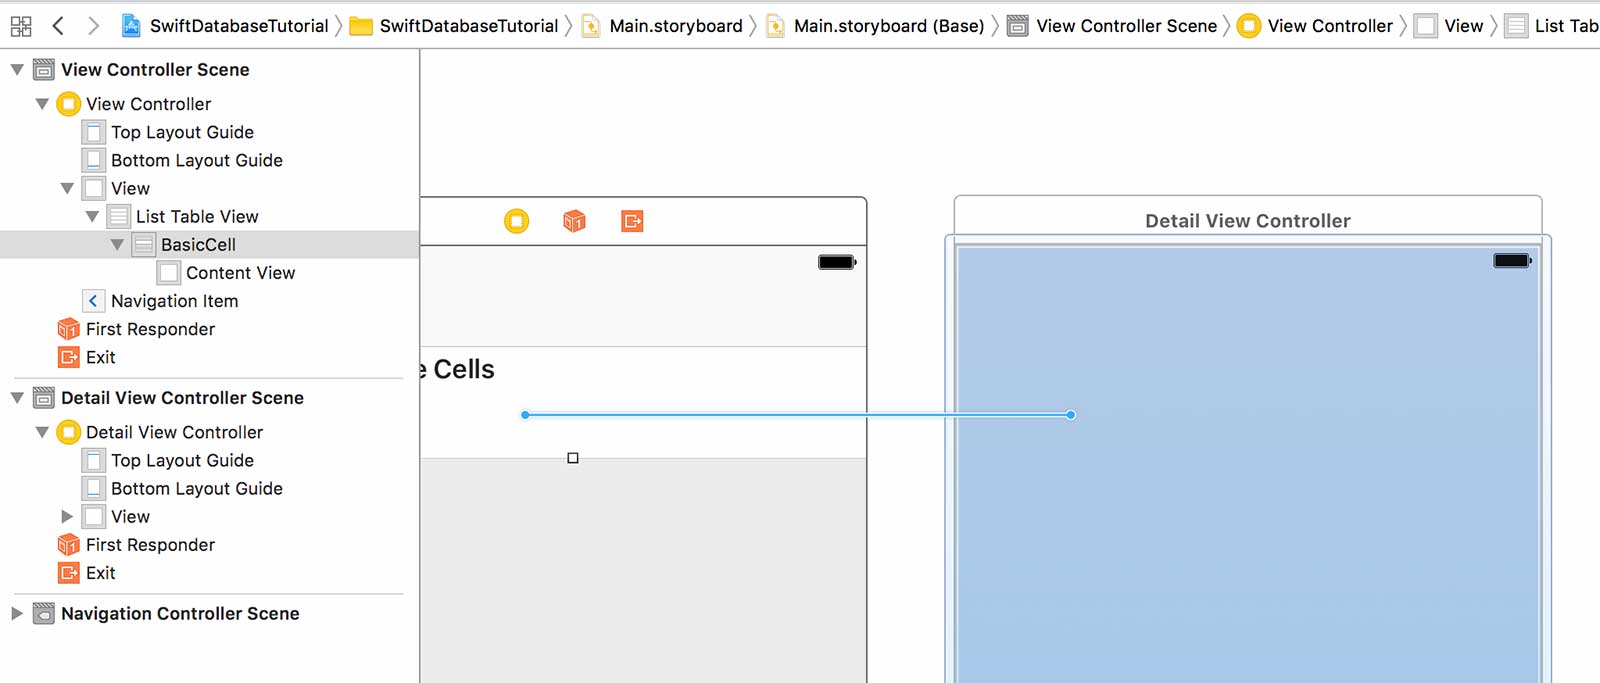
Now you should have a segue way to your second view controller. You’ll see a line between them. Click the segue and on the right hand side, name the segue detailSegue.
2.8 Creating a custom class for the detailed view controller
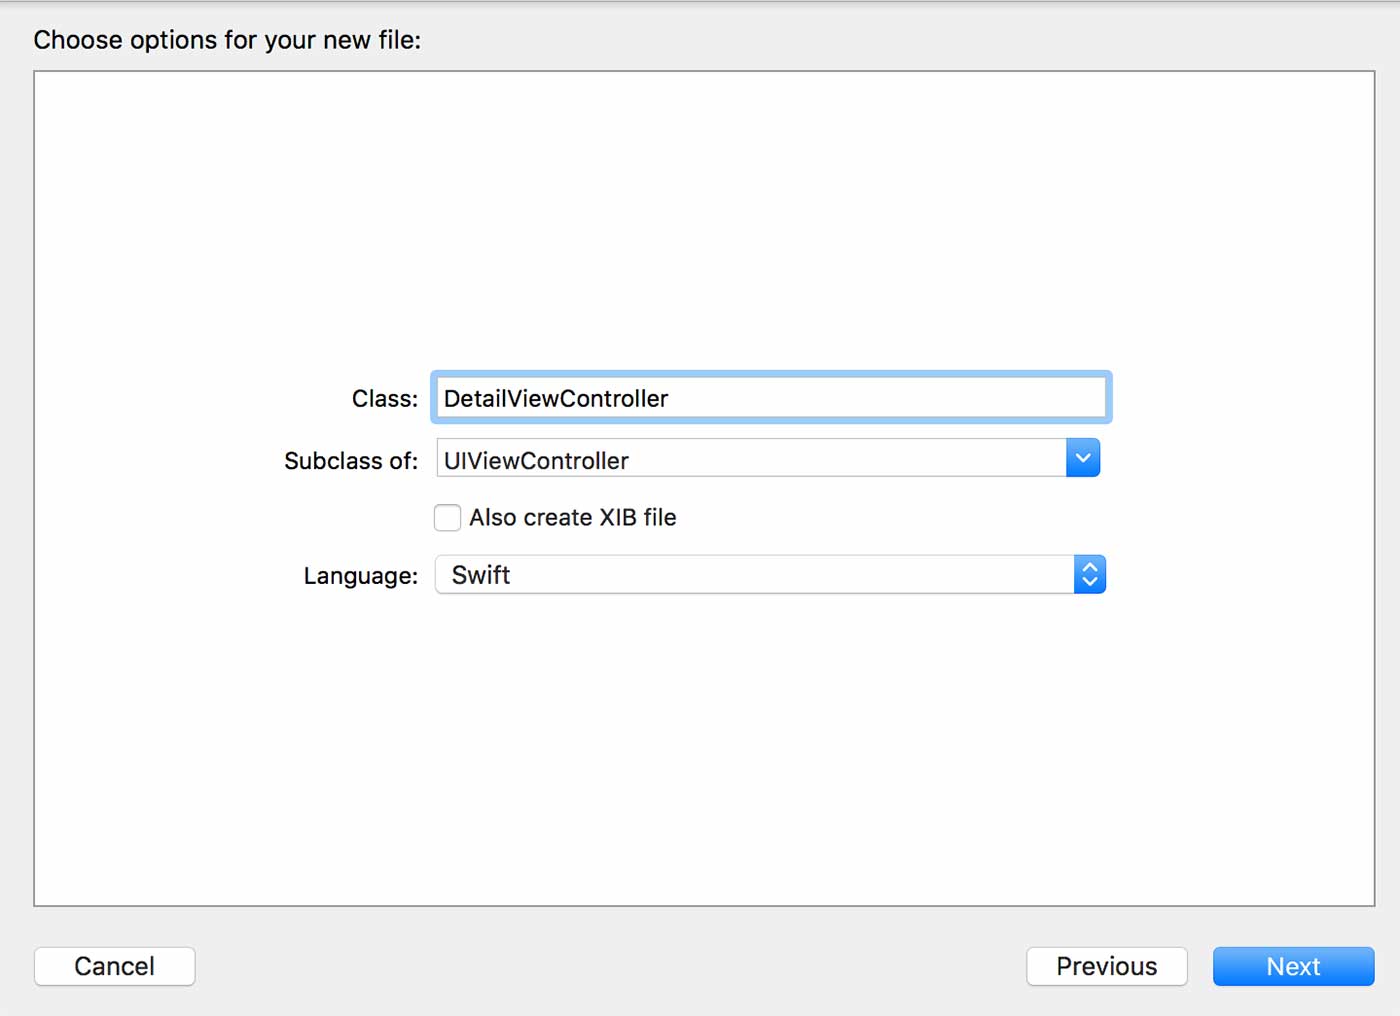
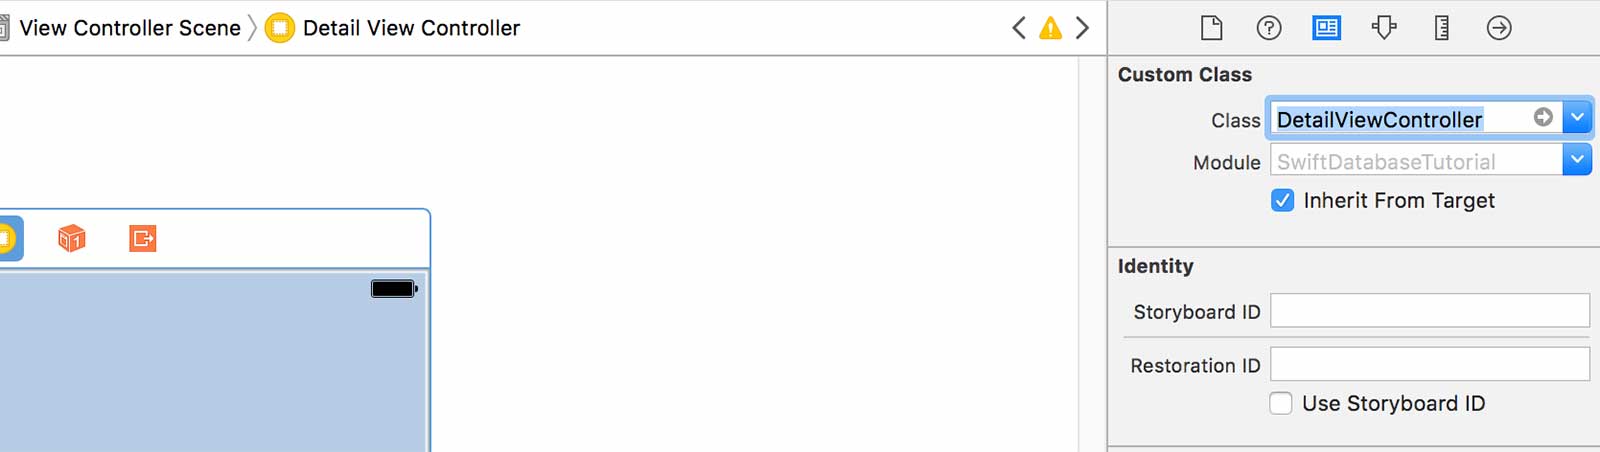
Now, create a new class called DetailViewController that subclasses UIViewController.
After you create the DetailViewController, go to your Main.Storyboard and click the 2nd view controller.
Make sure it’s highlighted with the blue outline and on the right hand side inspector, change the tab until you see a field called Custom Class. In that drop-down, we’ll want to select the DetailViewController class that we just created.
2.9 Adding a UIWebView to the detail view controller
In Main.Storyboard, we’re going to add a UIWebView element to the 2nd view controller so that we can display the story.
So in the UIElements library, search for “webview” and you’ll find the UIWebView element which you can drag onto the Detail View Controllers view like in the screenshot below:
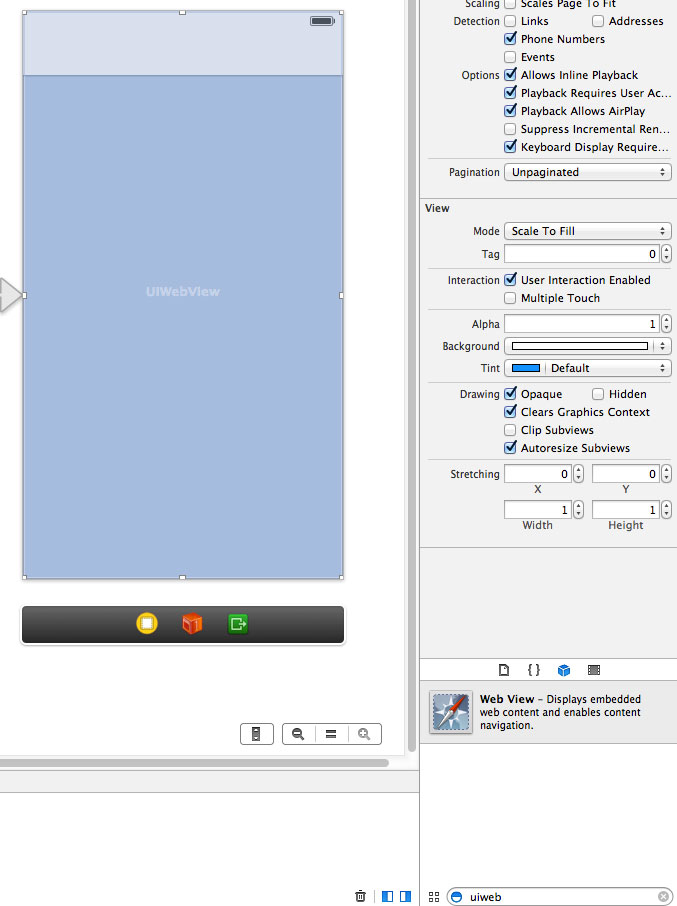
And in order to expose this webview to the code, we do the same thing we did for the table view in the first view controller by opening the “Assistant Editor” and making sure that the left pane shows the storyboard and the right pane shows DetailViewController.h.
Then hold down the control key, click the web view element and drag a blue line over to under the @interface line. When you let go, you can name this IBOutlet webView.
While you’re in DetailViewController.h, let’s import FeedItem.h and add a property to store the FeedItem that it will be displaying. It should look like this:
#import <UIKit/UIKit.h>
#import "FeedItem.h"

@interface DetailViewController : UIViewController
@property (weak, nonatomic) IBOutlet UIWebView *webView;
@property (strong, nonatomic) FeedItem *selectedFeedItem;

@end
Now go to DetailViewController.m, and we’re going to add code to the viewDidLoad method to load the url of the selected feed item in the web view.
- (void)viewDidLoad
{
    [super viewDidLoad];
    // Do any additional setup after loading the view.

    NSURL *url = [NSURL URLWithString:self.selectedFeedItem.url];
    [self.webView loadRequest:[NSURLRequest requestWithURL:url]];
}
This will cause the web view to load up that url.
2.10 Handling table view selection and pass data through the segue
Since our ViewController class already conforms to the UITableViewDelegate protocol, all we need to do to get notified when a user taps a table cell is to implement the didSelectRow method.
First, at the top of ViewController.m, add an instance variable to your private interface to store the selected feed item.
@interface ViewController ()
{
    HomeModel *_homeModel;
    NSArray *_feedItems;
    FeedItem *_selectedFeedItem;
}
@end
Now at the bottom of your ViewController.m file, add these two methods right before the @end tag.
- (void)tableView:(UITableView *)tableView didSelectRowAtIndexPath:(NSIndexPath *)indexPath
{
    // Set selected feeditem to var
    _selectedFeedItem = _feedItems[indexPath.row];
    // Manually call segue to detail view controller
    [self performSegueWithIdentifier:@"detailSegue" sender:self];
}

#pragma mark Segue

- (void)prepareForSegue:(UIStoryboardSegue *)segue sender:(id)sender
{
    // Get reference to the destination view controller
    DetailViewController *detailVC = segue.destinationViewController;
    // Set the property to the selected listing so when the view for
    // detail view controller loads, it can access that property to get the feeditem obj
    detailVC.selectedFeedItem = _selectedFeedItem;
}

@end
When the user taps a row, the method didSelectRowAtIndexPath will get triggered with the row number that was selected. We use this row number to get the appropriate feed item from our _feedItems array.
Then we store this selected feed item in our instance variable and we programmatically call the segue named detailSegue. That triggers the prepareForSegue method.
In that method, we get access to the view controller which we’re transitioning to and we set it’s selectedFeedItem property to the selected feed item so that when the viewDidLoad method of the DetailViewController gets fired, the property will be set and it can load that feed items URL into the web view.
Conclusion
Give it a run and if everything has been set up correctly, you’ll be able to get a list of your content on the main page and a detailed view of the article if you select one of them from the table view.
Now you’ve successfully created a brand new website along with a companion app that reads the content from your website!
If you run into some errors, check this article first and then leave a comment below and we’ll get to the bottom of it!
What’s next?
In the next chapter, we’ll also be creating a companion app for a WordPress site but we’ll be doing it a different way. There’s a lot less coding involved and depending on your needs, it may be better suited for you!
Click here to go to the next chapter
or
Click here to go back to the guide main page
Please help me by sharing, tweeting and liking it with the social buttons below. I really appreciate it!