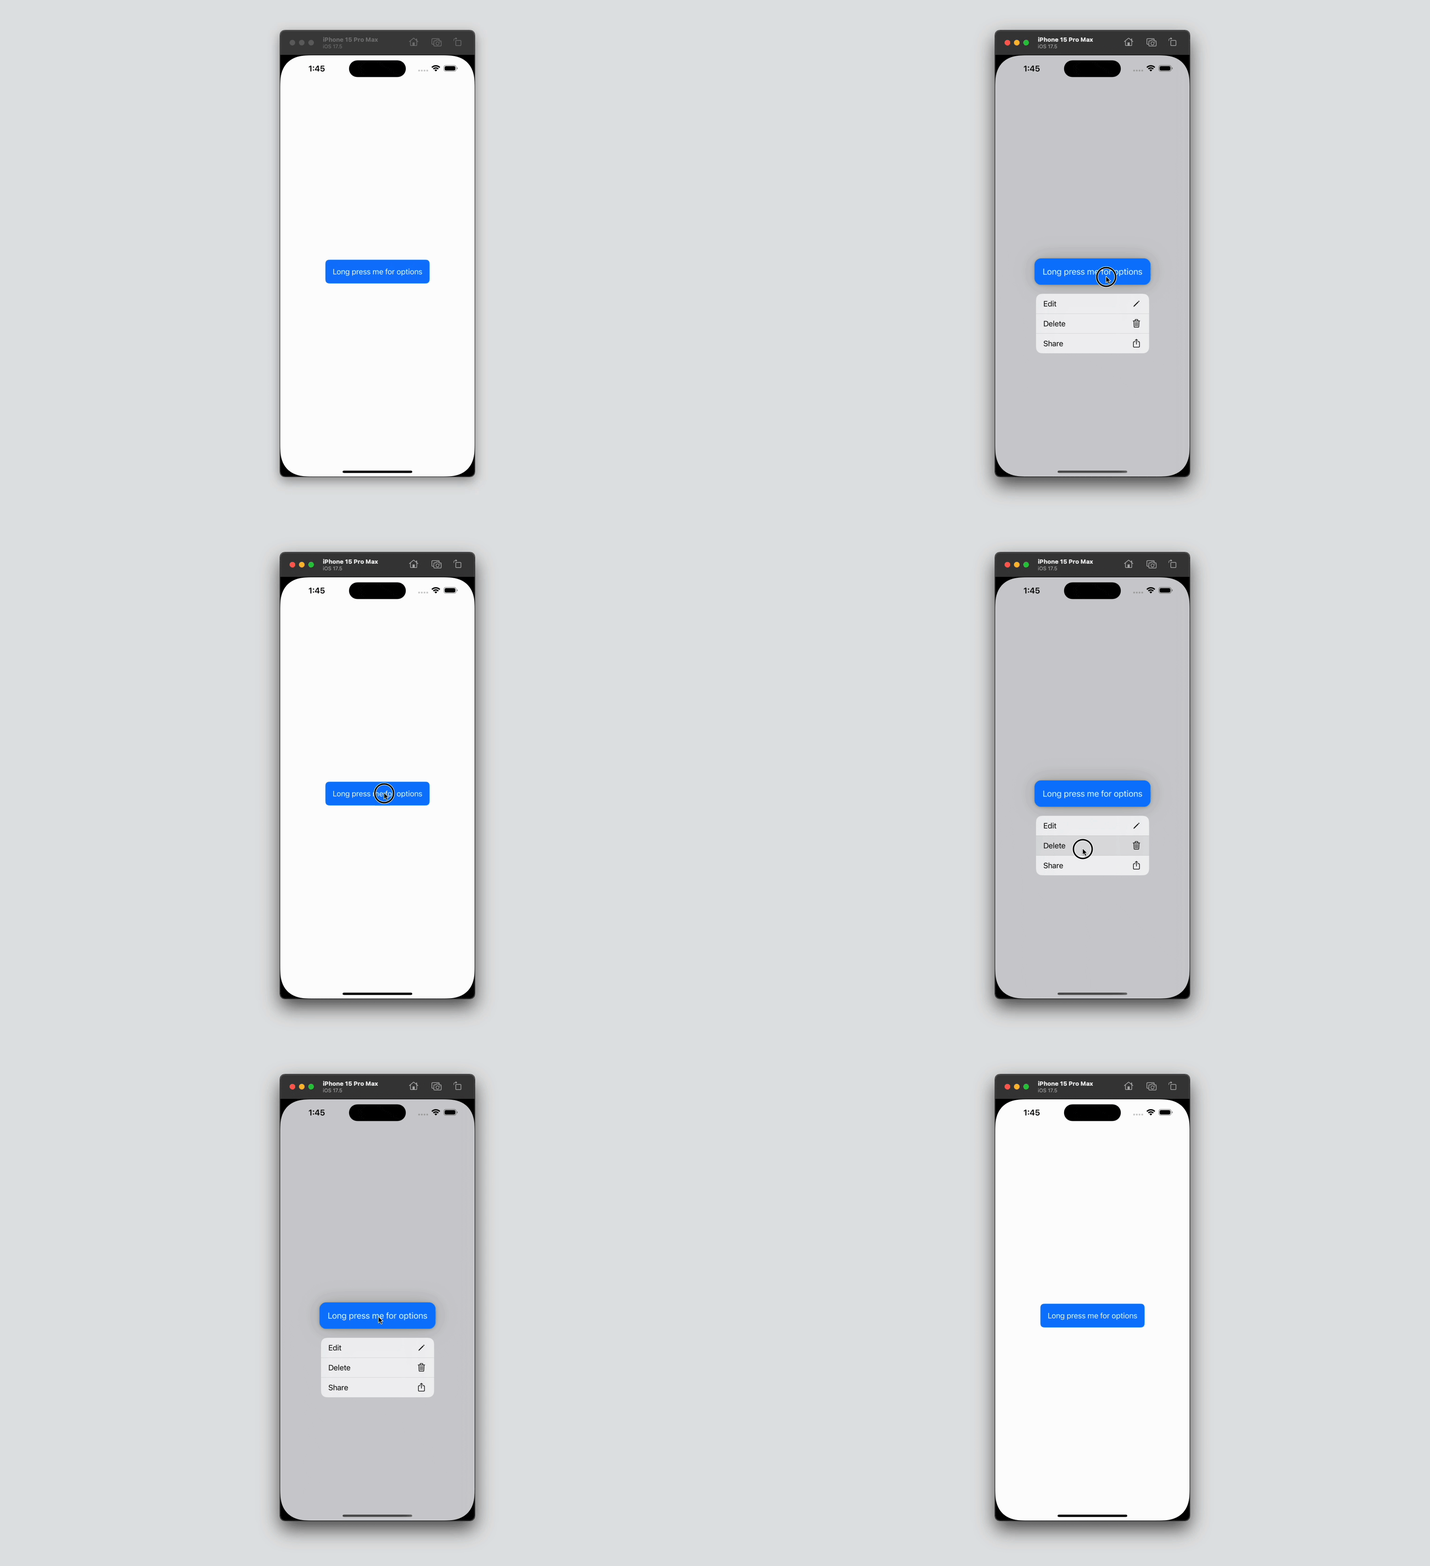
Overview
SwiftUI’s ContextMenu is a powerful tool that provides a way to attach contextual menus to views. These menus, similar to the right-click context menus found on desktop platforms, allow users to access additional options and actions directly related to the content they are interacting with. Implementing ContextMenu in your SwiftUI app enhances user experience by making actions more accessible and intuitive, providing a cleaner interface without cluttering it with unnecessary buttons or options.

Code Snippet
import SwiftUI

struct ContextMenuExample: View {
    var body: some View {
        VStack {
            Text("Long press me for options")
                .padding()
                .background(.blue)
                .foregroundStyle(.white)
                .clipShape(RoundedRectangle(cornerRadius: 8))
                .contextMenu {
                    Button(action: {
                        print("Edit action")
                    }) {
                        Text("Edit")
                        Image(systemName: "pencil")
                    }

                    Button(action: {
                        print("Delete action")
                    }) {
                        Text("Delete")
                        Image(systemName: "trash")
                    }

                    Button(action: {
                        print("Share action")
                    }) {
                        Text("Share")
                        Image(systemName: "square.and.arrow.up")
                    }
                }
        }
    }
}
ContextMenu Code Explanation
VStack { ... }: AVStackis used to stack views vertically. In this example, it holds a singleTextview.Text("Long press me for options"): This is the main view that will display a message to the user. When this text is long-pressed, the context menu will appear..padding(): Adds padding around the text to increase touch area and improve the visual appearance..background(.blue): Sets the background color of the text to blue..foregroundStyle(.white): Changes the text color to white to ensure it contrasts well against the blue background..clipShape(RoundedRectangle(cornerRadius: 8)): Clips the text’s background to a rounded rectangle shape with a corner radius of 8 points, adding a rounded edge to the background..contextMenu { ... }: This modifier attaches a context menu to the text view. When the user long-presses the text, the context menu appears with the options specified inside the curly braces.Button(action: { ... }) { ... }: Defines an interactive button within the context menu. Each button is associated with a specific action that executes when the button is tapped.Text("Edit")andImage(systemName: "pencil"): TheTextcomponent provides a label for the button, and theImagecomponent displays an icon. This combination is used to make each menu option descriptive and visually distinct.print("Edit action"),print("Delete action"),print("Share action"): Each button’s action is defined within a closure. Here, the actions are simple print statements, but they can be replaced with any functionality needed for the app.
Comparison with Menu and Link
SwiftUI provides multiple ways to offer interactive options, including Menu and Link, each with its specific use cases and behaviors:
-
Menu: Unlike
ContextMenu, which appears on a long press,Menuprovides a way to display a list of options directly in a pop-up menu when tapped. It is typically used when you want the user to immediately see and choose from multiple actions without having to perform a long press gesture.Menuis more suitable for iOS interfaces where quick, frequent access to multiple options is needed. If you’re interested in learning more about how to useMenu, check out our detailed article: How to Use SwiftUI Menu – Tutorial and Examples. -
Link: A
Linkin SwiftUI is used to create hyperlinks to other content, such as web pages or other app views. It is a more straightforward, single-action item that immediately performs a navigation or opens a link when tapped.Linkis useful for directing users to a different context or external content. To dive deeper into how to implementLink, refer to our article: Using SwiftUI Link for Navigation.
SwiftUI’s ContextMenu is a versatile feature that helps you keep your user interfaces clean and organized while providing users with quick access to relevant actions. By utilizing ContextMenu, you can create interactive and intuitive experiences that respond to user gestures such as long-presses, making your app feel more dynamic and user-friendly. Whether for editing, deleting, or sharing, the use of context menus in your SwiftUI applications can greatly enhance the overall usability and appeal.


