


The UIFont class is a programmatic interface to access font characteristics and provide the system with glyph information of the font. In SwiftUI UIFont has been simplified to a system class called Font that makes it easier to set custom fonts to be used by the application!
Setting up
To add a custom font, we of course need to add a font file in order to do to that.
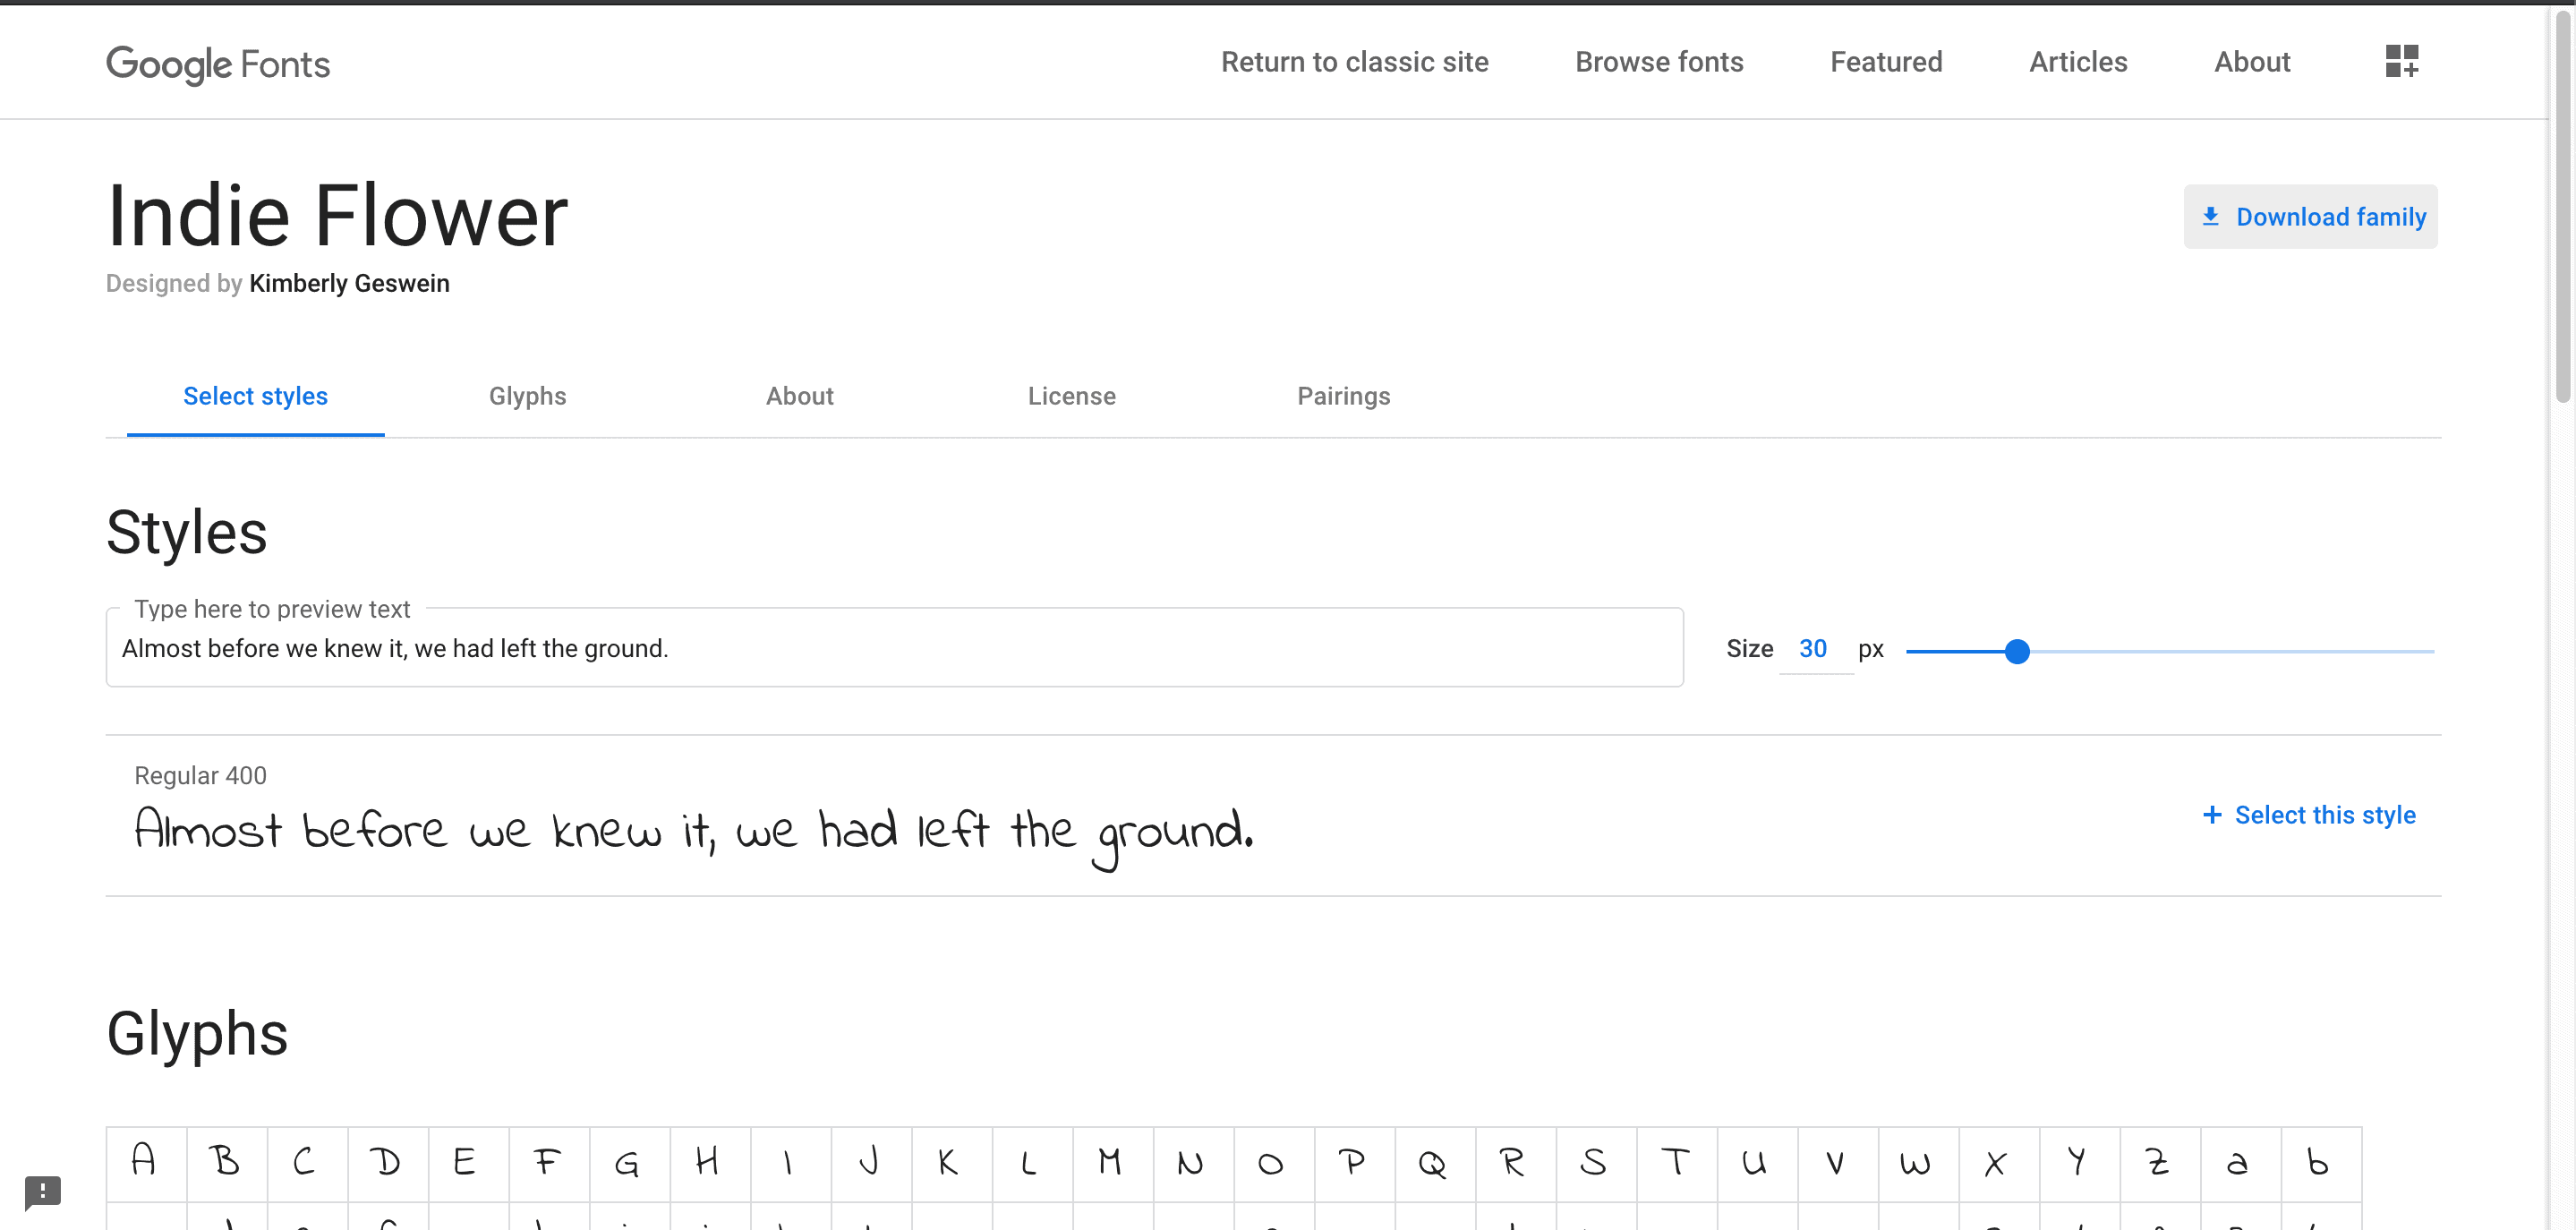
Go to your favorite font site and look for the font that you want to add. For this example we went to https://fonts.google.com/ for an opensource list of fonts.
Choose the font that you like and download. Usually the file type of the fonts are TTF or OTF format.
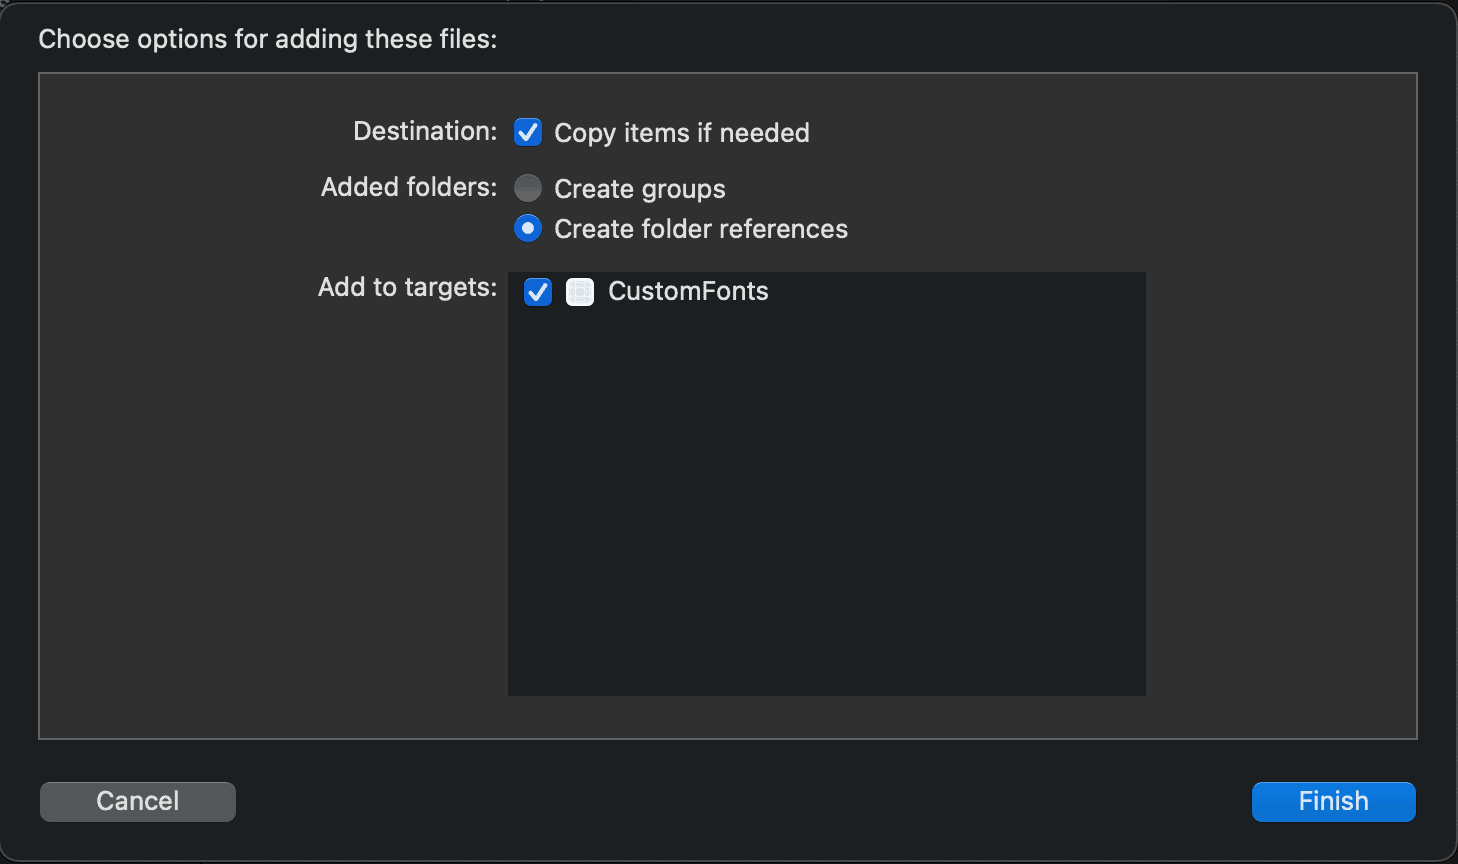
Once you have your font ready, drag the files to your project, you can put them inside a folder if you create a New Group (.
Make sure to check Copy items if needed and check Add to targets.
Make sure your fonts have been added properly by checking if it is listed in your Project Properties -> Build Phases -> Copy Bundle Resources

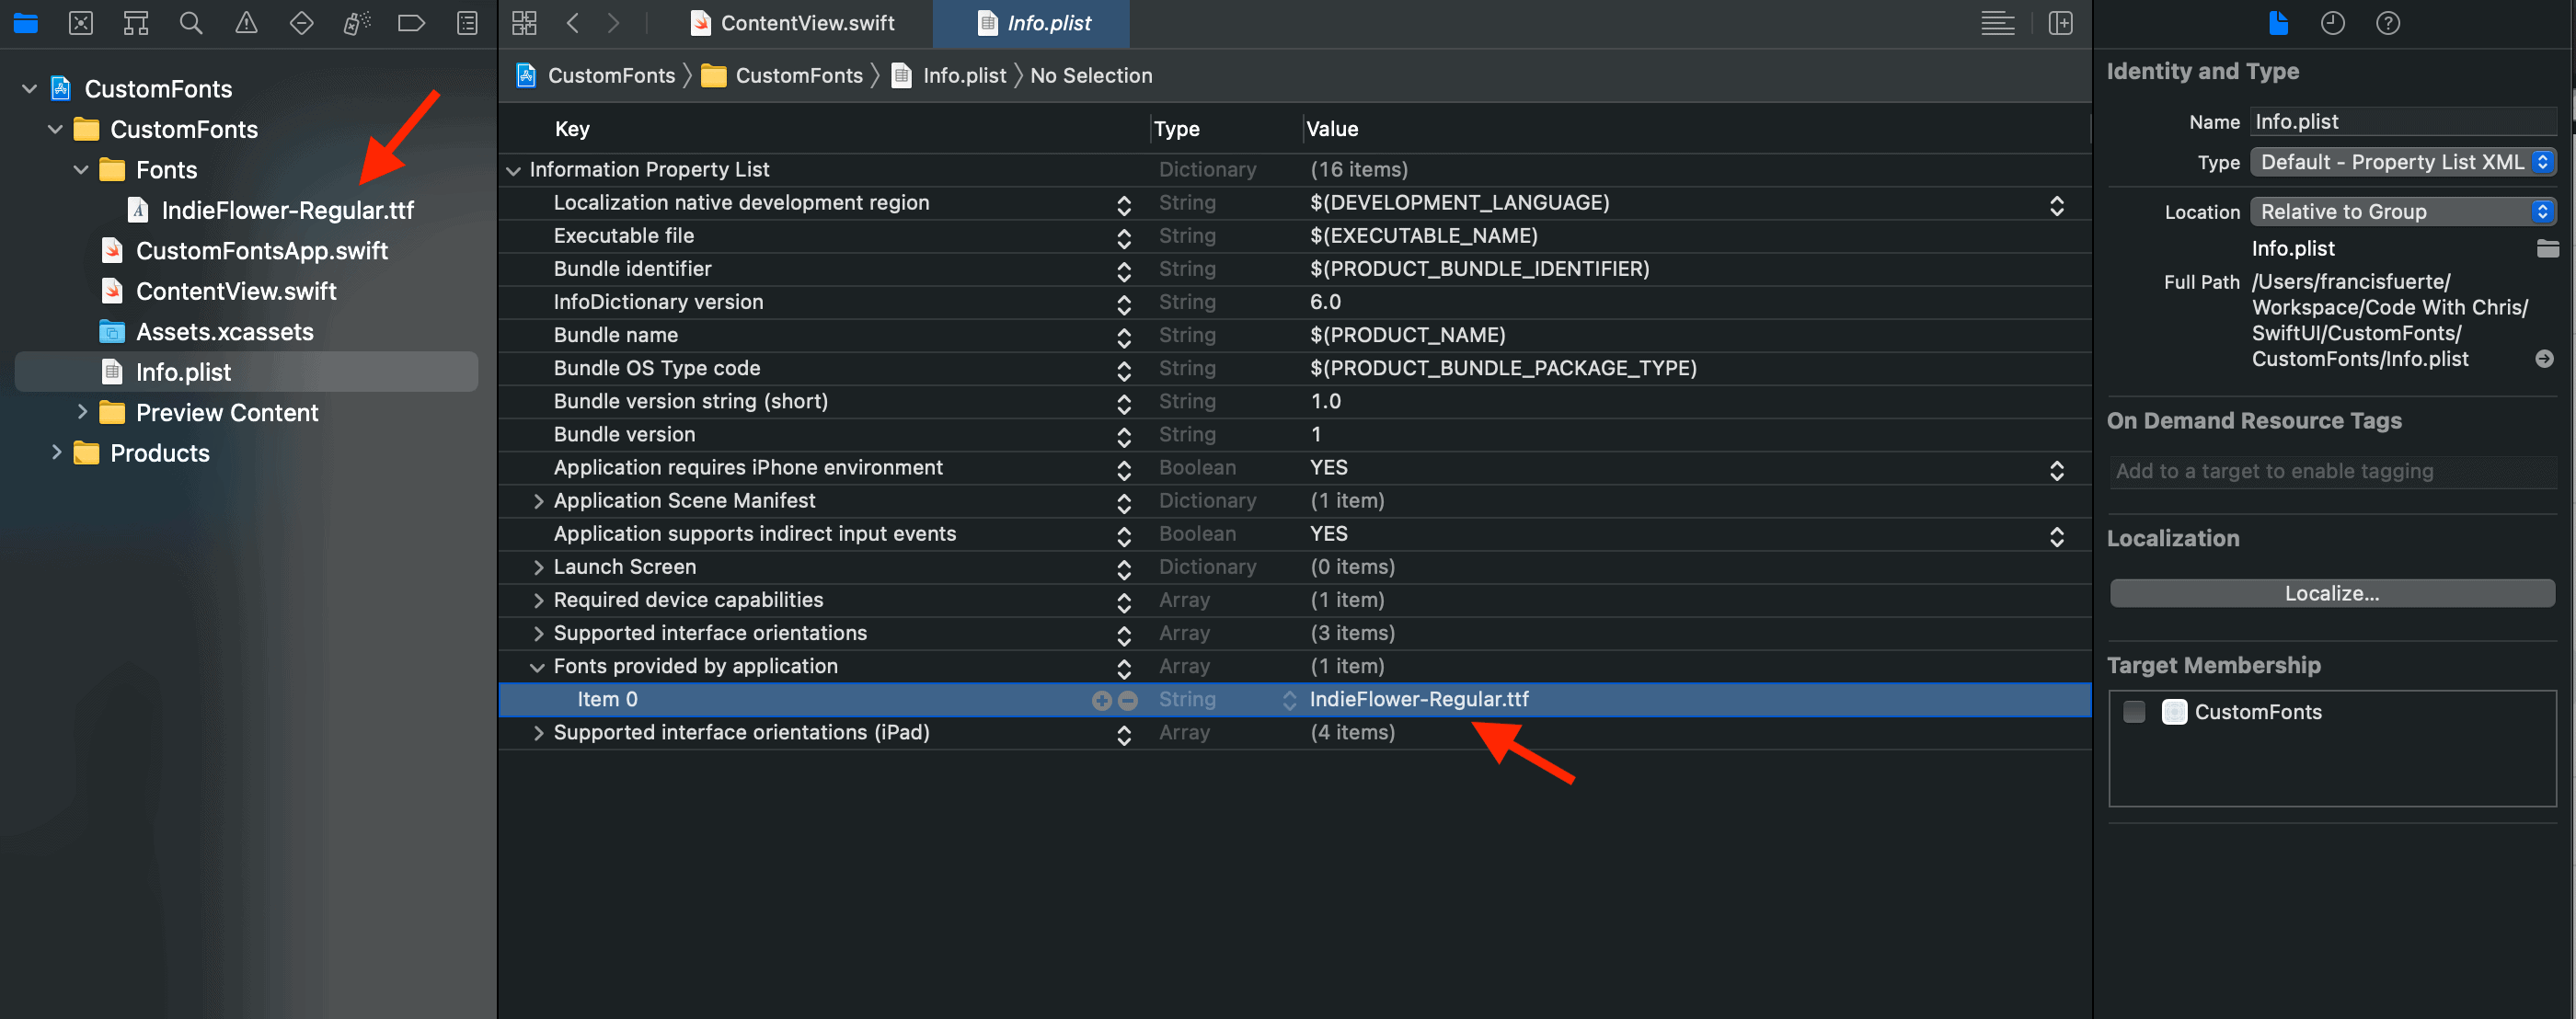
After you verified that your font file has been added, open your Info.plist.
Add a row and put in Font provided by application of type Array, add the name of the fonts you have copied individually as Items of the Array.
In our sample it was only one style of font so we just added only 1 file as an Item. Make sure to check your spelling and capitalization as it needs to be exact!
Setting Text and Changing Fonts
The most basic way we can add text in SwiftUI is by the use of Text() so to make it easy lets just use this as example.
Text("Hello, world!")Changing Font is easy, you just need to use the dot notation called .font which accepts a Font type value.
Font has many attributes and styles that we can use like italic, bold, headline, footnote, etc. What we are interested in using is the custom font which can be access just by doing a .custom(fontName, size: fontSize)
Given this info we can then easily add the name of our custom font here and just simply specify the size of the font, the default size is usually 17
Text("Hello, world!").font(Font.custom("IndieFlower", size: 20))and that’s it we can now see and use the custom font in our app.
Getting to know the fontName of custom font
It might not be so easy to know the actual font name of the font that want to use, so in order to properly determine this we can try listing the names of the fonts we have available in our system.
To do this we can simply just easily loop through all the fonts by accessing the UIFont property called familyNames and then listing all fontNames under each family name.
Since we are using SwiftUI we can just call and print this during initialization so feel free to add an init to your app.
The code should look like this:
init(){
    for family in UIFont.familyNames {
         print(family)

         for names in UIFont.fontNames(forFamilyName: family){
         print("== \(names)")
         }
    }
}
the resulting list should look like this
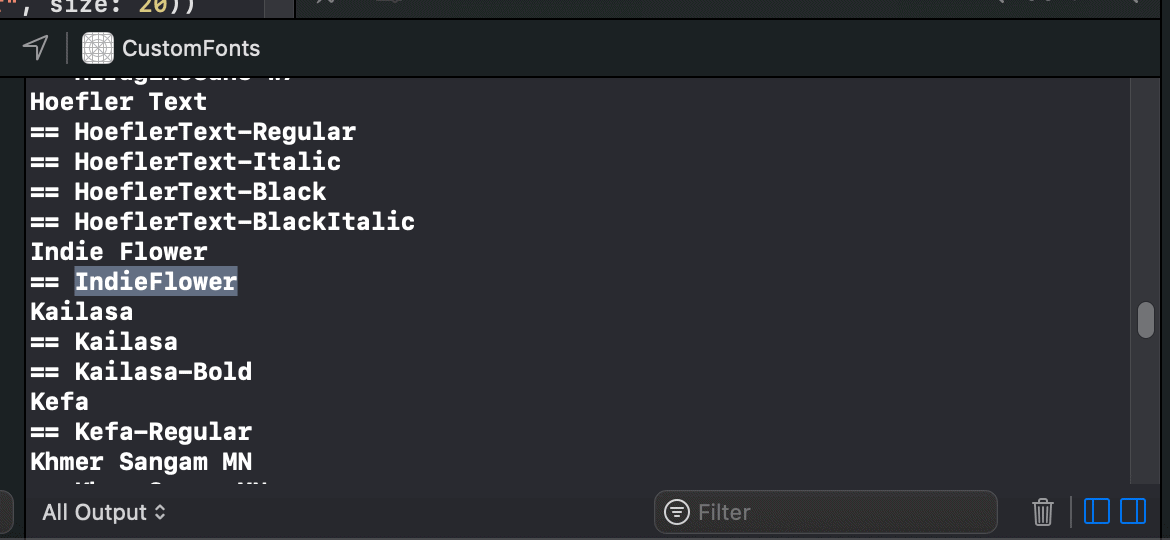
You will notice that fontsNames will usually have their down styles and may not be as straightforward as our sample so it’s best to check what fontName you will be needing exactly.