
If you’re building an iPhone app, you might find it exhausting and wastely to test the functionality of your app every time you add a new feature or refactor your code. In this case, you might want to look at UI testing for Swift. UI testing allows you to automate this procedure, so every time you update your code, Xcode will automatically test whether your app works correctly without you having to manually do it.
When is UI testing used?
If you are building an app with multiple screens and countless features, you may want to invest the time to look into implementing UI tests since it may save you a lot of time in the long run. Additionally, if you are using the Continuous Integration development method, where your team merges their code several times a day, you would want to have UI tests to make sure your app remains functional even after multiple changes to its code. For smaller projects, UI testing is not as useful because you can manually test the app within seconds.
How do we use it?
We’ll get to some specific code examples later, but the main idea behind unit testing is that we will describe our interaction with our UI in code, and then make an assertion statement about what we should expect to see (a statement that either evaluates to true or false). If the assertion passes, our test passes and if it fails, our test fails.
For example, let’s say we have an app which has one screen. On the top right we have a plus button, and we have a tableView in the middle.
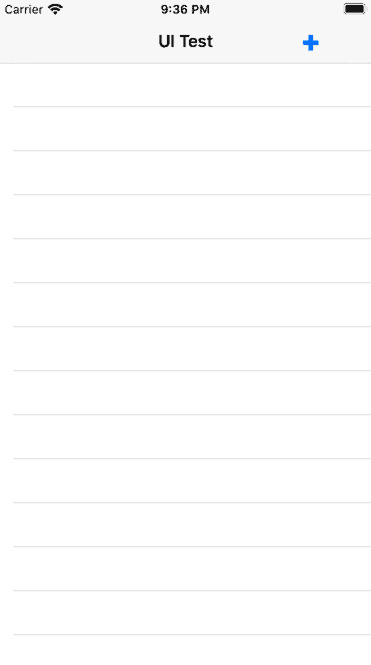
When we click this plus button, all we want to do is to add a row to our tableView. So either we could manually click the plus button everytime we build our app to make sure it adds a row to the tableView, or we could automate the process with UI tests. Let’s look at how we would do that:
Simulating a button tap on the UI
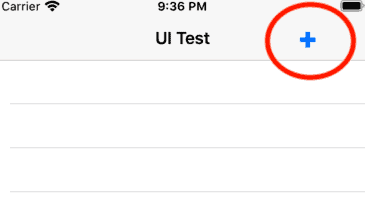
Firstly, we will describe the interaction we want to make. So we will select the plus button and tap it. Our function will look like:
func testAddingItem() {
        // Lines 1 and 2
        let app = XCUIApplication()
        app.launch()

       // Line 3
        app.buttons["+"].tap()
       // Line 4
       XCTAssert(app.tables["tableView"].cells.count == 1)
    }
Let’s not worry too much about what lines 1 and 2 mean right now, since we’ll get to that later. Our main focus is on line 3, which simply means select the button with the text “+” and then tap it. In line 4 we will assert whether this interaction does what we want it to, which in this case is adding a row to our tableView. So if our tableView has one row after the interaction, it will pass the test, but if for some reason it doesn’t (eg. can’t communicate with the database) we will know that this feature of our app does not work.
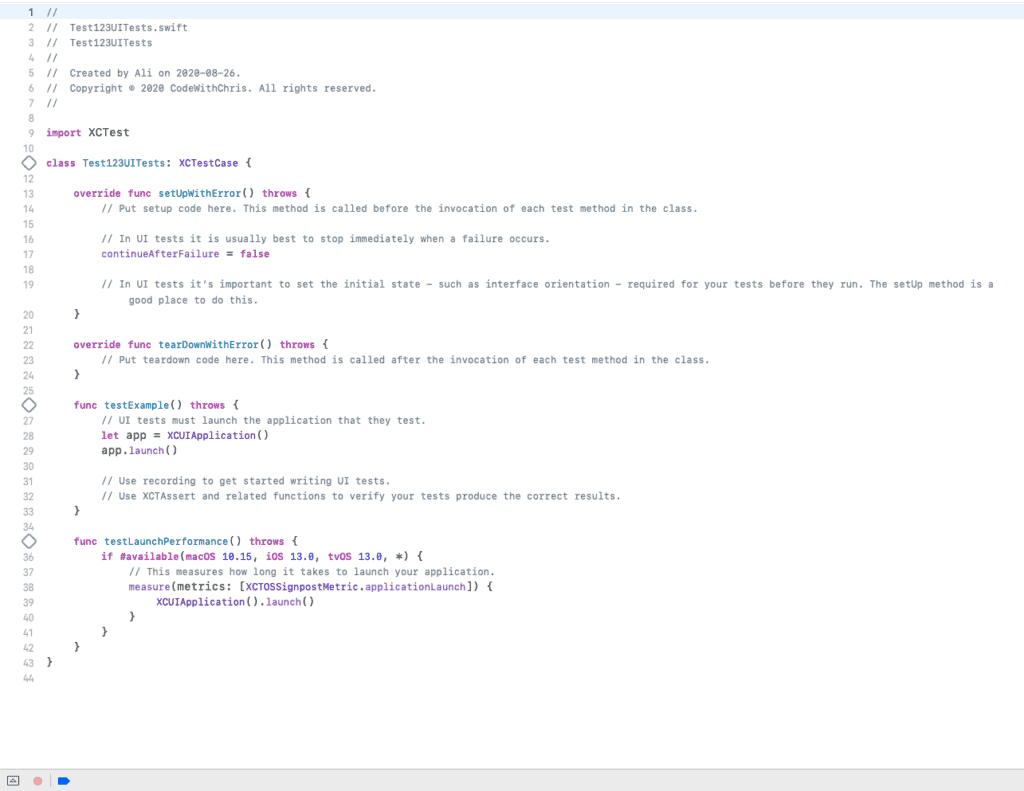
How to add UI tests in your app?
If you are making a new app, make sure you select the “Use UI Tests” checkbox when creating a new Xcode project. To add it in an existing project go to the build folder and on the bottom left you will see the plus button. Selecting that will give you a dropdown menu, where you can then select “UI Testing Bundle”. Then go to the UITests.swift file in you file hierarchy. In this class, you can add your test functions. Any function beginning with the word “test” will be called when you run the test build. So for example, the function named testAddingEntry will be automatically fired off, while AddingEntry won’t be.
Detailed example: Note taking app
For a more detailed example, let’s look at the note taking app we made previously. Our app has 4 main functionalities. It can read notes from the database, add notes to the database, update notes and delete notes. You can see the app in action in this video:
Since our app has 4 main functionalities, we would want to add UI tests that cover these 4 functionalities to make sure they work correctly.
Test function for adding a note
Looking at our app, we see that to add a note, first we click the “Add Note” button in the top right, then we tap on the textField and type in it, and then we tap on the textView and type in it, and then we click the save button on the top right. Then we see that it adds a row to our tableView. So now let’s look at the test function:
func testAddingEntry() {
        // Line 1
        let app = XCUIApplication()
        app.launch()

        // Line 2
        let initialTableRows = app.tables.children(matching: .cell).count
        // Line 3
        app.navigationBars["Notes"].buttons["Add Note"].tap()
        // Line 4
        createEntry(app: app, note: "Add Test")
        // Line 5
        let finalTableRows = app.tables.children(matching: .cell).count
        // Line 6
        XCTAssert(initialTableRows + 1 == finalTableRows)
    }
Firstly, we define our app so Xcode knows what it’s looking at. This is done in line 1. After this we get the number of rows that are initially in our tableView before we do anything (line 2). Then we go to the navigation bar with the title “Notes” and then tap the button in the nav bar titled “Add Note” (line 3). Tapping this button goes to another screen in which we type our note in the two text field and then click the save button. Since this goes to another screen, we can write a separate function that handles the next interaction instead of writing the code directly in the function (line 4). Let’s look at the createEntry function:
func createEntry(app: XCUIApplication, note: String){
        // Line 1
        let textField = app.textFields["Enter a title"]
        // Line 2
        textField.tap()
        // Line 3
        textField.typeText(note)
        // Line 4
        let textView =  app.textViews["TextView"]
        // Line 5
        textView.tap()
        // Line 6
        textView.typeText(note)
        // Line 7
        app.navigationBars["Add Note"].buttons["Save"].tap()
    }
All this function does is tap the textField, and types in it, selects the textView and taps it and selects it and types in it. And then finally it clicks the save button on the top of the screen. Finally, we go back to our test function and get the number of new rows in the tableView (line 5). Since we have added a new item, we expect that there should be a new row in our tableView. So we assert that the initial number of rows + 1 equals the new number of rows (line 6). So that’s our first test complete, and this function will make sure that the create note functionality of our app works, and let’s us know if it doesn’t.
Test function for deleting a note
Now let’s look at deleting a note: again we write a function starting with the key word “test” and then define our interactions:
func testDeletingEntry(){
        // Line 1
        let app = XCUIApplication()
        app.launch()
        // Line 2
        let initialTableRows = app.tables.children(matching: .cell).count
        // Line 3
        deleteEntry(app: app)
        // Line 4
        let finalTableRows = app.tables.children(matching: .cell).count
        // Line 5
        XCTAssert(initialTableRows - 1 == finalTableRows)
    }
Again we start by defining our target which is our app (line 1) and then we get the number of rows in the tableView (line 2). Then we call the delete function:
func deleteEntry(app: XCUIApplication){
        // Line 1
        let lastRowIndex = app.tables.children(matching: .cell).count - 1
       // Line 2
        app.tables.cells.element(boundBy: lastRowIndex).tap()
       // Line 3
        app.navigationBars["Add Note"].buttons["Delete"].tap()
}
Which simply gets the index of the last row (line 1, since the newest item is always at the bottom of our tableView) and then taps the tableView at that index and then clicks the delete button in the navigation bar (lines 2 and 3). Then our test function just gets the number of rows after the delete has happened and asserts that it is always one less than before the delete happened (lines 4 and 5). So again, this function will always make sure that our delete functionality works.
Test function for updating a note
Finally, we have the functionality to update a note. Let’s look at the code:
func  testUpdatingEntry(){
       // Line 1
        let app = XCUIApplication()
        app.launch()
       // Line 2
        app.navigationBars["Notes"].buttons["Add Note"].tap()
        createEntry(app: app, note: "Add Note")
       // Line 3
        let lastRowIndex = app.tables.children(matching: .cell).count - 1
        app.tables.cells.element(boundBy: lastRowIndex).tap()
       // Line 4
        createEntry(app: app, note: " Updated")
       // Line 5
        XCTAssert(app.tables.cells.element(boundBy: app.tables.children(matching: .cell).count -
        1).staticTexts["Add Note Updated"].exists)
       // Line 6
        app.tables.cells.element(boundBy: app.tables.children(matching: .cell).count - 1).tap()
        app.navigationBars["Add Note"].buttons["Delete"].tap()

    }
This function is very similar to the previous two functions. We firstly create a note with the title “Add Note” (line 2), and then tap that new note but this time we write the word “ Updated” at the end of the note and then save it (lines 3 and 4). Then we assert that the text says “Add Note Updated”, and if it does we pass the test (line 5). Then finally we can delete the note (line 6)

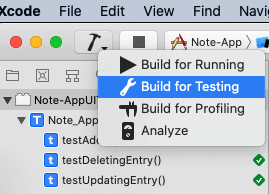
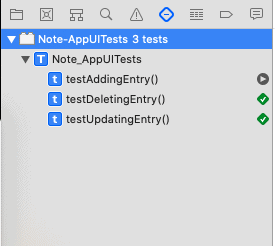
Running your tests
To run your tests, you can either hover over the build button on the top left and then click the little arrow and select “test” or you can manually run each test in the hierarchy by hovering over the test and clicking the play button next to it.
Conclusion
There we have it! We have automated the testing of our app. Now if we ever make any changes to our app and update our app, we will instantly be able to tell if our app works as expected even after the changes or if we have broken something.